Blog Posts

quinta-feira, 8 de agosto de 2019

Uretano? E imprimir mais transparente, 607 ideias(!), façam uma Fresa CNC, e 10 passos para boa impressão.

Ora aqui está um meio caminho entre imprimirem, um por um, uma pequena série de objectos, e mandar fazer um Molde para injecção em séries grandes.
Isto vai libertar muito Criador e Engenhocas...


Urethane Casting – All You Need to KnowAlex Haysler  
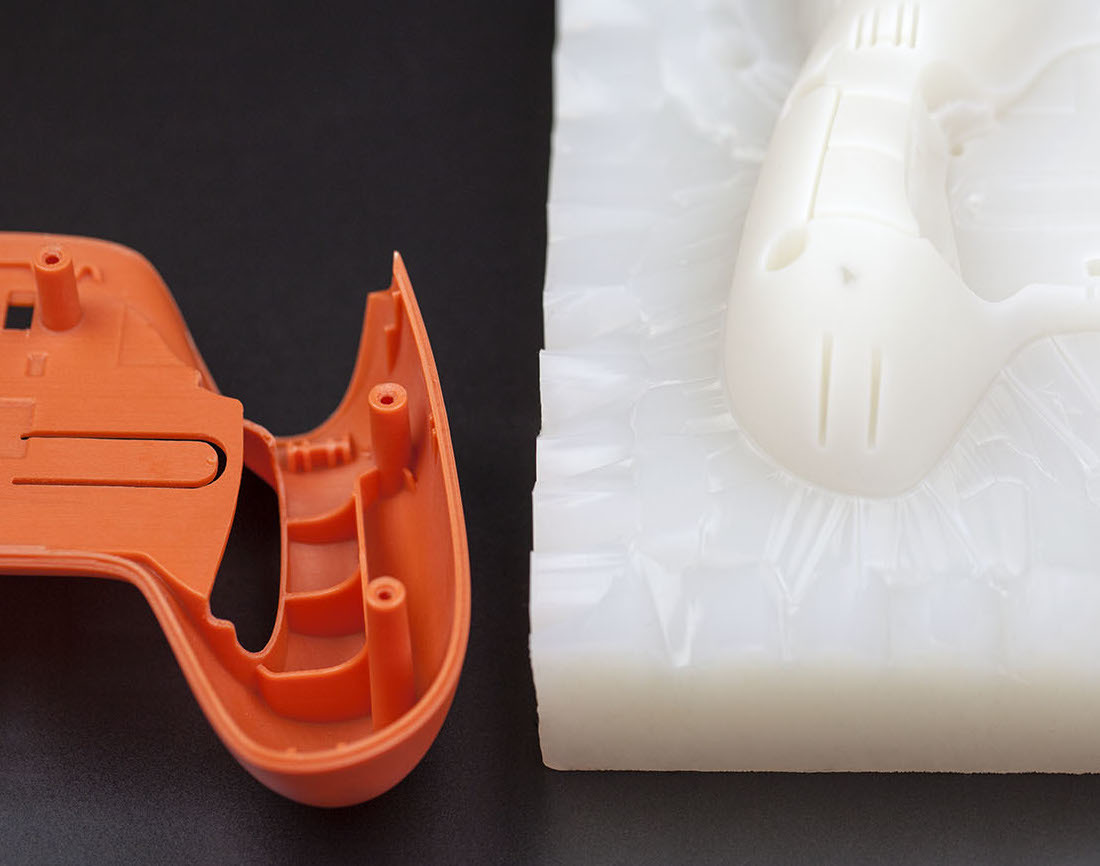
Urethane casting (UC) is a manufacturing technique allowing for low- to mid-range volume production. It successfully bridges the gap between alternative low-cost methods, which lack scalability, and injection molding. This method allows creation of production-like parts with high-quality, detailed features and cosmetic similarity both quickly and inexpensively.
UC is primarily aimed towards situations where the cost of hard tooling in aluminum or steel, such as for injection-molded parts, would prevent manufacture. UC can also be referred to as room temperature vulcanization (RTV), where the silicone mold is cured in ambient conditions. 
https://all3dp.com/2/urethane-casting-all-you-need-to-know/


Há Materiais Transparentes, mas aqui aprendem com aperfeiçoar a Impressão para o melhor possível:
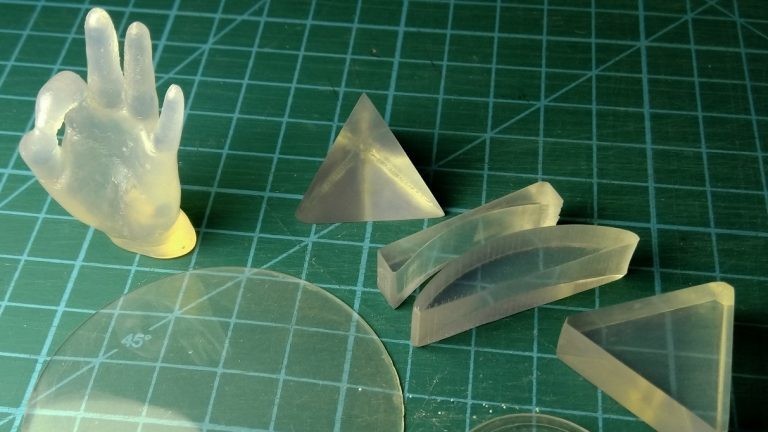


Transparent 3D Printing – 4 Ways to Create Transparent PartsBenjamin Goldschmidt  
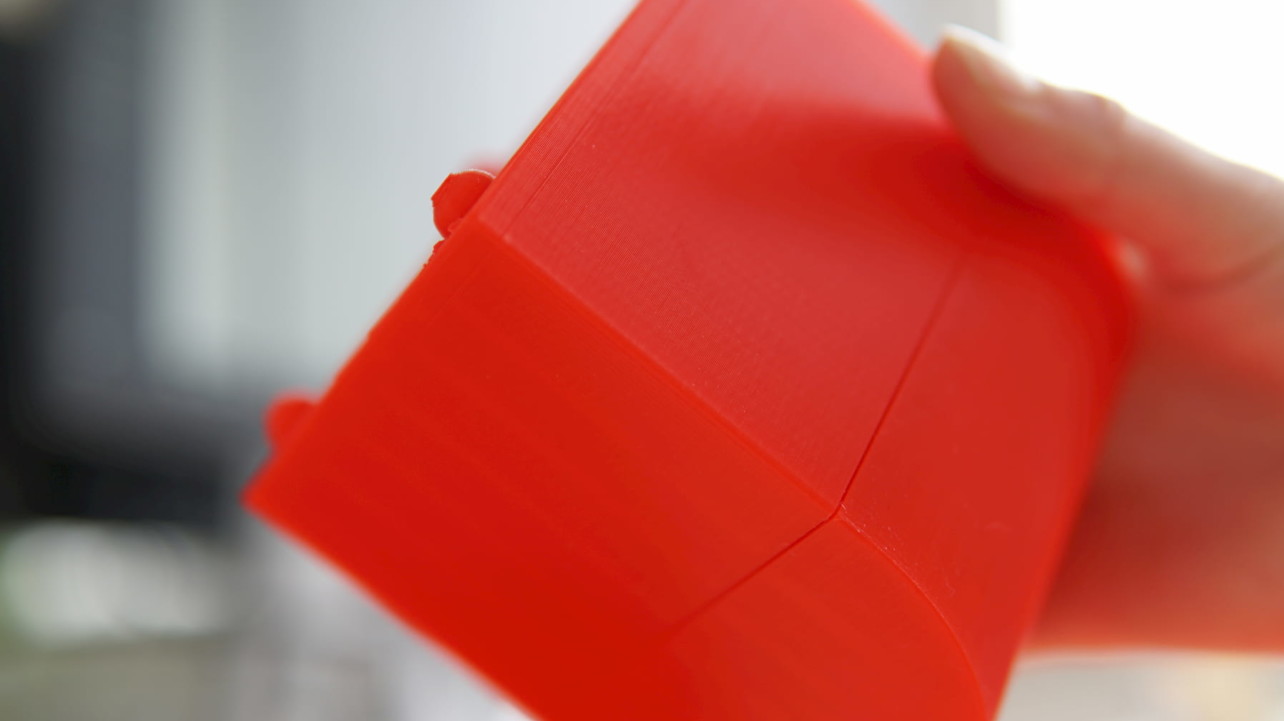
As you might have guessed, transparent 3D printing is printing a plastic part that you can see through. Applications of this technique vary from see-through vases to optical elements like prisms, art, or decorative pieces. While this might seem simple to achieve (buy transparent filament and print it), the reality is a bit more complicated. Before going into methods, we’ll need to learn about some of the science behind what makes something transparent: What is transparency?
Transparency, or the ability to see through an object, is controlled by how light passes through it. If light passes through an object without being redirected in a significant way (i.e. through a pane of glass), the object will appear to be transparent. In glass, the material is homogenous and clear, meaning that you can easily see through it. To mimic this property in a 3D printed object, we must adhere to the following rules:
Plastic material must be transparent to start with
Printing must limit the introduction of air bubbles into the part
The part should have a smooth surface in the desired transparent area 
https://all3dp.com/2/transparent-3d-printing-create-transparent-parts/


...E se vos faltam as Ideias sobre o que imprimir, cá vão 607 nLinks para seguirem!


https://www.pinterest.pt/fgunawanc3po/3d-printer-printing/


Podem seguir estes planos Open Source, para criarem a vossa Fresa CNC, e sigam o Site, com atenção, que tem muito mais:


The LowRider2 CNC
V1ENGINEER
The LowRider2 CNC is my revised version of a CNC router that can handle full sheet material! Of course you can go smaller. If the MPCNC is not big enough for you this picks up where that left off.
Thingiverse Printed parts files – Links 25.4mm, 25mm version. Hardware list – Parts.
This CNC router can handle any length (within reason), the Y direction is only bound by your table length.
Width (X direction on rails) should always be the shorter axis and is recommended to keep the work area no larger than 4′ on this axis.
The Z direction (height) is best kept to a 3-4″ maximum for wood, with that being said, you can make the usable z length as much as you want you will be working from the bottom up, so go to town. 


Eis como tratarem de terem Impressores perfeitas, com 10 ajustes avançados, que vos ensinam na Pinshape:


10 Advanced 3D Slicer Settings That Will Save Your Prints!

Accurate 3d slicer settings are one of the most important factors to achieve a successful 3d print. Even the most experienced makers often go through trial and error to find the 3d slicer settings that give them a beautiful print. In our last article Slicer Settings for Beginners – 8 Things you Need to Know, we went over the basic settings and how each one affects your print. Now we’re going to go over some of the more advanced settings that give you more detailed control over how your print comes out so you can take your 3d printing to the next level. An overwhelming number of you voted for Simplify3D as Top 3D Slicing Software in our 2015 Pinshape Awards which is one of the reasons we chose to use them as our example software for this post.  There are a lot of settings in this slicer program that give you a ton of control and provide faster, better quality prints. In one review, Simplify3D sliced a file in 55 seconds that took over 40 minutes to slice in another program!  


segunda-feira, 22 de julho de 2019

Automatismo para qualquer um! E acabamentos na Impressão 3D, com uma PISTOLA DE COLA(!), Concrete Molds, Derreter VIDRO no Micro-ondas, e temperar PLA

Qualquer um pode controlar agora a sua Màquina, sem saber programação!
Brutal! 
E podem controlar, vigiar etc.


Machine Control at Your FingertipsMichael Di Staulo 
We’re proud to present our new MachineMotion Pendant: a plug-and-play touchscreen interface for automated equipment powered by the MachineMotion controller. Now you can program, control, and monitor your machine through an intuitive code-free user interface.
The pendant features a 10.1-inch touchscreen, impact-resistant enclosure, rear mounting tabs compatible with UR’s eSeries Pendant Mount, and a comfortable hand strap. It also makes your system safer by ensuring an emergency stop button is always within the user’s reach. 
https://www.vention.io/blogs/machine-control-at-your-fingertips-184


Note: Besides the cool uses that you see on the neat idea below, think also it can be used to COLORIZE details on monocrome Prints!


Isto é uma  ideia que toda a gente gostaria de ter tido!
Paa o quê?
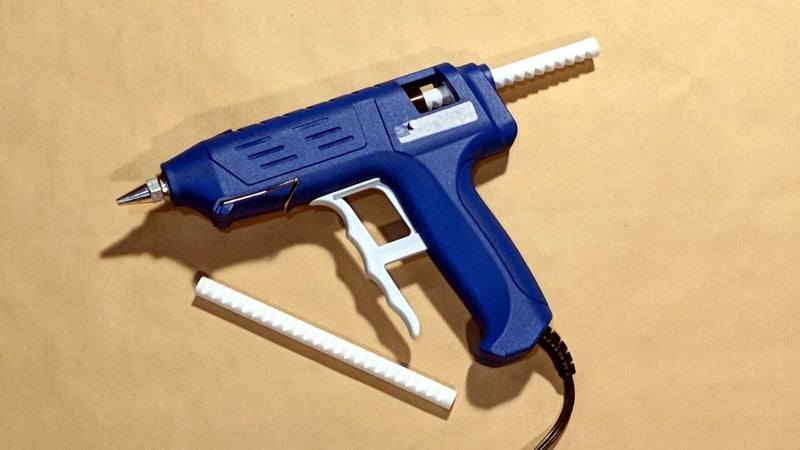
Para acabar, soldar ou reforçar, etc. umas peças com a vossa simples Pistola de Cola, o que vos poupa muito tempo e chatiçes!
Porreiro.
Até... 
Pode servir para COLORIR detalhes duma impressão Monocromo, já pensaram nisso? 


[Project] 3D Printing Sticks for PLA Hot Glue GunTyler Koslow
Who needs a 3D printer when you have a hot glue gun? This Hackaday project from Donald Papp shows us how to use molten PLA filament to glue 3D printed objects together.
When 3D printing ambitiously sized projects, hot glue guns come in handy as a tool to join two separate things together. But what if you could bind these objects with the very same PLA filament that you used to 3D print in the first place?

https://all3dp.com/weekend-project-3d-printing-sticks-for-pla-hot-glue-gun/


Cimento neles!
Já viram que bacansa de Impressoras 3D se faziam, com partes em CIMENTO, para tornar a máquina muito mais sólida?
Até TORNOS se podem fazer com Moldes, seguindo este método.


Useful both for 3D printers a lot more solid, AND even for Lathes, using this Cement Mold idea!


Create Concrete Products With 3D Printed MoldsFurther Fabrication  
In this Instructable I wanted to show you my process, for making 3d printed moulds, to create cost effective prototype products, with cast concrete.
https://www.instructables.com/id/Create-Concrete-Products-With-3D-Printed-Molds/


Note, although Metal on the Microwave is a big NO-NO, removing the Kiln, at a certain temperature, and quckly pouring it onto a Mold...
That's feasable.


Derreter VIDRO no Micro-ondas!
E sabe-se lá que outros Materiais não-metálicos.
Porque Metal, no Micro-ondas...
NÃO!

Mas... Isso não impede de se poder retirar o Cadinho, com uma boa temperatura...
E, rápidamente, inserir um pouco de Metal, e logo, se verter para um Molde! 
MEWAHAHAHAHA!


DIY Microwave Kiln | Fuse Glass in Your MicrowaveShakeTheFuture 
In this Instructable, we'll look into way to make a microwave kiln.
For those who don't know what is a microwave kiln, here is a quick introduction.
Microwave kiln is a kiln that you can put in your regular microwave oven.
It does not use a wire heating element or gas to heat up. Microwave kiln is covered with silicon carbide.
Silicon carbide absorbs microwaves and turns them into heat.
Microwave kilns are usually used to fuse glass.
You can turn broken glass into amazing jewelry. 
https://www.instructables.com/id/DIY-Microwave-Kiln-Fuse-Glass-in-Your-Microwave/


Tempera-se Metal...
Porque não, PLA?
É o que este nosso amigo nos ensina a fazer:


Annealing PLA Prints for Strength – 2 Easy WaysMiroslav Sarcevic 
Background Information
Annealing, when referring to metals, is when you heat up a material to make it less brittle and more pliant. In order for this physical change to occur, you have to heat the material to a sweet spot that’s cooler than its melting point but hotter than the temperature it recrystallizes at. You have to maintain this temperature for a while and then let it naturally cool down.
...
Annealing Plastic
Though this definition refers mostly to metals, a similar process can also be used with plastic. The technology behind plastic annealing is not new. It has been used for decades in the production of injection-molded plastic objects. Annealing is used to reduce internal stress in molded parts and make those parts stronger and less prone to warping.

https://all3dp.com/2/annealing-pla-prints-for-strength-easy-ways/


quarta-feira, 19 de junho de 2019

Soldar peças 3D! E façam o vosso Portátil com uma Raspi, AzureSphere para IoT, gravar METAL com uma gravadora Laser(!)e, e Scan 3D com uma Câmara normal

Isto é importante.
Porque assim, com este acessório manual, podem criar à vontade, sem problemas nem de tamanho, nem de cores diferentes...
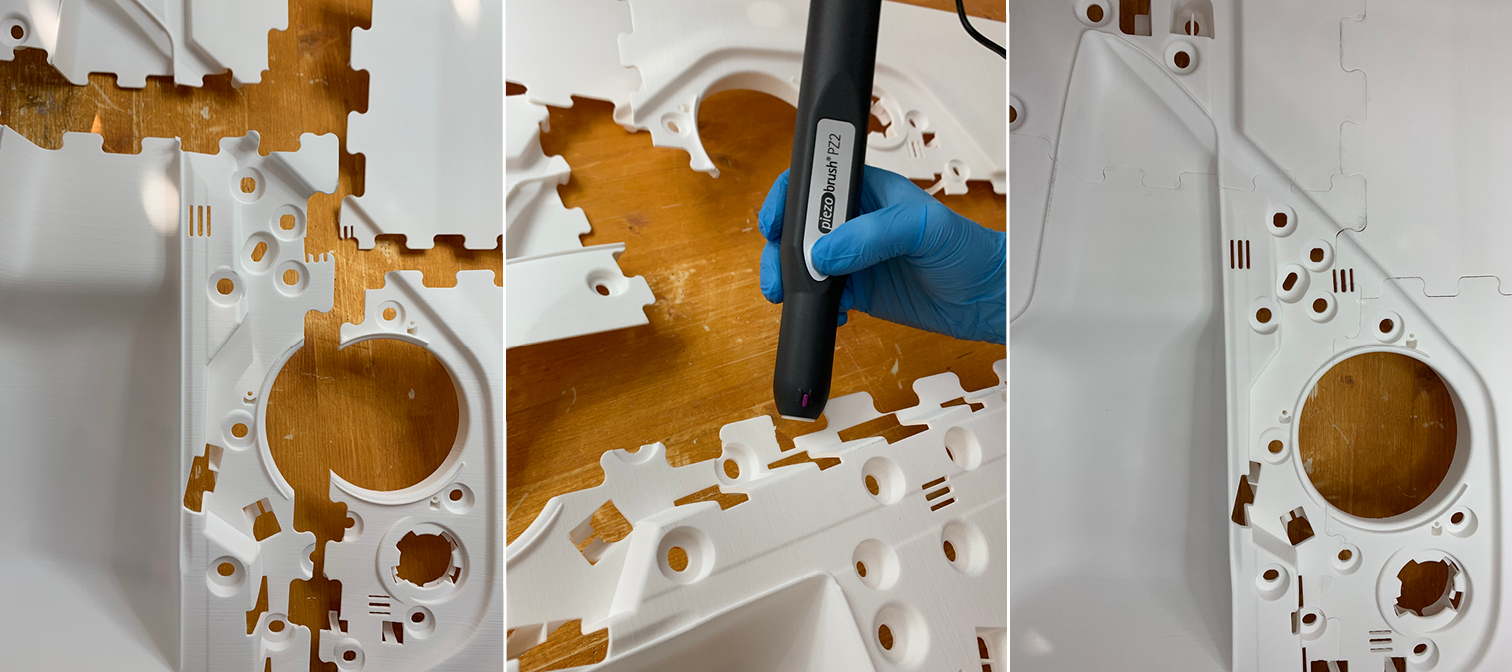
Basta SOLDAR as peças, com este método de Plasma Frio.
Impressionante!


IS PLASMA THE MISSING LINK IN ASSEMBLING 3D PRINTED PARTS?
UMAIR IFTIKHAR

Creabis, a Kirchheim-based 3D printing service bureau, is using Relyon Plasma’s piezobrush PZ2, a handheld cold plasma device, to bond 3D printed parts.
The piezobrush PZ2 uses plasma to activate surface particles of a substance which strengthens the adhesion between joined parts. With a strong bond between assembled 3D printed parts, it is possible to manufacture large-sized sturdy components on small sized 3D printers. 
According to the CEO of Creabis, Ralf Deuke, plasma-aided bonding will lead to more novel applications in 3D printing.


Peguem numa Raspberry PI, e numas coisitas mais, e fazem o vosso próprio Computador Portátil todo manerinho, que cabe num bolso, dobrado! 
É bom!


Make a Portable Computer Using a Raspberry PiTylerJohnson

Have you ever wanted a portable computer you can take with you? This is the easiest way to build your own. For those of you who do not know what a Raspberry Pi is, it is a complete computer about the size of deck of cards that can run many different kinds of Linux. This portable computer will be complete with a screen, keyboard, wifi, and a battery. This is just to show how to make the components work on battery, this indestructible does not have instructions for building a case. There are a lot of interesting ideas for cases and I did want to limit anyone's options. I tried to find the easiest way of making a portable all in one battery powered computer.
For this project you will need to be comfortable doing electrical soldering and desoldering; if you are have not done electrical soldering before, there are many tutorials online.

https://www.instructables.com/id/Make-a-Portable-Computer-Using-a-Raspberry-Pi/


Para essa história do IoT, Internet of Things, podem desenvolver os vosso Porjectos, à brava com este Kit, Azure Sphere por isso, cá segue o Anúncio da coisa, mas atenção, podem até receber o Kit GRÁTIS, se forem, seleccionados...


Azure Sphere

We're partnering with Microsoft and Avnet to test their new, highly secure IoT dev kit, the Azure Sphere MT3620 Starter Kit. We'll be hosting multiple Design Challenges around this kit, as well as a RoadTest, webinars about using it for prototyping, and more, so we'll provide everything you need to get started with this IoT solution!
If selected for the RoadTest, you will receive the kit for free. Follow this group and watch for Design Challenge news.


Sabiam...
Que podem gravar em METAL, até com as minísculas gravadoras Laser que há à venda, por aí?
Podem, MAS com uns truques.
É preciso um tratamento Químico, e este Instructable, foi ver quais os melhores para quais metais, por isso, têem a papinha toda feita!


Laser Engrave Metalbrichtl

Being able to engrave metal was one of the main reasons, why I got a laser cutter.
In this instructable I am going to show you some of my experiences.
Please share your results and experiences in the comments, I would love to learn more about engraving metals.
A word of warning: The process of engraving metal after applying an agent to the surface is patented. So please inform yourself, before doing so commercially.

https://www.instructables.com/id/Laser-Engrave-Metal/


Mais uma forma de fazerem Scan 3D, com uma vulgar Câmara digital, todos os passos, programas e aparelhos necessários:


3D Scanning Yourself in High Resolution With a Camerashuang peng 

In this instructable, I'll share with you how to create a 3d model of yourself with a camera. Then clean up, fix the mesh make them printable models.
Things you'll need:
  • A camera (or a phone with camera function)
  • Autodesk Remake
  • Autodesk Mudbox
  • Geomagic studio (optional)
  • A 3d printer (if you want to print them)
https://www.instructables.com/id/3D-Scanning-Yourself-in-High-Resolution-With-a-Cam/


terça-feira, 11 de junho de 2019

Aerogel feito em casa! E um 4º Eixo CNC, um Modelo de Motor Radial, uma Bio-Impressora(!), gravem a Laser com a vossa Impressora 3D, e o vosso Filamento feito em casa!

Ficam a saber que há uma Org que vos ensina a fazerem...
AEROGEL!
Impecável!
Tudo, desde a aparelhagem, até aos diversos tipos desse sólido incrível que é o Aerogel, o que não é nem rápido nem barato, mas para Universidades, e diversos Grupos de Nardos, deve dar...


How-To: Make Your Own AerogelSean Michael Ragan 
The folks at Aerogel.org are serious about it: The “Make” section of their exhaustive “open source aerogel” site will teach you how to make high-quality monolithic aerogel the way the pros do it, from building your our own supercritical drying apparatus (“manuclave” is their neologism), to mixing up the wet ingredients, to actually performing the supercritical drying operation. It still won’t be easy or cheap, but all the information you need is right there, well organized and clearly explained. 
https://makezine.com/2012/02/01/how-to-build-a-supercritical-dryer-and-make-your-own-aerogel/


A vossa Fresa CNC pode melhorar muito, com este 4º Eixo, que a transforma quase num Torno CNC de origem...
É bom!


CNC Router Rotary Axis
mkmra2
My router was a 3-axis machine. Adding a 4th rotary axis allows considerably more flexibility as the part to be machined can be rotated to expose different faces for cutting. I'd previously done some 4-axis router work at Stamps School of Art & Design - here's that post. I really wanted to add this capability to my router.
After exploring a few options - most of which were very expensive - I chose to go with an inexpensive kit from China. It was only $358 including shipping. I'd have to figure out how to get it hooked in to the electronics then build my own mount.


Eis algo de nada banal, para fazerem com as vossas Impressoras 3D...
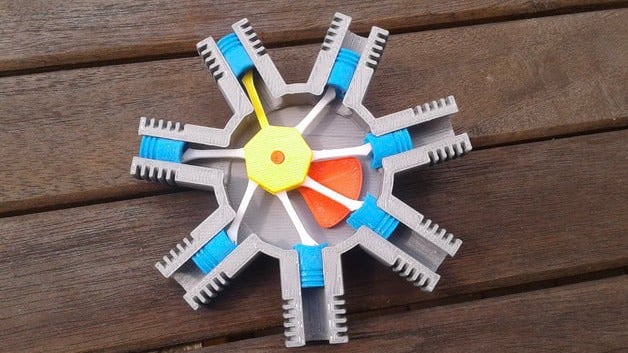
Um Modelo de Motor Radial de 7 Cilindros!
E sem complicações de montagem, por isso, de que estão à espera?


[Project] 7-axis Hand-Cranked Radial Engine ModelMika Yeap 

Hand-cranked and fully functional, this is a model of a seven-cylinder radial engine by plusalphaDesigns. It’s a “reciprocating type internal combustion engine configuration in which the cylinders ‘radiate’ outward from a central crankcase like the spokes of a wheel,” according to Wikipedia.
It’s a relatively painless model to assemble and print, requiring just a handful of plastic parts – you don’t even need any fasteners. So let’s jump right in!

https://all3dp.com/1/project-7-axis-hand-cranked-radial-engine-model/


Isto existe MESMO, uma Bio-Impressora para Laboratórios, e podem fazer uma destas por uma fracção do preço das do Mercado!


Low Cost Bioprinter
mechbioprinter

The goal of this project is to develop a low-cost bioprinter to make bioprinting more accessible to research institutions. Currently, low-end bioprinters cost approximately $10,000 while high-end bioprinters cost approximately $170,000. In contrast, our printer can be built for approximately $375.


Só coisas boas!
Não é que podem transformar a vossa Impressora 3D numa Gravadora Laser?
E não é muito difícl, nem caro!


Convert a 3D PRINTER to LASER ENGRAVER | Under 40$Jakes

- To start this project we are gonna need a laser that is strong enough to burn into most of the household materials. I found that 500 mw laser is just right for this project due to its low price and capability of engraving in almost every material with exception of metals and glass.
-I bought my laser on Aliexpress for a small price. Here is the link: https://goo.gl/obFmFD
-With laser you will also get a laser driver circuit and a safety glasses which are necessarry when operating with lasers.

https://www.instructables.com/id/Convert-a-3D-PRINTER-to-LASER-ENGRAVER-Under-40/


...E como não quero que vos falte nada, cá vai como fazerem o vosso próprio Filamento para a Impressão 3D!
Poupa-se dinheiro, assim...


Build Your Own 3d Printer Filament Factory (Filament Extruder)ianmcmill

UPDATE: Now with wiring diagram !
Long read:
3D printers are cool and they finally start to drop in price. Kickstarter campaigns like the one from QB-UP or M3D are popping up and they are finally "affordable". And with affordable I mean affordable like 200 $ and not "affordable" like 2.199$ affordable. However, once you are a proud owner of a 3D printer you will soon realize that your wallet is far from being let alone. No ! You need plastic filament of course to print those super awesome coat hooks and wheel chocks. Since the price for these filaments tend to top the actual material costs, printing before mentioned life savers is kind of expensive and could become a problem to the development of the ever growing 3D printer community
BUT FEAR NO MORE !! Some clever gents came along - Hugh Lyman with his Lyman Extruder may be mentioned here or the guys over at Filastruder.com - and saved the day ! YAY. And there was much rejoicing ! They have built plastic extruders everyone can build or buy at a decent price. However if you are a fellow Instructable.com user the first thing that should come to your mind is "I can build this by myself...and cheaper...". Building at lower costs is the nature of DIY after all.

https://www.instructables.com/id/Build-your-own-3d-printing-filament-factory-Filame/


sábado, 1 de junho de 2019

Um Nano mais barato! E aprendam FreeCad, um braço-robot Open Source(!), convertam scad para stl, e um Kit Arduino,

Muita coisa para cobrir, por isso, vai ser rápido:

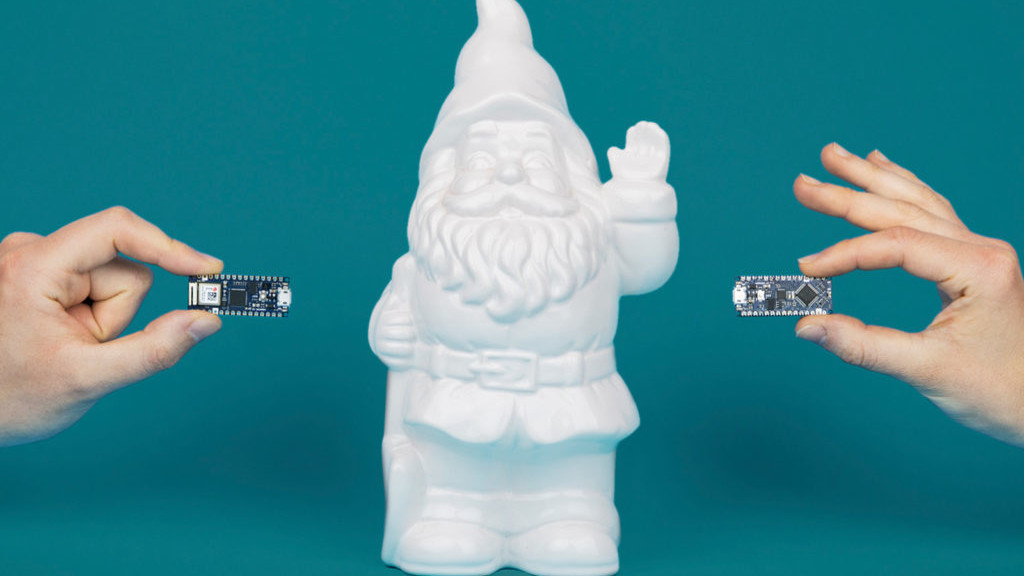
Eis a ùltima criação da Arduino, um Micro-Controlador Nano, e mais em conta, para facilitar ainda mais a vida dos Engenhocas:


Arduino Launches New Affordable Nano Microcontroller BoardsHanna Watkin  
Arduino is the Italian open-source computer hardware and software company announced a new family of affordable, microcontroller boards at last weekend’s Maker Faire Bay Area 2019.
“The new Nanos are for those millions of makers who love using the Arduino IDE for its simplicity and open source aspect, but just want a great value, small and powerful board they can trust for their compact projects,” said Massimo Banzi, co-founder of the Arduino project.
The company’s press release explains that these boards offer high quality and reliability, with a cheaper price tag. The microcontroller boards are also compatible with classic Arduino boards and boast low energy consumption. They’re also equipped with powerful processors. 
https://all3dp.com/4/arduino-launches-new-affordable-nano-microcontroller-boards/


O FreeCad é a melhor opção para quem quer desenhar os seus Objectos 3D, e aqui vai um simpático Tutorial para aprenderem como dominar o Programa:


2019 FreeCAD Tutorial for 3D Printing – 5 Easy Lessons
Rocío Jaimes Gutierrez 

Welcome to our FreeCAD tutorial for 3D printing. FreeCAD is a 3D parametric modeler, designed to create and customize real-life objects. Its beauty lies on the easiness to modify your designs, together with the open-source principle, and of course, being for free.
In this 5-lesson FreeCAD tutorial, you will learn the basic commands and tools to visualize your ideas on screen for 3D printing. We will construct a seemingly simple object – step by step. After each instruction, you will find pictures highlighting the steps. By the end of this tutorial, you will be ready to print your first self-constructed CAD model.


Ora aqui está um Kickstarter a apoiar, um braço-robot OPEN-SOURCE!
Dito de outra maneira, CNC para o Povo!


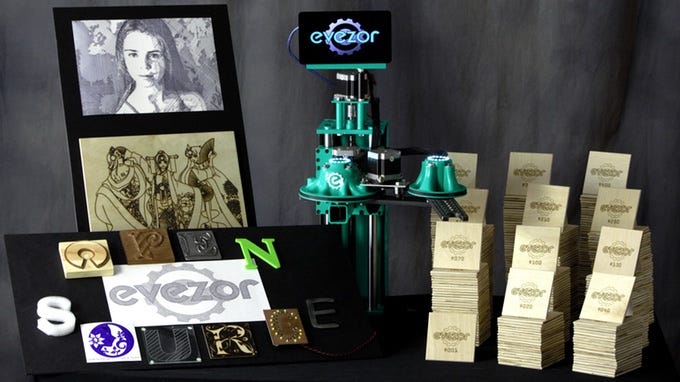
Evezor: Open Source SCARA Robot ArmJeremy S. Cook

Per this project’s Kickstarter video seen below, when 3D printing first jumped came into the mainstream, many people thought they could now make anything they wanted, perhaps even many of them to sell with no human interaction. While true in some sense, these machines do require human intervention between prints, and can take a very long time to produce useful parts. Additionally, some designs may require a different tool, such as a laser cutter or CNC router. That, of course, means more space and money, and still there is the issue of machine tending.

https://blog.hackster.io/evezor-open-source-scara-robot-arm-b955daac3d82


O programa SCAD tem muitos aderentes, por isso, podem aprender como transformar aqueles Sólidos criados em relações Matemáticas, em Objectos impresso em 3D:


SCAD to STL – How to Convert SCAD Files to STLBenjamin Goldschmidt 

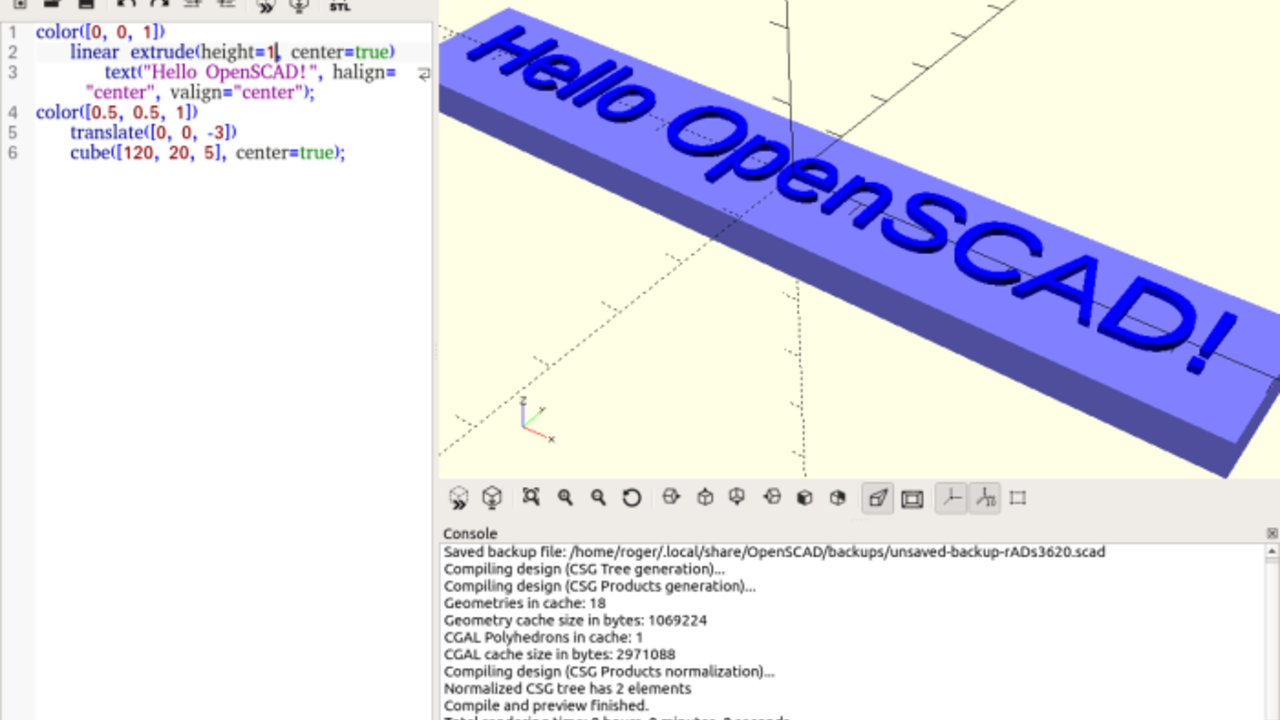
SCAD and STL files are two common file types for 3D design applications. SCAD stands for “Solid Computer Aided Design”, and the file format is used to describe 3D objects. It was pioneered by a software called “OpenSCAD,” which is a free CAD software for designing 3D objects. STL stands for “stereolithography” and is a popular file type to use with slicers for 3D printing.
The main difference between these two file types is in the way the models are described in code. In STL files, the 3D model is created using a “tiled” set of triangles along the surface of the object. This creates a fully 3D object. In contrast, SCAD files design an object using mathematical relationships. For example, a cube-like object can be described using its length, width, and height. This type of design can be useful for printing objects such as fractal art on objects.
Because the geometry used by STL files is more capable of conforming to complex designs, you may find you want to convert SCAD to STL. Lucky for you, there are two really easy ways to do this.

https://all3dp.com/2/convert-scad-files-to-stls/


Este nosso amigo tem-vos a oferecer um bastante exaustivo Instructable para aprenderem uma data de usos para o Arduino!
É bom!


Arduino Learner Kit (Open Source)taifur

If you are a beginner in Arduino World and going to learn Arduino having some hands-on experience this Instructables and this Kit is for you. This Kit is also a good choice for the teachers who like to teach Arduino to their students in an easy way.
If you want to learn Arduino you should include the following topics:
Digital Output:
Controlling multiple LEDs using Arduino
Generating Tone using Buzzer
Digital Input:
Interfacing button switch using Arduino
Interfacing DHT11 Sensor Using Arduino
Analog Input:
Reading Analog data from a potentiometer
Interfacing LM35 temperature sensor using Arduino
Analog Output (using PWM):
Generating multiple colors using the RGB LED.
SPI Communication:
Interfacing 74HC595 Shift Registerwith Arduino
Interfacing MAX7219CNG with Arduino for driving DOT Matrix display or multiple seven segment display using only 3 pins of Arduino.
I2C Communication:
Reading date and time from DS1307 real time clock
UART Communication:
Interfacing GROVE GPS and Bluetooth Module with Arduino
Display Interfacing:
Driving 16 X 2 Character LCD display using Arduino
Multiplexing:
Driving multiple seven segment display using a minimum number of Arduino pins.
You will be wondering to know that the Kit is designed to experiment with all the above-mentioned topics. So, it can be an Ideal Learner Kit for learning Arduino Programming.
[The Kit includes onboard 6 Green LED, 1 RGB LED, 1 Potentiometer, 1 LM35 Sensor, 1 DHT11 Sensor, 4 Button Switch, 4 Seven Segment Display, 1 8X8 Dot Matrix Display, 1 MAX7219CNG IC, 1 74HC595 Shift Register, 1 Buzzer, 1 16X2 LCD display, 1 DS1307 RTC, 3 Grove Universal Connector.]
No more separate shield or module, no more disgusting wiring on the way of learning Arduino.
https://www.instructables.com/id/Arduino-Learner-Kit/