Blog Posts

Mostrar mensagens com a etiqueta pla. Mostrar todas as mensagens

segunda-feira, 22 de julho de 2019

Automatismo para qualquer um! E acabamentos na Impressão 3D, com uma PISTOLA DE COLA(!), Concrete Molds, Derreter VIDRO no Micro-ondas, e temperar PLA

Qualquer um pode controlar agora a sua Màquina, sem saber programação!
Brutal! 
E podem controlar, vigiar etc.


Machine Control at Your FingertipsMichael Di Staulo 
We’re proud to present our new MachineMotion Pendant: a plug-and-play touchscreen interface for automated equipment powered by the MachineMotion controller. Now you can program, control, and monitor your machine through an intuitive code-free user interface.
The pendant features a 10.1-inch touchscreen, impact-resistant enclosure, rear mounting tabs compatible with UR’s eSeries Pendant Mount, and a comfortable hand strap. It also makes your system safer by ensuring an emergency stop button is always within the user’s reach. 
https://www.vention.io/blogs/machine-control-at-your-fingertips-184


Note: Besides the cool uses that you see on the neat idea below, think also it can be used to COLORIZE details on monocrome Prints!


Isto é uma  ideia que toda a gente gostaria de ter tido!
Paa o quê?
Para acabar, soldar ou reforçar, etc. umas peças com a vossa simples Pistola de Cola, o que vos poupa muito tempo e chatiçes!
Porreiro.
Até... 
Pode servir para COLORIR detalhes duma impressão Monocromo, já pensaram nisso? 
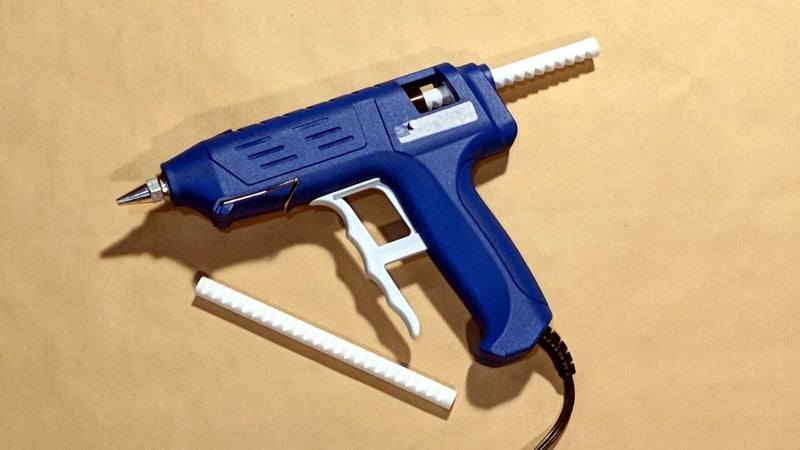


[Project] 3D Printing Sticks for PLA Hot Glue GunTyler Koslow
Who needs a 3D printer when you have a hot glue gun? This Hackaday project from Donald Papp shows us how to use molten PLA filament to glue 3D printed objects together.
When 3D printing ambitiously sized projects, hot glue guns come in handy as a tool to join two separate things together. But what if you could bind these objects with the very same PLA filament that you used to 3D print in the first place?

https://all3dp.com/weekend-project-3d-printing-sticks-for-pla-hot-glue-gun/


Cimento neles!
Já viram que bacansa de Impressoras 3D se faziam, com partes em CIMENTO, para tornar a máquina muito mais sólida?
Até TORNOS se podem fazer com Moldes, seguindo este método.


Useful both for 3D printers a lot more solid, AND even for Lathes, using this Cement Mold idea!


Create Concrete Products With 3D Printed MoldsFurther Fabrication  
In this Instructable I wanted to show you my process, for making 3d printed moulds, to create cost effective prototype products, with cast concrete.
https://www.instructables.com/id/Create-Concrete-Products-With-3D-Printed-Molds/


Note, although Metal on the Microwave is a big NO-NO, removing the Kiln, at a certain temperature, and quckly pouring it onto a Mold...
That's feasable.


Derreter VIDRO no Micro-ondas!
E sabe-se lá que outros Materiais não-metálicos.
Porque Metal, no Micro-ondas...
NÃO!

Mas... Isso não impede de se poder retirar o Cadinho, com uma boa temperatura...
E, rápidamente, inserir um pouco de Metal, e logo, se verter para um Molde! 
MEWAHAHAHAHA!


DIY Microwave Kiln | Fuse Glass in Your MicrowaveShakeTheFuture 
In this Instructable, we'll look into way to make a microwave kiln.
For those who don't know what is a microwave kiln, here is a quick introduction.
Microwave kiln is a kiln that you can put in your regular microwave oven.
It does not use a wire heating element or gas to heat up. Microwave kiln is covered with silicon carbide.
Silicon carbide absorbs microwaves and turns them into heat.
Microwave kilns are usually used to fuse glass.
You can turn broken glass into amazing jewelry. 
https://www.instructables.com/id/DIY-Microwave-Kiln-Fuse-Glass-in-Your-Microwave/


Tempera-se Metal...
Porque não, PLA?
É o que este nosso amigo nos ensina a fazer:


Annealing PLA Prints for Strength – 2 Easy WaysMiroslav Sarcevic 
Background Information
Annealing, when referring to metals, is when you heat up a material to make it less brittle and more pliant. In order for this physical change to occur, you have to heat the material to a sweet spot that’s cooler than its melting point but hotter than the temperature it recrystallizes at. You have to maintain this temperature for a while and then let it naturally cool down.
...
Annealing Plastic
Though this definition refers mostly to metals, a similar process can also be used with plastic. The technology behind plastic annealing is not new. It has been used for decades in the production of injection-molded plastic objects. Annealing is used to reduce internal stress in molded parts and make those parts stronger and less prone to warping.

https://all3dp.com/2/annealing-pla-prints-for-strength-easy-ways/


quinta-feira, 16 de maio de 2019

3 em 1 diferente! E magnetizar e desmagnetizar, soldar PLA, Carvão dum Rocket Stove, desenhar e passar à fresa, e Mosaicos automáticos!

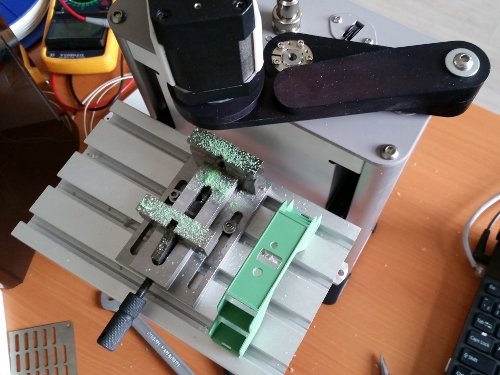
Aqui está uma máquina bem intrigante, com um mecanismo diferente, que eles dizem ser mais rápido e seguro, e parece mesmo ser assim...

E ainda vem com 3 meios de ser usada;

  • Como Impressora 3D
  • Como gravadora de Alumínio
  • Como fresa de plástico
É bom!


3D printer SkyOne 
3dlaboratorio 
Industrial 3D printer SkyOne is meant for printing by up-to-date plastics with melting temperature up to 260 °С. Fused deposition modeling technology (layer-by-layer formation of an object from as fused plastic) is behind a concept of its operation. The printer is realized according a coupled design SCARA (Selective Compliance Assembly Robot Arm), two motors control levers, which move an extruder in XY plane. Feeding along the Z axis is realized by a ballscrew transmission. Scheme SCARA provides an advantage in printing speed over printers, which use Cartesian ordinates. But at the same time the software for 3D printer SkyOne is much more complicated than for printers constructed according a standard design. 
https://3dlaboratorio.es/eng/3d-printers.htm


Às vezes, é mesmo útil ter uma ferramenta ou um parafuso magnetizados...
Outras vezes, é bem chato, só atrapalha!

Pois aqui aprendem como tanto magnetizar, como a fazer o contrário, desmagnetizar, e é um instructable bem porreiro:


Tool Demagnetizer and Magnetizer
tonyfoale 
Tools sometimes get magnetised, this can be both useful and undesirable depending on the type of tool and the actual job that you want to use it for. For example there are times when having a magnetised screw driver is helpful to hold a screw when you need to put it in an awkward place but unless you want to do that it can be a disadvantage because it will attract any ferrous swarf, nails and screws nearby. Drill bits are a tools which you would not want to ever be magnetised, it will get covered in chips when drilling ferrous material.
That said, we can see that a means to magnetise and demagnetise tools and other objects like vernier calipers would be a useful workshop addition. To magnetise a tool we only need subject it to a strong uni-directional magnetic field and to demagnetise we subject the object to an alternating magnetic field.

https://www.instructables.com/id/Tool-Demagnetizer-and-Magnetizer/


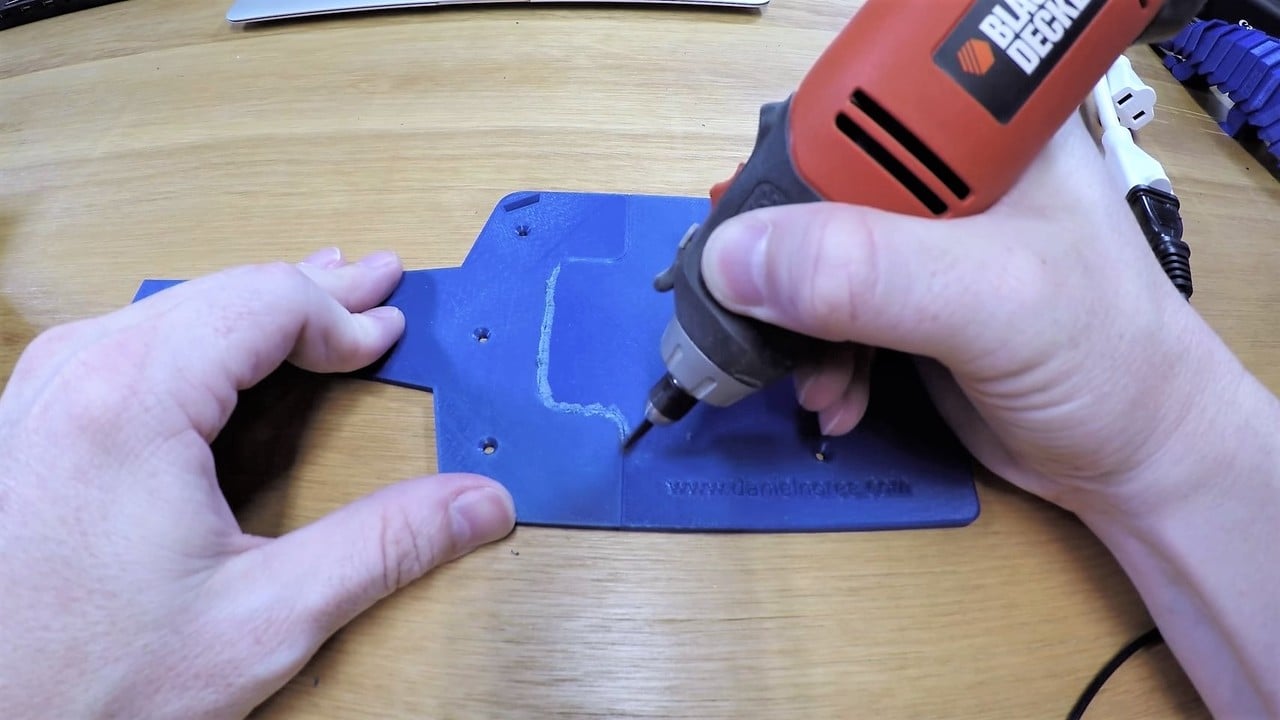
Para montarem as vossas Engenhocas em secções separadas, e juntá-las, sem cola, ou também para repararem uma Impressão com falhas, podem usar este belo deste método, a soldagem por Fricção!
Algo, portanto, que vos vai poupar a muita re-impressão maçuda...
E parmite ainda uma Engenhoca em várias partes! 


PLA Welding – How to Fuse PLA Seams and Cracks

Tian Ooi  
PLA welding is a way to fill in gaps or “glue” 3D prints together.
Using a power drill with a small piece of PLA filament instead of a drill bit, the rotating filament is pushed against the 3D printed plastic. This generates friction, which heats up the filament and softens it. The filament is then free to fill in a crack or weld plastic together. After cooling, this creates a strong bond, as if it had been part of the piece all along. 
Inspired by friction welding, a welding technique typically used to fuse metals, PLA welding applies the concept of utilizing rotational friction to plastics instead. Friction welding is often used in industry to join dissimilar materials at more stable temperatures than other welding methods. Applications include the aerospace and automotive sector, joining together turbine shafts, car frames, and more. 


Algo de bem ùtil, fabricarem o vosso próprio Carvão, a partir do super-económico Rocket Stove, que aproveita TUDO duma Combustão, o Comcustível, os Gases, as partículas, tudo!


Charcoal RetortKuzmanic
I have had a couple of attempts making charcoal using 44 gallon drums and they have worked okay, but needing a new project after buying a mig welder, I decided to make a retort.
The theory of a retort is that you heat the wood to be made into charcoal up to a point where it starts expelling all of the wood gas and impurities, which is then fed back into the fire to keep the process going.
After reading up and watching a number of videos on rocket stoves and retorts, I decided to make one with the idea of combining the two into one rocket stove powered charcoal retort.
https://www.instructables.com/id/Charcoal-Retort/


Se já têem o Fusion 360, podem idealizar algo, e passar à Fresa CNC, porque o programa tem essa funcionalidade, e aqui está como lá chegar, com um exemplo simpes:


Creating a Simple 3D Model on Fusion 360 and Creating a Toolpath MYDIYCNC 
Tory MYDIYCNC 
Hello there,
Tory at MyDIYCNC here. Today I want to show you how to use a very useful piece of software from Autodesk called: Fusion 360. With this software you can create simple 3D Models, to elaborate and complex 3D models.
What I hope to teach you today is how to create a simple model on Fusion 360, and then create a tool path in which you can then run the G Code on your MyDIYCNC machine or another CNC machine.
Let's get started! 
https://www.instructables.com/id/Creating-A-Simple-3D-Model-on-Fusion-360-and-Creat/


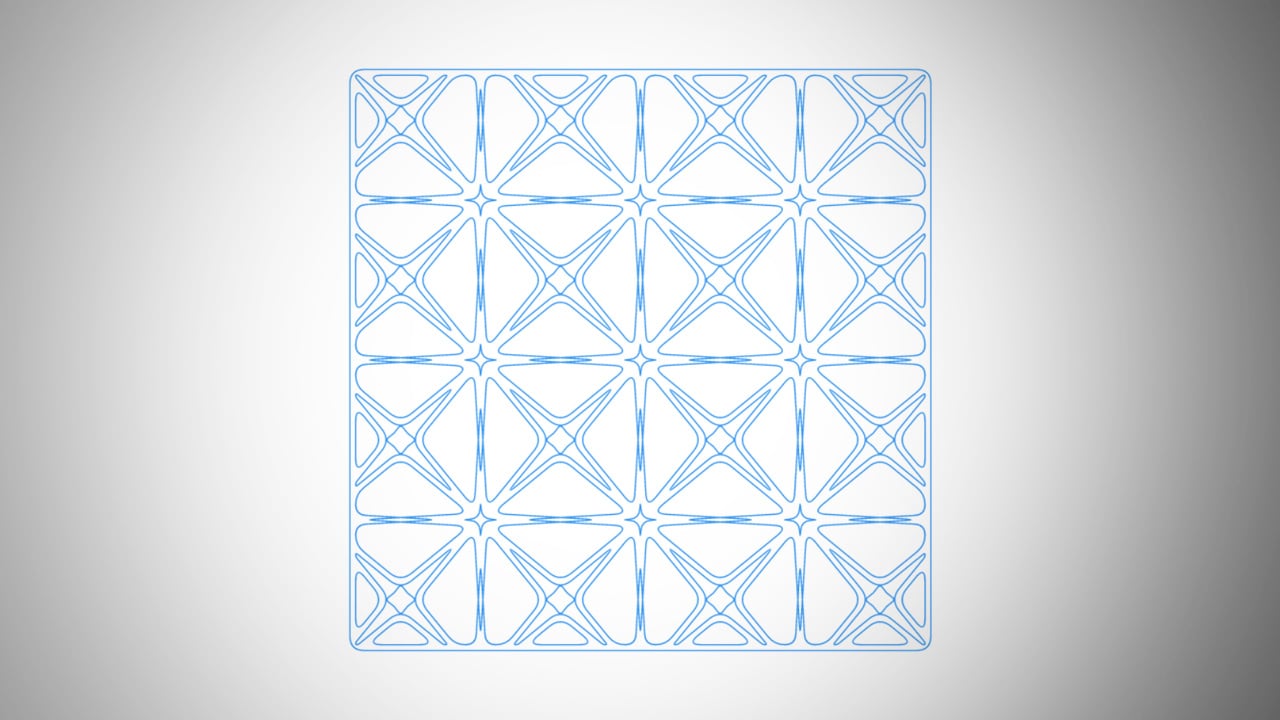
Para algo como desenhos repetivivos, cá está como fabricarem as vossas texturas ou mesmo Mosaicos, Grades, etc a partir duma App na Net:


[STUFF] Polygonia Design Suite
All3DP  
Offering possibly the simplest way to sketch repeating geometric patterns, this browser-based web app is a surefire resource for intricate 2D designs.
We’re not ones for lattice room dividers, but after spending some time toying around with Polygonia Design Suite, it’s just a matter of time before the All3DP office is a maze of fancy laser cut obstacles. A browser-based vector drawing tool for quickly creating geometric patterns, Polygonia is the result of a visit to the Smithsonian and a smattering of high school math and software engineering by its creator, David Kaufman.
Through the simple UI of an online design app, you can sketch out simple line inputs which get instantly translated into rad looking tiled designs. Multiple parameters allow you to customize the design to suit your project and a variety of output formats including SVG and PNG give flexibility for further design software you use after.