Blog Posts

Mostrar mensagens com a etiqueta tecnlologia. Mostrar todas as mensagens

sábado, 30 de maio de 2020

Imprimir objectos ocos? E moldes para metal feitos na vossa Impressora, um tico-tico, corte para serra manual, e um Spinner non stop

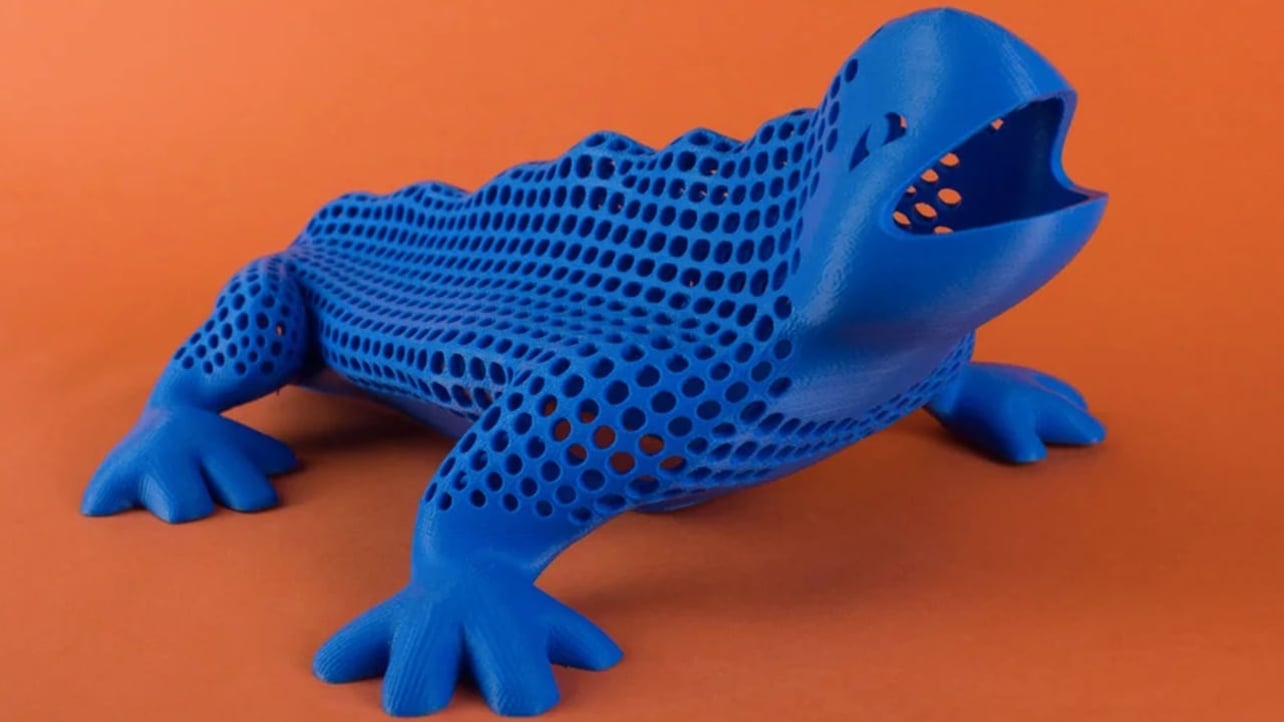
Se quizerem imprimir Objectos 3D, com uma data de buracada, o que os torna mais leves e rápidos nde imprimir, sigam este Tutorial: 


How to 3D Print Hollow Objects – Simply Explained
Pranav Gharge 
Have you ever wondered whether hollowing out a model is a good idea or not? Well, the simple answer is that since 3D printing is a volume-based production technique, there’s almost always a benefit to some degree of hollowing out of a print. Hollowing can save you printing material, time, and money, and of course, potentially improve your prints.
In this piece, we’ll discuss hallowing prints in general for FDM, SLA, DLP, and LCD (resin) printing. Then, we’ll focus on the three main ways to hollow out your prints: with a slicer, vase mode, or a modeling program (we choose Meshmixer as our example). And finally, we’ll go over some considerations for when and how much to hollow. 
https://all3dp.com/2/how-to-3d-print-hollow-objects-simply-explained/


Moldem chapa de metal, usando ferramentas impressas em 3Dmais rápidas e fáceis de produzir do que por Maquinação CNC:


Bending steel with plastic 3D printed toolsStuff Made Here 
I've been wondering if 3D printed tools could possibly bend steel. It seemed possible unlikely. I designed and printed several tools which are used on a hydraulic press to bend and form steel sheet metal. This particular tool could be made by CNC machining the tools from metal but 3D printing it is much faster and easier 
https://www.youtube.com/watch?v=WuY2-OrT9ig


Eis 2 vídeos de Daniele Tartaglia de seguida, o primeiro, uma serra tico-tico bem bacana:


How to make SCROLL SAW machine DIY
Daniele Tartaglia

https://www.youtube.com/watch?v=79MQiMw1XMo


O segundo Vídeo de Daniele Tartaglia ensina-vos a fazer uma estação de corte para o vosso tico-tico, sem os erros de corte do costume...


How to make JIGSAW Cutting Station - PERFECT corner cutting
Daniele Tartaglia


https://www.youtube.com/watch?v=HfW0J4r7y-o&feature=em-uploademail


Estou farto de dizer que para uma Proof-of-concept não precisam de passar logo a um Produto Acabado, e aqui está mais uma prova.

Este nosso amigo fala de Energia Grátis; 

Certo, o Spinner rodará até que avarie, ou os Ìmanes percam força, cerca de 400 anos, para isso...

Mas saír alguma energia que se aproveite, só com uma data destes aparelhos em série, mas dá para um Brinquedo de Secretária impecável:


Free Energy Magnetic Fidget Spinner 100% Real working new idea technology
Multi Electric  
Free Energy Magnetic Fidget Spinner 100% Real working new idea technology
Visit my facebook page   fb.me/freeMultiElectric 


quarta-feira, 16 de outubro de 2019

Um Génio! E uma Máquina de Molas, Tele-controle Arduino, crescam a Impressora 3D, e uma Micro-Fresa

Não há muitos Divulgadores  e ao mesmo tempo, autênticos Professores como este...
Um Génio!

Na sua Série de Vídeos, aprende O QUE PRECISAM, para cada caso, mas vão absorvendo uma data de material que doutra maneira seria maçuda e sonorípora...

Acreditem, o ar descontraído esconde um menino que aprendeu Engenharia para Operador de CAD, 3 gigantes livronhos, como se não fosse nada, porque era preciso saber muita Matemática, e ele já a sabia, à vontade!!!

Como se não fosse nada!

.
Engineering Principles for Makers Part One; The Problem. #066Jeremy Fielding 
A easy to follow strategy for designing and making stuff with a focus on machines. Turn your idea into a real "thing". I call part one my “Dr. Farm“ Method.
My version of the basic design engineering process. 
https://www.youtube.com/watch?v=FHhXbz1K0k0


Ora cá vai esta muito satisfatória máquina de criar Molas e outras coisas, a começar pelo altaente satisfatório Vídeo, algo que faz mesmo falta ao Engenhocas, e uma data de vezes...


Spring Making / Wire Bending Machine 
jiripraus
Well, this machine is not only about making springs. It is a wire bending machine capable of bending 0.8/0.9/1 mm wire into any 2D shape. But yeah, the coolest thing I was able to make with it so far was the spring. How cool is that?
The main goal was to make it quite precise. Other DIY wire bending machines are not very precise and their bends tend to have quite a big radius. I like to work with nice sharp bends!
The second goal was to make it as easy to build as possible with commonly available parts and components. All the structural parts are 3D printed and all the metal parts are available in most of the hardware stores. 
https://www.instructables.com/id/Spring-Making-Wire-Bending-Machine/


Um Tele-Controle feito por vocês, usando nem menos do que um Arduino...


DIY Arduino Radio Controller || Remote Controller || Part 1Aatik's lab
You might have played with a lot of rc cars and probably want to make one by yourself but one problem you will face is from where to get the desired transmitter and receiver so in this video i will show you how to make a arduino based transmitter and receiver with the help of nrf24 radio

https://www.youtube.com/watch?v=ctHnHsukRAs


Como fazer uma Impressora 3D "crescer"(!) isto é, fazer duma pequena uma grande Impressora!!!


How to Create a Large 3D Printer Using a Smaller 3D Printer - "Project Locus"redhatman  
From those that own 3D printers, to those who simply are just curious about their capabilities, one topic that comes up rather frequently is the idea of "Printing another 3D Printer". Now this may not be 100% possible when considering components such as the electronics, however, nearly every 3D printer today in the open source community utilizes to some degree, 3D printed parts in it's construction. From fan mounts to spool holders, a person can spend a few minutes searching the web, and likely find a suitable design to use on their own printer. This has proved to be very useful, especially for those who love to build, modify, and design their own machines. 
https://www.instructables.com/id/How-to-Create-a-Large-3D-Printer-using-a-Smaller-3/


Que tal uma Micro-Fresa para a Oficina, para metais mais macios como Alumínio e Bronze?
Faz jeito:

Benchtop Micro Milling MachineHonus  
This is a micro sized benchtop mill that is suitable for milling small parts in soft metals such as Aluminum and Brass. While it is a manual mill it wouldn't be too difficult to convert it to CNC by adding suitable stepper motors and a CNC controller. 
The travel specs are:
X axis- 150 mm
Y axis- 75 mm
Z axis- 150 mm 
This design uses off the shelf assembled linear slides and 80/20 Aluminum extrusion for simple assembly and accurate alignment. The beauty of this design is its modular nature- you can make it any size you want and it's super easy to build.
Be sure to check out the build notes on all of the enlarged images! 
https://www.instructables.com/id/Benchtop-Micro-Milling-Machine/


sábado, 1 de junho de 2019

Um Nano mais barato! E aprendam FreeCad, um braço-robot Open Source(!), convertam scad para stl, e um Kit Arduino,

Muita coisa para cobrir, por isso, vai ser rápido:

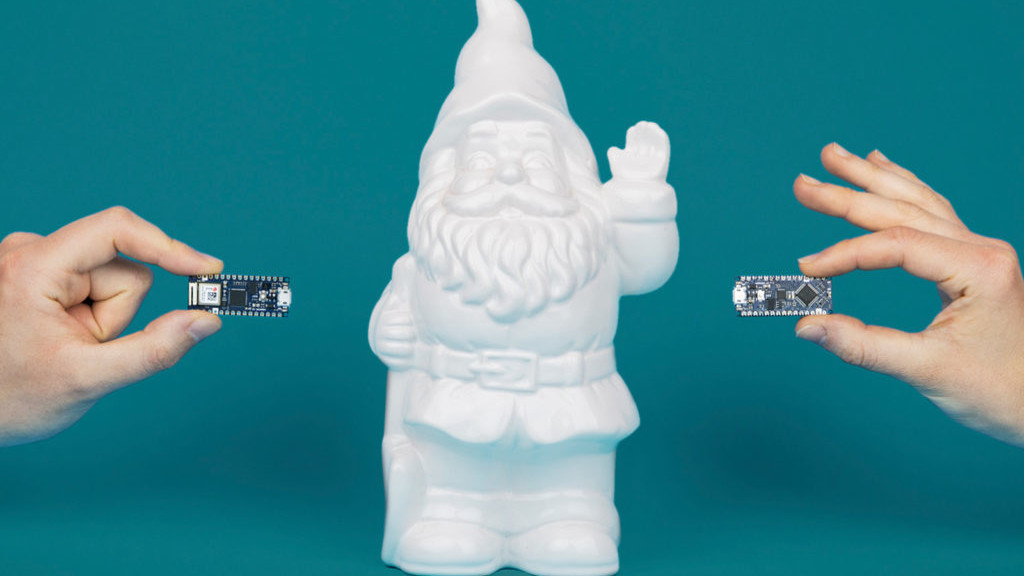
Eis a ùltima criação da Arduino, um Micro-Controlador Nano, e mais em conta, para facilitar ainda mais a vida dos Engenhocas:


Arduino Launches New Affordable Nano Microcontroller BoardsHanna Watkin  
Arduino is the Italian open-source computer hardware and software company announced a new family of affordable, microcontroller boards at last weekend’s Maker Faire Bay Area 2019.
“The new Nanos are for those millions of makers who love using the Arduino IDE for its simplicity and open source aspect, but just want a great value, small and powerful board they can trust for their compact projects,” said Massimo Banzi, co-founder of the Arduino project.
The company’s press release explains that these boards offer high quality and reliability, with a cheaper price tag. The microcontroller boards are also compatible with classic Arduino boards and boast low energy consumption. They’re also equipped with powerful processors. 
https://all3dp.com/4/arduino-launches-new-affordable-nano-microcontroller-boards/


O FreeCad é a melhor opção para quem quer desenhar os seus Objectos 3D, e aqui vai um simpático Tutorial para aprenderem como dominar o Programa:


2019 FreeCAD Tutorial for 3D Printing – 5 Easy Lessons
Rocío Jaimes Gutierrez 

Welcome to our FreeCAD tutorial for 3D printing. FreeCAD is a 3D parametric modeler, designed to create and customize real-life objects. Its beauty lies on the easiness to modify your designs, together with the open-source principle, and of course, being for free.
In this 5-lesson FreeCAD tutorial, you will learn the basic commands and tools to visualize your ideas on screen for 3D printing. We will construct a seemingly simple object – step by step. After each instruction, you will find pictures highlighting the steps. By the end of this tutorial, you will be ready to print your first self-constructed CAD model.


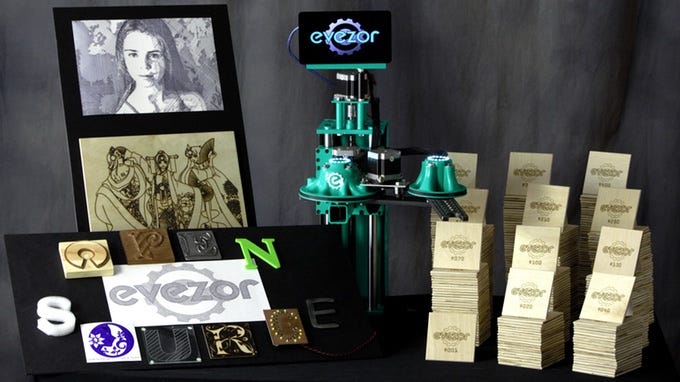
Ora aqui está um Kickstarter a apoiar, um braço-robot OPEN-SOURCE!
Dito de outra maneira, CNC para o Povo!


Evezor: Open Source SCARA Robot ArmJeremy S. Cook

Per this project’s Kickstarter video seen below, when 3D printing first jumped came into the mainstream, many people thought they could now make anything they wanted, perhaps even many of them to sell with no human interaction. While true in some sense, these machines do require human intervention between prints, and can take a very long time to produce useful parts. Additionally, some designs may require a different tool, such as a laser cutter or CNC router. That, of course, means more space and money, and still there is the issue of machine tending.

https://blog.hackster.io/evezor-open-source-scara-robot-arm-b955daac3d82


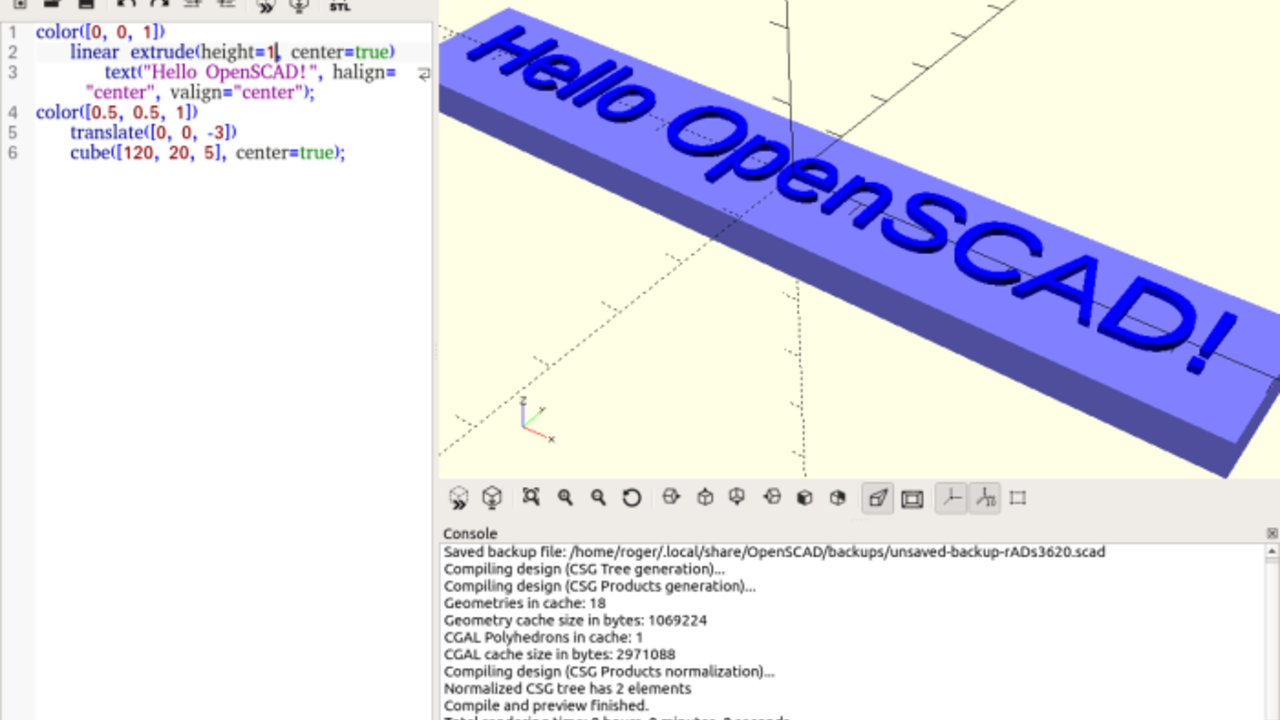
O programa SCAD tem muitos aderentes, por isso, podem aprender como transformar aqueles Sólidos criados em relações Matemáticas, em Objectos impresso em 3D:


SCAD to STL – How to Convert SCAD Files to STLBenjamin Goldschmidt 

SCAD and STL files are two common file types for 3D design applications. SCAD stands for “Solid Computer Aided Design”, and the file format is used to describe 3D objects. It was pioneered by a software called “OpenSCAD,” which is a free CAD software for designing 3D objects. STL stands for “stereolithography” and is a popular file type to use with slicers for 3D printing.
The main difference between these two file types is in the way the models are described in code. In STL files, the 3D model is created using a “tiled” set of triangles along the surface of the object. This creates a fully 3D object. In contrast, SCAD files design an object using mathematical relationships. For example, a cube-like object can be described using its length, width, and height. This type of design can be useful for printing objects such as fractal art on objects.
Because the geometry used by STL files is more capable of conforming to complex designs, you may find you want to convert SCAD to STL. Lucky for you, there are two really easy ways to do this.

https://all3dp.com/2/convert-scad-files-to-stls/


Este nosso amigo tem-vos a oferecer um bastante exaustivo Instructable para aprenderem uma data de usos para o Arduino!
É bom!


Arduino Learner Kit (Open Source)taifur

If you are a beginner in Arduino World and going to learn Arduino having some hands-on experience this Instructables and this Kit is for you. This Kit is also a good choice for the teachers who like to teach Arduino to their students in an easy way.
If you want to learn Arduino you should include the following topics:
Digital Output:
Controlling multiple LEDs using Arduino
Generating Tone using Buzzer
Digital Input:
Interfacing button switch using Arduino
Interfacing DHT11 Sensor Using Arduino
Analog Input:
Reading Analog data from a potentiometer
Interfacing LM35 temperature sensor using Arduino
Analog Output (using PWM):
Generating multiple colors using the RGB LED.
SPI Communication:
Interfacing 74HC595 Shift Registerwith Arduino
Interfacing MAX7219CNG with Arduino for driving DOT Matrix display or multiple seven segment display using only 3 pins of Arduino.
I2C Communication:
Reading date and time from DS1307 real time clock
UART Communication:
Interfacing GROVE GPS and Bluetooth Module with Arduino
Display Interfacing:
Driving 16 X 2 Character LCD display using Arduino
Multiplexing:
Driving multiple seven segment display using a minimum number of Arduino pins.
You will be wondering to know that the Kit is designed to experiment with all the above-mentioned topics. So, it can be an Ideal Learner Kit for learning Arduino Programming.
[The Kit includes onboard 6 Green LED, 1 RGB LED, 1 Potentiometer, 1 LM35 Sensor, 1 DHT11 Sensor, 4 Button Switch, 4 Seven Segment Display, 1 8X8 Dot Matrix Display, 1 MAX7219CNG IC, 1 74HC595 Shift Register, 1 Buzzer, 1 16X2 LCD display, 1 DS1307 RTC, 3 Grove Universal Connector.]
No more separate shield or module, no more disgusting wiring on the way of learning Arduino.
https://www.instructables.com/id/Arduino-Learner-Kit/


quinta-feira, 21 de março de 2019

Impressora 3D Portuguesa! E uma fresa CNC económica, a Lista de Geller, solas à medida, e packs de baterias de Lítio!

A BeeVeryCreative, 100% Portuguesa, está de parabéns, com este magnífico Kit, uma sólida e inovadora Impressora 3D, que o nosso Amigo, Angus, revê, sem favores, mas com justiça, e muito positivamente:


This is an i3 KIT you'll want to check out - B2X300 Review
Maker0s Muse

The B2X300 is a Huge, Open Source 3D Printer Kit with 2019 smarts and a killer design - but is it right for you? Watch to find out!


Para poderem ter uma Fresa CNC em casa, por 500€:


LOW COST DIY 500€ CNC MILL
Vulcaman

Hi,
in this Instructable I want to show you, how you can build your own CNC-Mill for less then 500€. I designed this machine for CNC-beginners, who don't want to spend a lot of money for their first experiences with CNC machines but also expecting a rigid and professional looking CNC.
This machine is perfect for maker, tinkerer and everyone who wants to start CNC-Machining.
In the pricerange of sub 500€ you will not find any other CNC with these features:

  •  710 Watt spindle motor
  •  MGN linear-rails on all axis
  •  1204 ballscrews on all axis
  •  effective workarea of 250x220mm
  •  max. travelspeed of 3000mm/min (at 12V)
  •  high accuracy of 0.1mm in all axis
  •  super rigidportal frame (out of one piece of wood and aluminium extrusions)


https://www.instructables.com/id/LOW-COST-DIY-500-CNC-MILL/


Algo de muito útil, a lista dos tópicos dos fantásticos Vídeos de Dan Gelbart, um Génio da construcção de Protótipos, e penso TODOS os Engenhocas deviam ver os seus vídeos, para evitarem muita dor-de-cabeça, e fazerem muitas mais coisas do que pensam possíveis, com os meios de que dispôem:


Dan Gelbart : How to Build Stuff
Al-Hala

Dan Gelbart has an excellent and well-presented series on YouTube on machines and prototyping. It`s a short course on how to build stuff aimed at students, researchers and others who are not machinists by trade. It`s applicable to prototyping and limited production with enabling technology in 18 parts, which I’ve listed links to below. Note: the chapters were obviously shot out of sequence, as there is referral to `as we`ve seen before` when we have not. It`s not that bothersome.


Para o bem dos vossos pés, têem agora este Site onde podem desenhar solas para os vossoa sapatos, para imprimirem em Filamento flexível, e até, solas correctoras de defeitos!


What is Gensole?

Gensole is a browser based tool which allows you to design insoles, optimised for 3D printing using the FDM process and Filaflex (TPE/TPU) type materials. It will ultimately export .AMF files for importing into Slic3r for 3D printer toolpath creation.
It is free for makers, and researchers for non-commercial use :

http://gensole.com/


...E acabamos, por hoje, com este Instructable para os que precisam de uma série de Baterias de Lítio para toda a espécie de Enhenhocas!


How to Make a 18650 Li-ion Battery Pack!
Nematic!

18650 Li-ion cells are a great way to power Projects. Which provides a nominal voltage of 3.7V which is not sufficient for most of the application for let's say you want to power a BLDC motor with an ESC which requires 9V to start. So we need more voltage which can be achieved by connecting them in series. So in this tutorial, I will show you how you can make a 18650 Li-ion Battery Pack with a BMS circuit and all the things you need to know before you built one!


quinta-feira, 7 de março de 2019

Um Clone de Prusa! E um Escafandro feito em espuma(!), dobrar cartão, uma Empilhadora R/C, e um Gerador de Sinais de RF

Um Clone da Impressora Prusa, e ainda por cima, o mais Económico possível?
É BOM!
Vejam aqui como se faz, e assim, mais gente poderá ter uma Impressora 3D...
Ou, os que já as tèem, podem ter ainda mais! 
LOL


Building the cheapest possible Prusa i3 MK2
Tom

What is the cheapest possible, real 3D printer you can buy without making one compromise after the other? That’s the question we’re asking by building a Prusa i3 MK2-style 3D printer that comes with most of the important features of the original one from Josef Prusa and requires a bit more work for sourcing and building the machine, but most importantly, we’re going to build it only with the most affordable set of parts.
This page will serve as a hub for part lists and build guides as the project moves along! All build videos and the accompanying project videos have been organized into a neat playlist!

https://toms3d.org/2017/02/23/building-cheapest-possible-prusa-i3-mk2/


Por incrível que pareça, podem fazer ISTO, com Placa de Espuma de Plástico, e por isso, é de aproveitar, malta!
Recriação Histórica, Carnavais e Espectáculos, Montras de Lojas, um sem-fim de usos...


Recreating an Antique Divers Helmet From Foam
LostWax

I love the ocean. I can sit on the beach all day just watching the waves do their wavey thing. Sadly, I happen to live in the middle of the Canadian prairies. No ocean to watch here. But there's always the world of make-believe, and what better way to get in the ocean vibe than with an amazing deep sea diver costume. I created this costume pattern to try and recreate the feel of the classic "Mark V" dive helmet which has become an iconic image of divers and the sea. It was used by the U.S. Navy from 1916 until 1984! Let's make one of our own.

https://www.instructables.com/id/Recreating-an-Antique-Divers-Helmet-From-Foam/


Eis mais algo de simplesmente espectacular, na sua simplicidade, uma Ferramenta para dobrar aquele Cartão que podem ter por aí, para uma série de novos usos:


Cardboard Bender
nml235l

A tool is something that makes life easier and more convenient. I have got a rather huge mass of cardboard (a cause of a new furnishings :-)) and appropriate number of ideas to make something with it (Bag for Containers). One problem is bend operations. Cardboard plates have a multiply layer (as usual) so I get clumsy splits during bending. To prevent such behavior I decided to flatten cardboard according the bend line. At this moment we get situation for a ... NEW TOOL. How to make flattening along the path? Certainly, using a one of the ancient inventions – the Wheel. We need only move the wheel (roller) along the path on cardboard surface with giving insignificant pressure. This principle we use in home preservation to connect bank and cover (or let's remember about the roller-machine for road construction). Concept of a tool is very simple: roller (wheel) and handle – nothing more.

https://www.instructables.com/id/Cardboard-Bender/


Este é um projecto que vai ser a alegria de muita gente, ainda mais porque é Open Source, todas as peças e planos à mão, para todos tentarem...
Uma Empilhadora em miniatura, tele-controlada, até a partir dos vossos Smartphones!
Dá para a mandar ir buscar os chinelos, do sofá...


Arduino Forklift
Leon van den Beukel

This is a video about making a remote controlled forklift car. I've used Fusion 360 to design and create the 3D printed parts and CNC machining templates. If you don't have a CNC machine you can also use a jigsaw to cut out the wooden parts. I've provided the cutting templates, sources and 3D printing STL files on my GitHub page:


Este Gerador de Sinais para Rádio-Frequência, vai fazer a alegria dos Macanudos, aquela malta dos Rádio-Amadores, um equipamento que serve para afinar os vossos emissores:


RF Signal Generator
Milen

The RF signal generator is a must to have tool when playing with radio receivers. It is used to tune a resonant circuits and adjust the gain of different RF stages. Very useful feature of the RF Signal generator is its modulation capability. If it can modulate the frequency amplitude or frequency makes it non replaceable tool for RF design works.
Some time ago I have designed an AM modulator, which could be used for such purposes. It works fine in some cases, but it has the disadvantage to be not able to work as standalone device. It requires additionally power supply module and two signal generators - for the RF carrier frequency and for the modulating signal. This makes it inconvenient to work with it outside the house. I decided to create an RF signal generator working as fully functional stand alone device. Instead to base the architecture on the modern DDS chip, I decided to use the analog approach. As a basis I have chose an existing RF signal generator published here. Similar design is described also here. The credits for this design go to their authors. I repeated mainly the first design adding additional digital frequency counter instead the not very precisely radial scale analog calibration.

https://www.instructables.com/id/RF-Signal-Generator/


terça-feira, 11 de setembro de 2018

Plástico grátis! E estampar Lata, 3D para Lucro, um Braço-Robot, e Wi-Fi para a Impressora!

A Impressão 3D foi criada para Moldes, de Injecção de Plástico...
Por isso, agora, podem fazer MESMO algum Dinheiro, se usarem as Impressões para isso mesmo.
E reciclado, é ainda mais lucrativo!
É bom!


Hello 🖐
We are Precious Plastic.
Precious Plastic is a global community of hundreds of people working towards a solution to plastic pollution. Knowledge, tools and techniques are shared online, for free. So everyone can start (yes, you too!).
We are independent, poor but free :)
Hundreds of people all over the world contribute to the project with their skills & knowledge, single or monthly donations.
Precious Plastic was started in 2013 by Dave Hakkens and is now at its third iteration (version) counting on dozens of people working on the project, remotely or on site (somewhere below sea level in the Netherlands).
Join the fight against plastic pollution.


Continuando na onda da Reciclagem, podem pegar nas vossas Impressoras 3D, e fazer, não só estampagem de Couro, com já referi, mas também...
Metal!
Chapa fina de Metal, claro, ou seja, Latas de refrigerante, recicladas.

Impecável.


Embossed Metal Artwork From a Pop Can
paigenoelle

While pop cans have a deposit in my state, other canned non-carbonated drinks like lemonade do not. The recycling center is a bit out of the way from me, so I wanted to give reusing these cans a try first. There’s a lot of flexibility in materials and methods in this project, so I’ve tried to highlight substitutions as best as possible.
Note: this project involves sharp edges and cutting tools. If you are looking for a project suitable for children, consider using aluminum foil as discussed in “Substitute Materials.”


Querem fazer algum dinheiro com as vossas Impressoras 3D, mas não sabem bem que modelos vão imprimir, e etc? 
Eis um vídeo mesmo para isso:


3D Printing for Profit - First Sale, Customer Service, Questions
3D Printing for Profit

Today we will be going over getting your first sale.
https://www.youtube.com/watch?v=5HStg7Wuqq0


Outra coisa de jeito que podem fazer, com a vossa Impressora 3D, é este Braço-Robot, vem tudo explicadinho, aqui:


EEZYbotARM MK2 3D Printed Robot Build - Chris's Basement
Chris Riley

In this one we build the version 2 of the easy robot arm from thingiverse.


Mais outra do Chris, eis como adicionar Wi-Fi a qualquer Impressora 3D!
Já podem ver as vossas Obras a serem impressas, de qualquer lado, assim, mandar G-code, e controlar o Bicho, de qualquer lado... 
Por à volta de 5 Euros e qualquer coisa!


3D printer Wi-Fi Moniturung, AND lots of Control, for a Pittance!


Add WiFi To Your 3D Printer For $5!!! - ESP8266 - LUC ESP3D - Chris's Basement
Chris Riley

I this one we add WiFi connectivity to a 3D printer using the popular RAMPS controller board and a ESP8266 module.