Blog Posts

Mostrar mensagens com a etiqueta didáctica. Mostrar todas as mensagens

quinta-feira, 4 de agosto de 2016

Um desenhador CNC em Cartão! E Rute, um Kit didáctico acessível, um Gerador de Gás, um cortador de Plasma, e uma Bicicleta com Pneus de Carro!

Desmontável, configurável, sem usar cola, e porreiramente bacano, eis um Desenhador CNC feito de Cartão, que vai fazer as delícias de muito Engenhoca!
Sabe-se lá, se não haverá outo Instructable, mais abaixo, que não se consiga usar, com este, para um Projecto nunca visto... 


High Precision Cardboard CNC Drawing Machine

Dan Chen


After achieving decent accuracy with the 2-Axis Cardboard CNC machine, it gave me the confidence to make the 3-Axis CNC machine with the cardboard. Here are some of my design considerations when designing this machine.
No Glue
Modular design elements / cut outs
Reconfigurable, you can make the bed/stage larger or smaller
Press fit construction
You can use different materials other than cardboard by changing the press fit slots based on the thickness of the material.
Easy to disassemble and reassemble. Easy to repair


Um Kit Didáctico, mas acessível, e com a possibilidade de usar material reciclado, ou seja, a grande ajuda tão conhecida dos Inventores...
A Sucata!
Eis o que estes simpáticos Educadores Brasileiros  nos oferecem, RUTE, uma ideia meritória e que importa divulgar!


Missão 
Nos últimos anos, surgiram vários kits educacionais maravilhosos. Somos fãs de vários deles. Porém, todos eles têm em comum um preço que não é acessível para comunidades carentes para a educação em países em desenvolvimento.
Estes kits custam de U$ 100 a U$ 300. Para uma escola, os valores costumam ser acima de U$ 2.000. Com impostos, taxas e custos de importação esses valores se multiplicam. No Brasil, não é incomum achar brinquedos vendidos em lojas com valores 4 ou 5 vezes o preço original.
Por isso dizemos que RUTE não é um concorrente destes kits. Para quem não pode pagar, nós não somos uma opção mais simples e mais barata, somos a única opção. Outra característica importante é que muitos dos kits atuais não são totalmente open hardware, inviabilizando a cópia sem pagamento de royalties ou licenças. Acreditamos que era necessário fazer algo mais simples, sem técnicas avançadas de produção. Ser rudimentar nos ajuda em 4 pontos:
1 Custo de desenvolvimento mais baixo pois não precisa de molde para injeção de plástico, placas de circuito integrado ou manufatura automatizada
2 Pessoas em regiões afastadas podem produzir seus próprios kits, usando ferramentas e componentes fáceis de achar
3 Possibilidade de usar sucata eletrônica, o que deixar o kit mais barato e a natureza agradece
4 Maior facilidade do entendimento da eletrônica. Para uma criança, uma placa de circuito integrado é muito mais difícil de compreender que um botão soldado em um conector 

MISSION

In the last years, several wonderful educational kits appeared. We’re fans of some of them. But they all have in common a price that isn’t affordable for needy communities’ educational.
These kits costs from US$ 100 – US$ 300. To a school values are usually over US$ 2000. With import and costs and taxes, price grows even further. In Brazilian stores, it isn’t uncommon to find toys marked four or five times its original price.
And that’s why we say that RUTE is not competing with these kits. For those who cannot afford, we’re not a cheaper and simpler option, we are the only option.
Another important feature is that several of the existing kits aren’t fully open hardware, and doesn’t allow replications without the payment of royalties or licenses. We believe that was necessary to do something simpler, that didn’t require advanced manufacturing techniques. Being rudimentary helps us in 4 points:
1 Lower developing costs, because it doesn’t need molds for plastic injection, printed circuit boards or automated manufacturing.
2 People in distant regions can produce their own kits, using tools and components that are easy to find.
3 Possibility of using electronic scrap, which makes the kit even cheaper and nature thanks.
4 Makes understanding electronics easier. To a child, an integrated circuit board is much harder to understand then a button soldered in a connector.


Algo, hum, não para os de fraco ânimo, um Gerador de Hidrogénio e Oxigénio, portátil e resistente, para fazer Experiências no Quintal, de espantar a Vizinhança!
MUÁHÁHÁHÁ! 


Simple and Durable Hydroxy Gas Generator

Austin Noble 
This instructable is a description of how I made my fifth hydroxy gas generator. Hydroxy gas has been an evolving science for me as I have learned what works, and what doesn't, what you need on a generator, and what you really don't, and that you shouldn't ignite a milk jug full of this stuff at 10:00 PM in the middle of your neighborhood, or you will have some explaining to do. My goal with this generator was to make a device that quickly separates water into hydrogen and oxygen gasses, can be made without advanced tools and is as tough as nails, so that I can throw this thing in my trunk and set it up at a friends house without worrying about spilling caustic fluid, or starting anything on fire. So let's get started.


Não se arranja fácilmente um Isqueiro mais Steampunk que este, mas o que é certo, é que este Projecto é definitivamente algo a tentar, e até, quem sabe, a juntar ao Desenhador CNC ali acima, para fazer uma màquina de corte a Plasma CNC, mesmo que só para chapa metálica ultra-fina, papel, algum plástico condutor, e cartão!


Plasma Cutter From an Arc Lighter

NightHawkInLight 
I recently purchased a few cheap arc lighters on ebay with various projects in mind for them. I hadn't thought of a plasma cutter until I had one in my own hands and saw how it could bore a hole through thin materials that get in the way of the arc. There's an issue with trying to cut things with an arc in exposed air as the material will typically burst into flame. In this project I'll show how to integrate the arc lighter with a cutting head that acts as both a shield against air flow as well as a heat sink to prevent the arc from heating materials to their carbonation point beyond the edges of the cut 


Se quizerem aprender a soldar, ou apenas, ter uma Bicicleta para chamar as atenções, e de que maneira, têem este Projecto incrível, e que até pode ser mais cómodo para as articulações, se usarem Jantes em Plástico, e "pneus" em Espuma de Borracha...
Incrível! 


Car Wheel Bicycle - The Learn To Weld Project

Mr-Mash 
This whole thing started off with me finding rusty holes in my car and I figured for the cost of paying someone to fix it I could buy a welder and do it myself, seems logical, right?
I was speaking to a friend about needing to learn how to weld and he said why not build a bike (we originally met while I was working in a bike shop and he came in looking for parts for a chopper he was building) he lent me a couple of books by Atomic Zombie, who you should check out, that dude builds some cool stuff.
His website and forum can be found at www.atomiczombie.com
After toying with the idea for a while it seemed like a good one but I was concerned that it wouldn't come out right so it was decided that I would build something a little silly, so, hence the car wheel bicycle was born. 


segunda-feira, 29 de fevereiro de 2016

Formcard! Mais o novo Raspberry Pi, Armações 3D, a Impressora 3D Tetrix, e Micro-motores

Eis algo para ter sempre no bolso, Plástico termo-moldável, para reparações, Moldes, bases para o Smartphone, e tudo o que calhar! 
E numa placa bem maneirinha, que cabe no bolso da camisa:


FORMcard
Melt, Mold, Make, Mend  
FORMcard is a handy, pocket sized card of meltable bio-plastic. Simply drop it in a cup of hot water to make little solutions to everyday problems. When it's cool it's really strong like nylon, so you can make solid durable solutions with it, and then you can reheat it again and again to adapt, change and reuse it. Because it's a convenient card size, you can keep one in your pocket, wallet, kitchen drawer or tool box so that it's there whenever and wherever it's needed.
A great benefit is that when it's very hot, it sticks to some other plastics, so you can actually use it to instantly fix say.... a favourite plastic shovel when you are on holiday.
(please remember that hot water and hot FORMcards should be handled with GREAT care as either can scold you. Very hot FORMcards are sticky when they first come out of the hot water and can also stick to wooden surfaces. Work on a ceramic plate and if in doubt about using it, let it cool down first, you can always heat it up again later on!)
FORMcard is designed and developed by Peter Marigold and launched on Kickstarter on the 11th November 2015. It was successfully funded on the first day and completed the campaign with 816% funding and more than 2000 backers. It will soon be fully commercially available around the world. 
It would be great to connect with you on social media where we will be posting updates as the project develops by clicking on the links at the bottom of this page. 


O Micro-computador Raspberry Pi vem com 10 vezes mais potência que o oroginal(!), e Wireless LAN e Bluetooth, é só verificar as capacidades cada vez maiores desta pequena maravilha:


Raspberry Pi
A small, powerful and lightweight ARM based computer. 
Introducing the new Raspberry Pi 3 Model B, the latest member of the Pi family. Delivering up to 10x the processing performance of the original Raspberry Pi and added connectivity with 802.11 b/g/n Wireless LAN and Bluetooth 4.1. 
The new board is not only great for learning to programme, gaming and hacks it’s now perfect for IoT projects too. 


Eis algo de interessante, peças de canto para fazerem as vossas próprias Armações, de Impressoras 3d, Fresas 3D, ou lçá o que seja...
Feitas por Impressão 3D! 


Custom Sized Frame Kit 500mm
The wall thickness is 5mm.
3D Printed using Strong PLA Plastic
 
Parts Included
 
2020 alu profile 500mm 8
2020 alu profile 500mm 4
Plastic tri-corner 8
Allen cap 8mm screws 100
Slide M5 Tslot nuts 100
M6 threaded feet


Há mais barato, há mais caro, mas não há, é mais Didáctico.
Uma Impressora 3D para a Educação, que a brincar, a brincar, faz os alunos aprenderem CAD, Electrónica, Programação, e Técnicas de Construcção, ficando-se com uma Impressora 3d, por Bónus!
Notável

Ficam ainda a saber, se não sabem, que a Tetrix, é um Jogo de Contrucção, como a Meccano, mas muito mais preciso, tão mais, que serve para montar destas Impressoras! 


TETRIX 3D-Printer
k2tech 
The TETRIX 3D-Printer was designed as an educational tool for middle and high school technology students, robotics teams, and adults. The purpose of constructing the printer is to train people's building, tool usage, electronics, CAD, and programming skills with a single project. You also get a 3D-printer once you're done!
The printer design is based on TETRIX parts, which are designed by PITSCO and used in the FIRST Tech Challenge robotics competition. The printer also utilizes elements of various RepRap printer designs, such as the Printrboard control system. The design is completely open-source, so feel free to personalize and alter your printer.
The overall cost of the printer is about $640, and the educational value is priceless! The majority of the cost is attributed to the TETRIX parts, but the high accuracy of the pre-drilled, pre-sized aircraft-grade aluminum saves time and reduces error, which outweighs the price. 
http://www.instructables.com/id/Tetrix-3D-Printer/


E cá vai Dica, para terminar por hoje, estão sempre a perguntar onde é que se arranjam aqueles micro-motores dos Quadracópteros de ter por casa, pois aqui está um Link para os poderem comprar, à fonte...
E atenção, no Site, página inicial, há muito mais, como armações, Baterias, Hélices, etc.  


CL-0820-17 "Dark Edition", motor set, direct drive 
(speed: insane)
 
compatible to:
- Hubsan 107C, 107D
- many other micro quads with 8.5mm motor holders
specifications:
speed: 17.000K
operating voltage: 1.5-3.7V
max. static thrust: 40g (direct drive, Hubsan X4 propeller)
3.2A max. load current at 3.7V  (Hubsan X4 propeller)
factory lifetime rating: 5-6 hours
can diameter: 8.5mm
can length: 20mm
shaft diameter: 1mm
shaft length: 5mm
weight: 4.9g
wire length: 8cm
plug: Micro-JST-1.25
housing: dark anodised

http://micro-motor-warehouse.com/


terça-feira, 2 de fevereiro de 2016

Um Torno para Madeira, um Gerador de Engrenagens, uma Onda Mecânica, e uma Mão Biónica!

O melhor trabalho até agora, que eu tenha visto, para transformarem um Engenho de furar num Torno de Madeira sólido e práctico!


Homemade Woodworking Lathe

WoodCrafts 67 

This My Homemade Lathe I made Last year. It consists of An old drill press and Off cuts I had Leftover in the shop. Rails are from An Old louvre door some pine and for the rotating centre I used the bit/ collet end from an old router that was broke. I use this quite often and it still works great. 


Já vos mostrei outros Geradores de Engrenagens, mas este é mais completo, com engrenagens complexas, de rodas dentadas múltiplas:


About
Gear Generator is a tool for creating involute spur gears and download them in SVG format. In addition it let you compose full gear layouts with connetcted gears to design multiple gears system with control of the input/output ratio and rotation speed. Gears can be animated with various speed to demonstrate working mechanism.
Why this tool was created? Just for fun. I'm working on a hobby project, a scale construction machine, which needed some spur gears, and i quickly made a simple spur gear creator script in Javascript with SVG output. As it was done, i couldn't stop, and i added more and more features, and finally i got this tool. It was a pleasure to code the whole thing, i'm a bit sad it is already done, so if you have any idea, what would be a helpful feature, just let me know by sending an e-mail (I couldn't have done this tool without Pageflip, my main project).
Notes about browser compatibility: all new major browsers are supported (i didn't tested IE), but unfortunately Chrome can't render SVG circle correctly. The winners are: Opera for the best performance (shame on me, i never use it) and Firefox for the best looking SVG render. 


Didáctica, simples, mas engenhosa, esta Onda Mecânica mostra-vos como funcionam as ondas, ou seja, o mecanismo ondulantário, e o que ancontece quando a Onda começa no meio, ou nas extremidades, etc:


Mini Wave Model
The Oakland Toy Lab 

A little wave goes a long way!
The mini wave model is small but mighty. With just a few minutes of set-up, it's just as good at demonstrating as its bigger siblings. This is a great model for waves that move, reflect, stand, and wiggle, perfect for a starter project in classrooms learning about waves and motion.
What: Mini Wave Model
Concepts: waves, propagation, physics
Time: ~15 minutes to set up
Cost: ~$1.50
Materials:
Bolts x 2 (with nuts that fit)
Nuts x 40 (or so)
Sticks (I used candy sticks, but cut dowel or other sticks work great, too)
String
Block of wood (2x4 works great)
Tools:
Drill
Hot glue gun / hot glue
Ruler
Scissors
Make
Hop on the wave! 


Uma ideia que nos faz sentir melhor com a Humanidade, aqui está Ada, uma Mão Protésica, que pode ser feita para qualquer um, em qualquer lado, tudo Open Source, Bravo, Inventores do Grupo Open Bionics! 


Ada Robotic Hand - Open Bionics

Open Bionics 
This is a step by step guide on how to make an Open Bionics Ada robotic hand. This is derived from the Dextrus robotic hand, by the Open Hand Project. It assumes you have either ordered the Ada robotic hand kit or have access to a 3D printer are planning to print 3D parts from YouMagine or thingiverse. The list of required 3D printed parts, components and tools are stated below. If you have ordered the Ada kit, you can skip the first step and start straight from step 2.
This hand would provide an excellent research platform for robotics or a test platform for prosthetics research. It has been designed to be easy to build and repair and should be a great project for someone with interests in robotics or prosthetics and wants their very own robotic hand! 


quarta-feira, 2 de julho de 2014

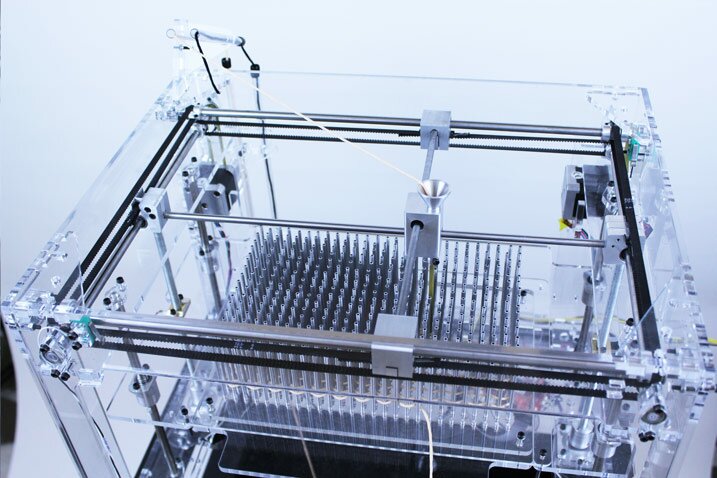
CNC para todos! Cestaria 3D, uma Impressora 3D para a Criançada, outro Cellphone Faça você mesmo, e re-magnetizar um velho ìman de Ferradura.

Ajudem este Engenhocas Brasileiro a concretizar um sonho de alto gabarito, CNC para toda a gente!
Divulguem que eles merecem, esta foi uma Dica da Rede Brasileira de Fabricação Digital, que é preciso apoiar!

Protoptimus quer colocar máquinas CNC ao alcance de todos mas precisa de sua ajuda para isso - See more at: http://site.designoteca.com/2014/06/09/protoptimus-quer-colocar-maquinas-cnc-ao-alcance-de-todos-mas-precisa-de-sua-ajuda-para-isso/#sthash.QDl5Ebio.dpuf


Protoptimus quer colocar máquinas CNC ao alcance de todos mas precisa de sua ajuda para isso 

O maker Jeferson Simões quer colocar ao alcance de qualquer pessoa uma máquina CNC. Ele acabou de lançar no Catarse uma campanha de financiamento coletivo para colocar de pé a versão comercial da Protoptimus CNC.

O maker Jeferson Simões quer colocar ao alcance de qualquer pessoa uma máquina CNC. Ele acabou de lançar no Catarse uma campanha de financiamento coletivo para colocar de pé a versão comercial da Protoptimus CNC - See more at: http://site.designoteca.com/2014/06/09/protoptimus-quer-colocar-maquinas-cnc-ao-alcance-de-todos-mas-precisa-de-sua-ajuda-para-isso/#sthash.QDl5Ebio.dpuf
http://site.designoteca.com/2014/06/09/protoptimus-quer-colocar-maquinas-cnc-ao-alcance-de-todos-mas-precisa-de-sua-ajuda-para-isso
Protoptimus quer colocar máquinas CNC ao alcance de todos mas precisa de sua ajuda para isso - See more at: http://site.designoteca.com/2014/06/09/protoptimus-quer-colocar-maquinas-cnc-ao-alcance-de-todos-mas-precisa-de-sua-ajuda-para-isso/#sthash.QDl5Ebio.dpuf


Protoptimus quer colocar máquinas CNC ao alcance de todos mas precisa de sua ajuda para isso - See more at: http://site.designoteca.com/2014/06/09/protoptimus-quer-colocar-maquinas-cnc-ao-alcance-de-todos-mas-precisa-de-sua-ajuda-para-isso/#sthash.QDl5Ebio.dpuf


Cestaria 3D!
Embora neste caso, seja para Solas de Sapatos, pode ser utilizado num sem-fim de casos, e é uma forma rápida de se criar Estruturas leves...
Visitem o Site, que há muitos mais Projectos lá. 
Dica do Digi-Fab USB:


The 3D weaver is a loom specially designed for weaving in three dimensions. 


Para as Crianças, e as Escolas, cá temos mais uma Impressora 3D que facilita, pois nesta, não se vão queimar os míudos, por meterem as mãozinhas, no Extrusor!
Tem um aspecto colorido e alegre, pode imprimir a partir dum I-Pad, ora eis ALGO que elas podem fazer com Smartphones, que as não vai alienar do Mundo, só a olhar pró Telélé...
E a malta nova adora estas Maquinetas, porque as vê, como feitas para elas.


Printeer - a 3D printer for kids & schools

Mission Street Manufacturing 

Toys such as Lincoln Logs, Tinker Toys, Legos, and K'nex have been at the center of children's playrooms for generations. But what about now? In a digital age, when technology skills are some of the most important a child can learn, is there a way to bridge the gap between the screen and the physical world? Now there is. 3D printing is tailor-made for today's curious, tech-savvy kids. And that's why we've made Printeer.
Printeer is for today's kids, tomorrow's engineers & designers


Ora cá está mais um Cell Phone que vocês podem construír em casa, Open Source, cortesia da Rs-online:


Building a DIY Cellphone
Anrew Back

An open source mobile phone that you can build yourself.
The DIY Cellphone was developed by David A. Mellis, a researcher at MIT Media Lab and one of the creators of Arduino — which as it happens, is used in this project.
As far as I am aware this is not available as a complete kit of parts. However, it's an open source design, the Gerber files have been made available and PCBs can be ordered direct from OSH Park (note that there are two variants: the one described here with an LED matrix, and one with an LCD).


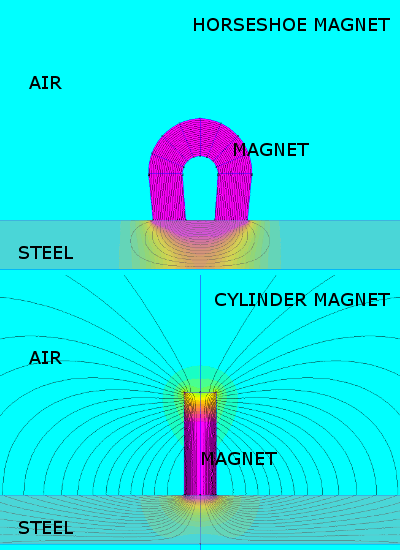
E para re-magnetizarem os vossos velhos Ímanes em Ferradura, eis uma lição da KJMagnetics, para além de outras considerações úteis sobre Magnetismo:


How to remagnetize an old horseshoe magnet

In the video below, we show how to re-magnetize a horseshoe magnet.  We’re using the HS1 Alnico magnets available in our Horseshoe Magnets section, and magnetizing them with some strong, DAA neodymium cylinder magnets.  We could also have used the larger HS2 for the same demonstration.

The electronic pole identifier can be found here: EPID.  The red and black plastic coated magnet is the handy D68PC-RB magnet.  Find other pole identifying products here.


quinta-feira, 30 de maio de 2013

Mais um Material da Shapeways, Arduino ATtiny, Truques chocantes, e um Robot que cresce com as vossa experiência

Um Material mais flexível, acabado de desenvolver pela Shapeways, mas atenção, NÃO é Borracha, embora seja muito útil para uma data de coisas, como Brinquedos, peças de dobradiça, molas, caixas de Ipads, pegas, etc..


Introducing Maker Materials & the New Improved Elasto Plastic

The backbone of Shapeways is the 3D Printing materials we offer to our community. From the versatile Strong and Flexible Plastics, to the beautiful, hand-polished finish of Premium Silver, materials inspire everyone to create new products that no one ever dreamed of before. 
Our mission at Shapeways has always been to enable anyone to make anything they want. First, we built a system to allow Makers to design and purchase models for themselves. Then we created Shapeways Shops to enable anyone to launch a business and sell their products worldwide. Now, we want to make it easier for Makers to gain access to the newest 3D printing materials on the market and test them with us. Think about it like one big, global 3D Printing R&D team.


Eis um Instructable sobre este acessório do Arduino, o ATtiny2313, que se pode programar, e com o Arduino, e alguns Componentes, num Protoboard, pôr o chip a funcionar:


Arduino ATtiny2313 Programming Shield
vishalapr

Today, I made a small 3x3x3 LED cube with an ATtiny2313 that I had from about 2 weeks ago. Whenever I had to reprogram the LED cube when I thought of more awesome patterns, I had to get out my breadboard and then wire up everything again referring to pin-outs of ATtiny2313 and make sure everything is connected right and then finally upload the new code.

So I went on to eBay and amazon searching for something to program these chips as I was planning on using these chips a lot in the future. After spending about an hour I just realized I was wasting my time as there was no way I was going to spend about 20-30 dollars on a simple shield.

After thinking for a bit, I decided to make a simple and easy to make, ATtiny2313 programming shield, after I made it, all I needed to do to recode any of my attinys' is to just put it in the programming shield and just in a few clicks you have your code uploaded! No need to worry if everything is wired right and make sure there are no short circuits or anything that can short out the chip and fry it or anything else of that sort.

So now in this instructable I will show you how to build one of these shields for yourself!
It costs almost nothing and takes only about 30mins or so to make it

http://www.instructables.com/id/Arduino-ATtiny2313-Programming-Shield/


Para a Galhofa, para a Palhaçada, e para a Malandrice, eis uma Experiência chocante, mas sem nenhum perigo...  
Um Baralho de Cartas mesmo electrificante, Muáháháhá!

330 volt "Shocking" Electric Deck of Cards! - (Electric Shock Kissing Prank)

The King of Random

Here's how to make a deck of cards that will pump out a shocking 330 volts of electricity.  Stuart Edge used it in his "Electric Shock Kissing Prank" to show the ladies how a man can really put the sparks in a kiss.

WARNING: This electric shocker outputs around 330 volts DC, and delivers a surprising jolt.  Be familiar with dangers associated with electric shocks, minor burns, damage to tissues, and possibility of cardiac arrest.  This project should not be attempted without adult supervision and adequate training.  Misuse, or careless use, of tools or projects may result in serious injury.  Use of this video content is at your own risk.

http://www.instructables.com/id/330-volt-Shocking-Electric-Deck-of-Cards-El/


E para aprender, duma forma divertida, eis um Robot que vocês vão fazer, por etapas, conforme ganhem esperiência:


Linkbot modular robot platform grows with your knowledge
Paul Ridden

Though somewhat time consuming and a bit of a brain drain, robot building can also be rewarding and fun. For those just starting out, however, the prospect of simultaneously playing the roles of designer, tinkerer, programmer and troubleshooter in order to breathe life into a pile of wires, motors, plastic and metal might be just a little overwhelming. Linkbots offer a gentler learning curve with a modular platform that starts with a single working unit, and grows into more complex robots by attaching accessories and connecting other units.
 
http://www.gizmag.com/linkbot-modular-robots/27677/


terça-feira, 7 de maio de 2013

Brinquedos didácticos, CNC para sonhar, o Brasil na frente (fria), Super-Condensadores, e Rodas de Bicicleta

A Mindsets oferece-vos uma série de mais de 20 Brinquedos Didácticos, sob o tema da Energia Solar, e com um Manual de 60 páginas, não há-que falhar:


Solar Mechanics

Build more than 20 solar-powered models to learn about how solar cells convert energy from sunlight into mechanical energy. Conduct experiments with the solar cell to see how different placement angles, different light levels, different sources of light, and different loads affect its operation. Learn about solar power in a fun, hands-on way.

This kit includes a unique single-piece solar motor that is composed of a photovoltaic cell and an electric motor joined together in one compact unit. With this solar motor, you can power dozens of electric vehicles and devices. Build models including cars, trucks, planes, windmills, waterwheels, robots, and other vehicles.

The 60-page, full-color experiment manual offers step-by-step illustrated instructions for the building projects and experiments.


Um dia, isto há-de ser acessível... Mas não agora!
Mas como sonhar não custa nada, e isto pode inspirar uns Engenhocas que eu cá sei, a fazer uma versão Desktop, cá vai o artigo sobre estas pequenas maravilhas, Fresas CNC de 5 eixos!


5-Axis machining for Mold and Die

More companies are investing in 5-axis technology for milling mold & die components. Part of this is certainly because of the growing numbers of different models of 5-axis machining centers becoming available in the marketplace. As with many other advanced technologies, new entries into the market place have brought innovation providing high functionality for lower costs. One such example is from the camera phone video below. This was from the IMTS 2012 exhibit trade show, and shows a Hurco iSeries mill performing smooth 5-axis movements on a part that had truly a mirror finish.


Brasil na frente, desta vez, Frente Fria, eis uma visão da futura Base Antártica Brasileira, espectáculo...
Para provar que a tragédia que vitimou 2 Valentes lá no Pólo Sul, Deus os tenha, não os desmotivou de continuar a fazer pelo Futuro...
Eis a futura Estação Antártica Comandante Ferraz:


Winning design chosen for Brazil's new Antarctic base

Antonio Pasolini

In February 2012 the Brazilian research base in Antarctica was almost entirely destroyed by a fire caused by an overflowing of the fuel tanks that fed the generator. Two people died and the operation suffered a financial loss of R$25m (US$12.4million). Fast forward to 2013 and the future looks much brighter for Estação Antártica Comandante Ferraz, as the station is officially called.
The winning proposal for the new Ferraz Antarctic station was announced by the Brazilian navy at a recent event in Rio de Janeiro. The commission for the R$105m ($52.3 million) complex went to Estúdio 41, a Curitiba-based design practice, which won R$100,000 (US$49,700) as part of the competition.
“The project is in the preliminary study stage and the complete executive version is due to be completed at the end of the year,” Estúdio 41 architect Eron Costin told Gizmag. It is hoped the new station will be ready to operate by March 2015.


Para a Energia nas vossas Engenhocas, cortesia da DesignSpark, considerem este Artigo sobre o uso de Super-Condensadores:


Benefits of Supercapacitors in Industrial Handheld Devices (Cap-XX)

neilgunby

We've often been asked to explain about using supercapacitors in battery operated equipment and so decided to present this article written by Jean Pierre Mars, VP Applications Engineering, CAP-XX (Australia) Pty Ltd.
Portable electronic devices for commercial applications must meet more stringent performance requirements and specifications than their consumer counterparts, and may have many power hungry features which need to operate simultaneously. A supercapacitor offers several key benefits when incorporated into the power architecture of an industrial handheld device.
Pulse power support: The supercapacitor provides the peak current required by all high power loads in the device, including GSM/GPRS and RFID communications, thermal printers, LED flash, bar code scanners, GPS chips, display refreshes, hard disk drives and audio amplifiers. This reduces stress on the battery, minimizing voltage droop, improving run-time (transactions per charge) and extending battery life.


E para construírem e / ou repararem as vossas Bicicletas, eis uma Base para alinharem as Rodas, algo que fará muito jeito a muita gente, ainda mais, quando é desmontável, e podem-na levar para os vossos Passeios e Provas de Ciclismo:


 Bicycle wheel truing stand
ehsiung

This is a simple truing stand for bicycle wheels. It's no-frills so it might not appeal to professional bike mechanics but it's perfect for recreational bikers who might only build a few wheels a year. It's made from just a few pieces of steel so it's cheap, and it breaks down nicely for storage.

I made it at TechShop.
www.techshop.ws

To create this wheel truing stand you’ll need the following raw materials:
- 36 in. x 2 in. x 1/8 in. steel angle
- 36 in. x 1 in. x 1/8 in. steel angle

Steel angle (aka angle iron) is just a length of steel that is bent at a 90 degree angle along its long axis, forming an L in cross-section. It’s pretty cheap and you can get the two pieces you need from your big-box hardware depot for about $20.