Blog Posts

Mostrar mensagens com a etiqueta aeromodelismo. Mostrar todas as mensagens

sábado, 8 de dezembro de 2018

Raspberry Pi 3, A+! E alojar as Impressoras, Mini-satélites(!), Lixar sem Stress, e o PVC sem Mestre

A placa Raspi não pára!
Agora um autêntico Computador, Quad-Coore de 64 bits, e o que mais,  a 1,4 GHz, vão ver à página deste Link as Especificações desta bela máquina!


Raspberry Pi 3 Model A+ Unboxing
e14phil

Introducing the Raspberry Pi 3 Model A+, the latest product in the Raspberry Pi 3 range.
Like the Raspberry Pi 3 Model B+, it boasts a 64-bit quad core processor running at 1.4 GHz, dual-band 2.4 GHz and 5 GHz wireless LAN, and Bluetooth 4.2/BLE.
The dual-band wireless LAN comes with modular compliance certification, allowing the board to be designed into end products with significantly reduced wireless LAN compliance testing, improving both cost and time to market.


...Algumas dicas que não são óbvias, e são mesmo essas as que nos tramam, quando não as sabemos...
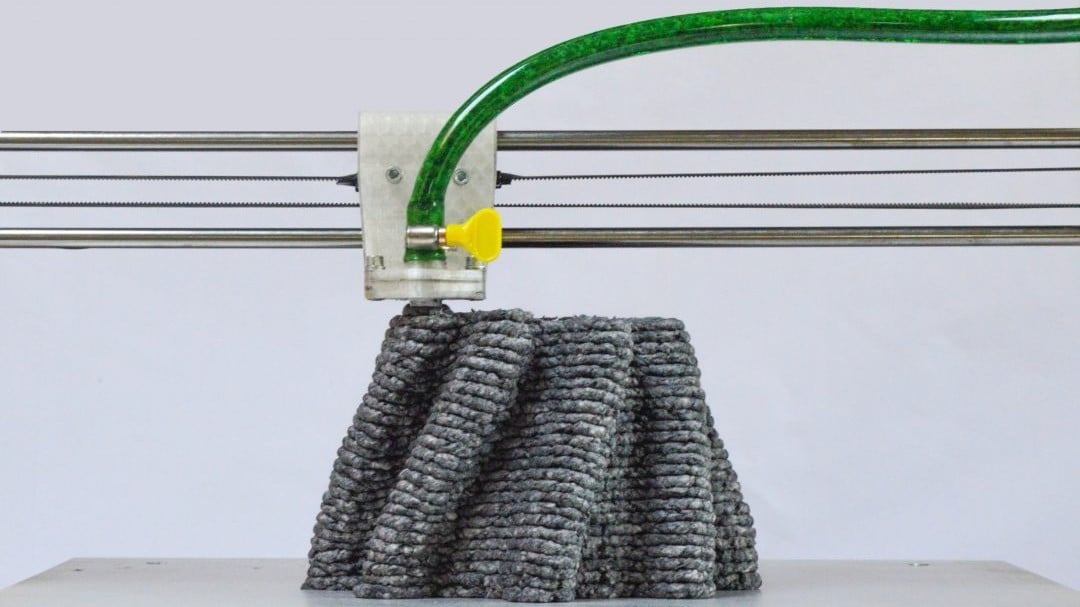
Saibam então como fazer uma caixa para as vossas Impressoras 3D, que permita uma temperatura estável, sem abafar a máquina, e mais!
Dicas porreiras.


5 Tips for Building a 3D Printer Enclosure
3D Printing Nerd

While at Printed Solid, I spoke to David Randolph about 3d printer enclosures. They sell a number of enclosures, and even white label their enclosures for other resellers. Knowing I tried to build one myself with Bill Doran, I asked Dave to give me his five best tips for building one!


MINI-SATÉLITES!!!
Muháháhá!
Malta Estudante, e Super-Geeks, aprendam como construír estes bichinos, mas para durarem, que lançá-los, não é pela UPS, ou pelos Correios.
Ainda... LOL
Maravilha.


ArduSat-1 and ArduSat-X launched from the ISS Picture credit: NASA
Build a CubeSat Satellite that actually works, Part 1: Make it Resilient
Bill Marshall

It’s such a great idea: students in schools and colleges inspired to become the next generation of Space engineers by building and orbiting their own satellite. But it’s not a new idea. The first amateur satellite, OSCAR 1 was actually launched in 1961 as a secondary payload - only four years after Sputnik 1. Project OSCAR continued with more launches until 1969 when the Radio Amateur Satellite Corporation (AMSAT) was formed to co-ordinate further activity. The OSCARs are primarily amateur radio communication satellites built by students in educational establishments worldwide. Three were constructed at Surrey University in the UK starting with UoSAT-1 (OSCAR 9) in 1981 then UoSAT-2 (OSCAR 11) in 1984 and UoSAT-3 (OSCAR 14) in 1990. The educational purpose behind these satellites was highlighted when a special purpose radio receiver with software for the BBC Microcomputer became available. In the late 1990’s the CubeSat was born when it was realised that thanks to microelectronics it had become possible to squeeze most of the functionality of an OSCAR satellite into a 10cm cube. Since the first one made it into Low-Earth Orbit (LEO) in 2003, many more have followed. But the failure rate has been high for two reasons: the stresses of launch can ‘break’ the CubeSat before it even reaches orbit, and the Space environment is very hazardous for delicate electronics once orbit is achieved. What can be done to increase the likelihood of success?


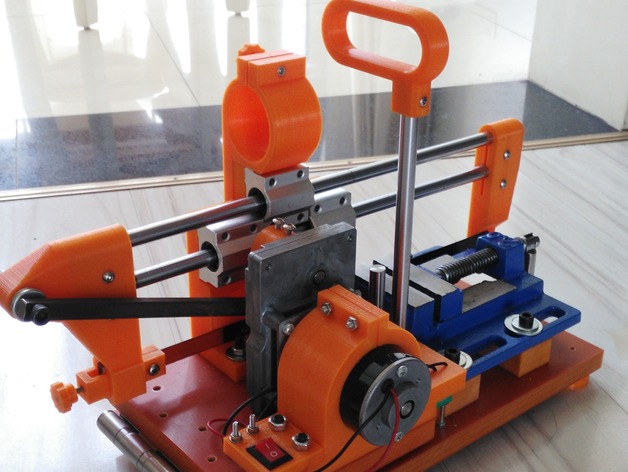
Para não ficarem piores da Vista, nem dos Pulmões, não se lixem, ao lixar à máquina, e usem mas é esta Caixa protectora, que a saúde é essencial.
E também é essencial à paz de espírito, uma Garagem limpa, para terem de ouvir a querida Esposa a ralhar à brava...
LOL


Garage Dust/Sanding Enclosure
corbor4shore

INTRODUCTION:
I have a very small shop in my two car garage. Unfortunately I have to share that space with two cars. When I am sanding, routing or drilling, dust seems to coat every surface in my garage, including my wife car. I was tired of washing my wife’s car so I needed to find a solution to all the dust I was creating. I did some research and found some sanding downdraft tables, but I couldn’t imagine those working without an incredibly powerful vacuum (which I do not have), plus they do not contain the dust jettisoned out. I then started looking at bead blasting cabinets and found that I liked the containment aspect of the cabinet but I needed the downdraft capabilities of the sanding tables, so I decided to create a hybrid.

https://www.instructables.com/id/Garage-DustSanding-Enclosure/


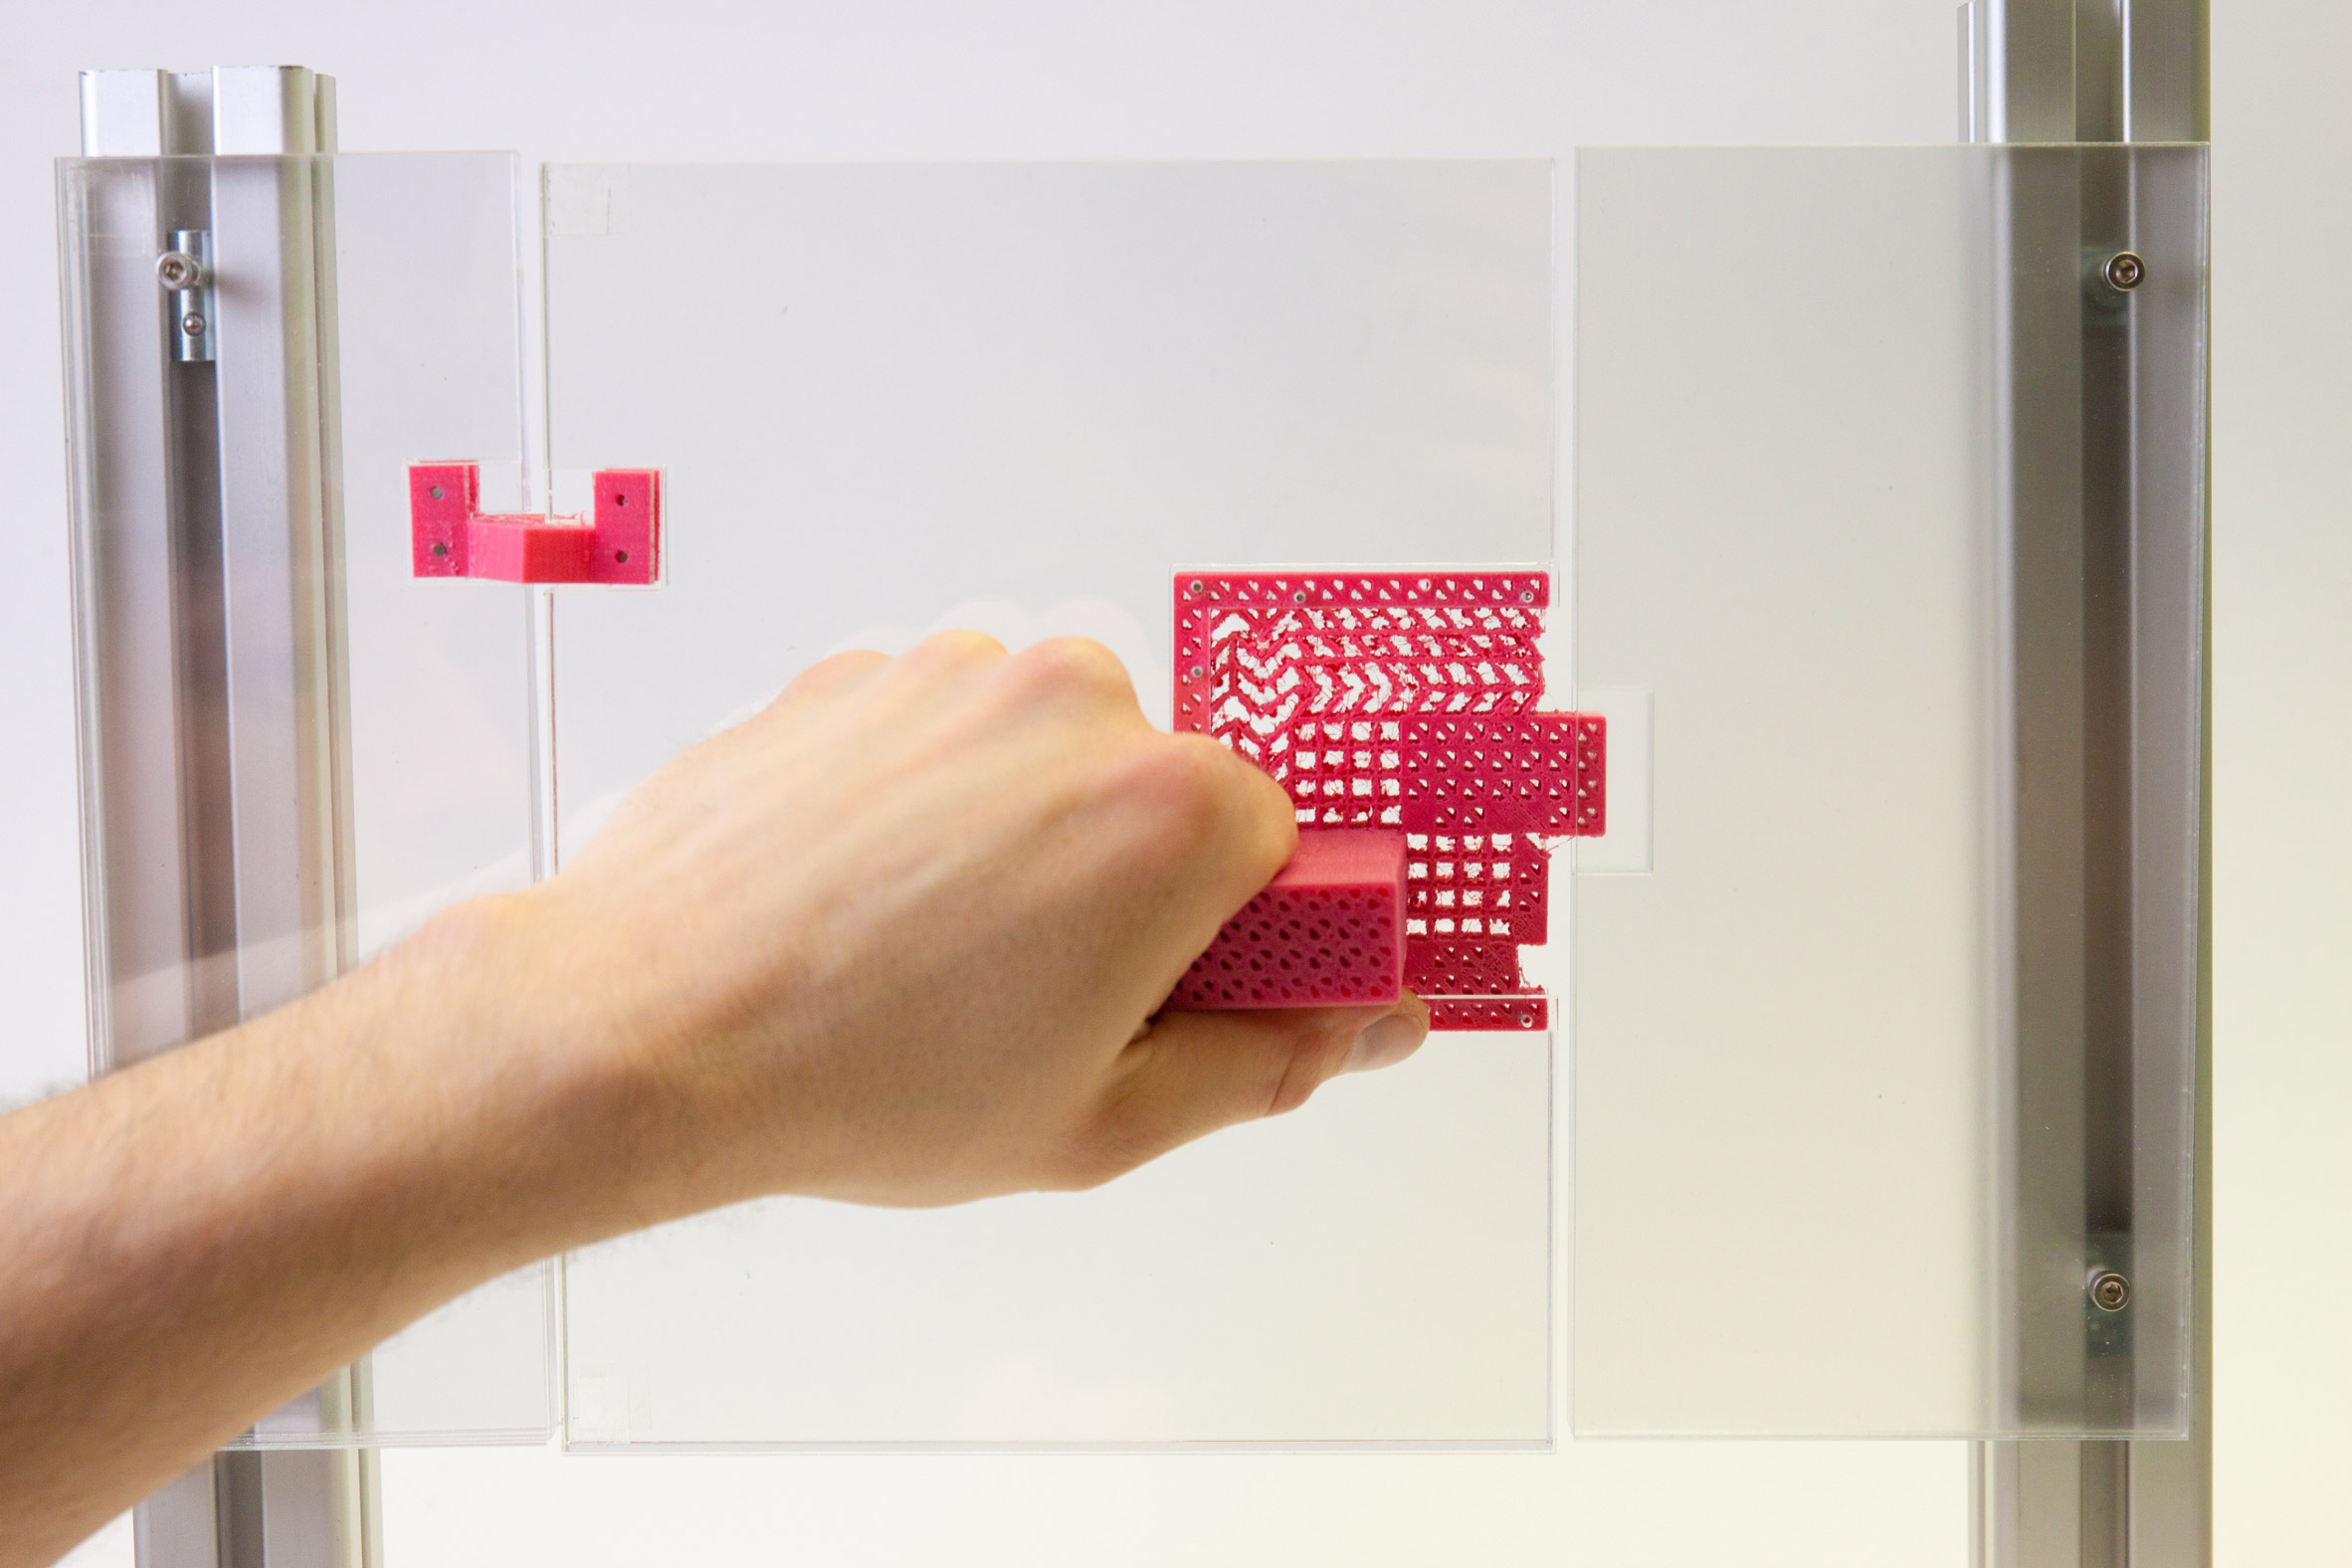
Aprendam 5 lições duma assentada, sobre como usar o humilde, mas tão útil, Tubo de PVC para uma data de coisas boas, cortesia da nodda amiga, audreyobscura, que não pára de nos surpreender com a sua creatividade:


PVC CLASS
audreyobscura

Plastic PVC is most commonly used by plumbers and very clever DIY enthusiasts. This material and pipe were designed to transport water, as it cannot wear out over time like rusting metal can. PVC is also structurally very strong. When parts are constructed properly, it can support structures that are hundreds of pounds!
This class aims to go over the material properties of PVC as well as the most common ways it is worked, machined, joined, and finished. You'll be inspired to create furniture, agriculture projects, and more after learning these simple techniques to work with PVC.


terça-feira, 13 de novembro de 2018

6 canudos! E impressão em papel(!) , uma serra motorizada para imprimir, servos, e um avião em cartão!

A pedido de várias Famílias, eis uma Zarabatana-Revólver para aumentar a Diversão inocente das Zarabatanas de Cones de papel, que todos já fizemos...

E agora, fazemos outra vez, prá Filharada, e atiramos com eles, também, "para mostrar como é"! 
LOL
Pois agora, são 6 de cada vez, cortesia deste vosso amigo, para se divertirem com as vossas Impressoras 3D, com um projecto fácil de fazer, só 4 peças, e que se monta num instante:


Six Shot Blowgun
Edgar Castelo

3D model description
A Blowgun with a revolver's cylinder, 6 shots in rapid succession. It uses 20 mm PVC tubing, and it's just 4 pieces and a rubber ban, all easy to print and assemble.

Some 3 and a half hours to print, 98*44*30 mm, the larger part.The rest is the PVC tubing;
One large PVC tube part is the barrel, and 6 smaller tube parts, along with 2 other printed parts, make the cylinder.
The last 2 are a Rubber band, and the cylinder holding piece, that holds the cylinder, but rotates.


Não só respeitador do Ambiente, (embora o PLA seja tão biodegradável, que mais, era comestível...), como, talvez, uma forma de ter um material de suporte, para impressoras de 2 ou mais cabeças, eis algo a seguir de perto...
Imprimir 3D em POLPA DE PAPEL!


Designer Develops 3D Printer That Spits Out Wet Paper Pulp
Tyler Koslow

Designer Beer Holthuis has developed the Paper Pulp Printer: a 3D printer that squirts out fascinating objects made from wet paper pulp. The project aims to give artists and designers a way to 3D print more sustainable objects.
3D printing is a marvelous and innovative technology that enables us to create even the most complex designs, but one issue that has concerned environmentally-minded makers is the excessive use of plastic materials. Sustainability is becoming a major focus for many 3D printing companies and enthusiasts, leading to the development of recycled materials and other more earth-friendly processes.
Taking inspiration from the mischevious kids that sat in the back of class shooting spitballs at one another, designer Beer Holthuis has developed the Paper Pulp Printer: a 3D printer that extrudes sopping wet paper. Using a bit of natural binder and wet paper, the designer created a 3D printer that could extrude a thick bead of pulp that could be built up layer-by-layer into a 3D object.


Eis uma muito boa razão para se ter uma Impressora 3D;
Fazer dela, UMA MÃQUINA QUE FAZ MÁQUINAS!
Isto vai-vos dar muitas ideias, e fazer uma Oficina, a partir de Filamento, é habilitar a Malta a ter outro nível de vida...
Ou, apenas, uns momentos bem passados!


Power Hacksaw by 3D Printer V4.0
Tomlie_Xie May

This time, I use bakelite to make the base. And the base reduced to 30cm. I have made two hacksaws for my friends.
Now, I'm building the v5 hacksaw, its base is 270x135mm and more easy to make. i'll update the STLs after test finished.


Pessoal da Robótica, e Tele-controle, aprendam umas coisas sobre os Drivers, que impelem os Servo-motores a fazer o que lhes mandam:


556 Servo Driver
hombremagnetico

Servos (also RC servos) are small, cheap, mass-produced servomotors used for radio control and small-scale robotics. The are designed to be easily controlled: the position of the internal potentiometer is continually compared to the commanded position from the control device (i.e., the radio control). Any difference gives rise to an error signal in the appropriate direction, which drives the electric motor either forwards or backwards, and moving the shaft to the commanded position. When the servo reaches this position, the error signal reduces and then becomes zero, at which point the servo stops moving.
Radio control servos are connected through a standard three-wire connection: two wires for a DC power supply and one for control, carrying a pulse-width modulation (PWM) signal. The standard voltage is 4.8 V DC, however 6 V and 12 V is also used on a few servos. The control signal is a digital PWM signal with a 50 Hz frame rate. Within each 20 ms timeframe, an active-high digital pulse controls the position. The pulse nominally ranges from 1.0 ms to 2.0 ms with 1.5 ms always being center of range

https://www.instructables.com/id/556-Servo-Driver


Mais fiéis ao original, de certeza, que as Caravelas feitas com Pau-de-Fósforo, e com aplicações em toda a espécie de Espectáculos, Desfiles, e Filmes amadores, vejam como se fazem, no humilde cartão, Modelos convincentes...


Boeing 737-800 Build Out of CARDBOARD
Lalramsiam
 
Hello. Today, I am going to share with you, how I made an airliner (Boeing 737-800) out of CARDBOARD.
This is my first instructable, so please forgive me if i post something incorrectly.


sexta-feira, 7 de outubro de 2016

Uma Máquina duma peça só! E uma máquina de jogos de garra, um Catamaran de Espuma de Nylon, um Quadracóptero de PVC, e o Sketchup paramétrico.

Como já referi antes, sobre Fixtures, a Ponoko oferece-nos esta dica, da Revista dezeen, aqui, chamam-lhes Metamateriais, mas parece-me a mesma coisa.
De qqualquer maneira, cá vai esta notícia sobre máquinas de uma peça só:


Metamaterials make it possible to create mechanisms from a single piece of plastic 
A door latch and a pair of pliers are among the mechanisms created without screws, bolts or other fixings by researchers working with a new technology called metamaterials (+ movie).
The team at the Hasso Plattner Institute's Human Computer Interaction Lab design objects that move despite being 3D printed as one single part.
To do this they use metamaterials – a type of engineered material defined by its internal structure rather than what substance it is made of. Metamaterials have properties not found in nature, as with the real-life "invisibility cloak".
The objects created can have controlled directional movement, which means they can perform set mechanical functions, like gripping something or latching a door. 


Uma ideia para se fazer em casa, que chama mesmo as atenções, é esta Máquina de Jogos digna dalguma Feira, é algo divertidíssimo de construír, e com sucesso certo:


HOMEMADE CLAW MACHINE

-MMM- in technologyrobots 

This is the second and new Version of my Claw Machine (Old Version)
As I announced in my first Version, the "new" Machine will be painted and setted up with an Arduino. 


E para uns Fins-de-Semana inesquecíveis, gastando pouco, que tal um Catamaran, feito com Espuma de Poliestereno, sim, Esferovite, ou Isopor, conforme o País, ora aqui está algo de fenomenal, e acessível à brava!


DIY styrofoam catamaran by Joshbuilds

outsideboats 
This is a Styrofoam catamaran i built. I had been wanting to build this for a while, then in the last few days of summer i decided to build it. This only took 2 full days to build and one day to test. The catamaran costed me around 200 dollars (sail not included) and this is comparable to a store bought catamaran which would cost 2000 dollars
In this instructable i have included a few schematics (located on the last page), a materials list, and various pictures and descriptions for all steps. 


E falando de coisas bacanas e acessíveis, vai aqui mais um belo dum Instructable, este, sobre como fazerem um Quadracóptero, com PVC, barato, e resistente, para se aprender a voar um Quadra, sem medos... 


The Ultimate PVC Quadcopter by thomasjarrett16

technologygadgets 
Whether you're a beginner looking for a quadcopter to help you get your feet wet in scratch building, or you're a little more experienced and are just searching for a cheap and reliable frame, look no further than The Ultimate PVC Quadcopter! This is a 450mm frame that is extremely cheap, at around $12 for all the hardware, and is extremely durable as well, mine withstanding dozens of near full speed crashes with nothing more than a couple of broken propellers! The electronics are 100% protected, either inside the PVC arms or underneath the lexan canopy, meaning 1: you'll never have to replace any electronic components and 2: you'll have the flyest (no pun intended :) ) looking DIY quadcopter around! This instructable is going to show you the creation process of this quadcopter and how to make it yourself! 


Dica da Sketchucation, se têem o Sketchup, isto é algo a juntar-lhe, para não perderem a paciência, após terem perdido uma hora de trabalho, por não terem gravado tudo, de 5 em 5 minutos...
Porque a história toda do que fizerem, está guardada, e podem voltar atrás, quando cometerem um erro, à vontade...
E podem usar um Modelo, para muitos usos, ou derivações, apenas mudando uns parâmetros, num Slider!


VIZ – Parametric Modeling for SketchUp 
Viz adds parametric modeling to SketchUp. All your modeling history is retained, you won’t need to redo all the work anymore. Often updating your complex model will turn out to be a matter of tweaking a couple of sliders.
Parametric Modeling
Boolean Operations and Constructive Solid Geometry
SketchUp 2014/2015/2016 Windows and SketchUp 2015/2016 Mac 


segunda-feira, 29 de fevereiro de 2016

Formcard! Mais o novo Raspberry Pi, Armações 3D, a Impressora 3D Tetrix, e Micro-motores

Eis algo para ter sempre no bolso, Plástico termo-moldável, para reparações, Moldes, bases para o Smartphone, e tudo o que calhar! 
E numa placa bem maneirinha, que cabe no bolso da camisa:


FORMcard
Melt, Mold, Make, Mend  
FORMcard is a handy, pocket sized card of meltable bio-plastic. Simply drop it in a cup of hot water to make little solutions to everyday problems. When it's cool it's really strong like nylon, so you can make solid durable solutions with it, and then you can reheat it again and again to adapt, change and reuse it. Because it's a convenient card size, you can keep one in your pocket, wallet, kitchen drawer or tool box so that it's there whenever and wherever it's needed.
A great benefit is that when it's very hot, it sticks to some other plastics, so you can actually use it to instantly fix say.... a favourite plastic shovel when you are on holiday.
(please remember that hot water and hot FORMcards should be handled with GREAT care as either can scold you. Very hot FORMcards are sticky when they first come out of the hot water and can also stick to wooden surfaces. Work on a ceramic plate and if in doubt about using it, let it cool down first, you can always heat it up again later on!)
FORMcard is designed and developed by Peter Marigold and launched on Kickstarter on the 11th November 2015. It was successfully funded on the first day and completed the campaign with 816% funding and more than 2000 backers. It will soon be fully commercially available around the world. 
It would be great to connect with you on social media where we will be posting updates as the project develops by clicking on the links at the bottom of this page. 


O Micro-computador Raspberry Pi vem com 10 vezes mais potência que o oroginal(!), e Wireless LAN e Bluetooth, é só verificar as capacidades cada vez maiores desta pequena maravilha:


Raspberry Pi
A small, powerful and lightweight ARM based computer. 
Introducing the new Raspberry Pi 3 Model B, the latest member of the Pi family. Delivering up to 10x the processing performance of the original Raspberry Pi and added connectivity with 802.11 b/g/n Wireless LAN and Bluetooth 4.1. 
The new board is not only great for learning to programme, gaming and hacks it’s now perfect for IoT projects too. 


Eis algo de interessante, peças de canto para fazerem as vossas próprias Armações, de Impressoras 3d, Fresas 3D, ou lçá o que seja...
Feitas por Impressão 3D! 


Custom Sized Frame Kit 500mm
The wall thickness is 5mm.
3D Printed using Strong PLA Plastic
 
Parts Included
 
2020 alu profile 500mm 8
2020 alu profile 500mm 4
Plastic tri-corner 8
Allen cap 8mm screws 100
Slide M5 Tslot nuts 100
M6 threaded feet


Há mais barato, há mais caro, mas não há, é mais Didáctico.
Uma Impressora 3D para a Educação, que a brincar, a brincar, faz os alunos aprenderem CAD, Electrónica, Programação, e Técnicas de Construcção, ficando-se com uma Impressora 3d, por Bónus!
Notável

Ficam ainda a saber, se não sabem, que a Tetrix, é um Jogo de Contrucção, como a Meccano, mas muito mais preciso, tão mais, que serve para montar destas Impressoras! 


TETRIX 3D-Printer
k2tech 
The TETRIX 3D-Printer was designed as an educational tool for middle and high school technology students, robotics teams, and adults. The purpose of constructing the printer is to train people's building, tool usage, electronics, CAD, and programming skills with a single project. You also get a 3D-printer once you're done!
The printer design is based on TETRIX parts, which are designed by PITSCO and used in the FIRST Tech Challenge robotics competition. The printer also utilizes elements of various RepRap printer designs, such as the Printrboard control system. The design is completely open-source, so feel free to personalize and alter your printer.
The overall cost of the printer is about $640, and the educational value is priceless! The majority of the cost is attributed to the TETRIX parts, but the high accuracy of the pre-drilled, pre-sized aircraft-grade aluminum saves time and reduces error, which outweighs the price. 
http://www.instructables.com/id/Tetrix-3D-Printer/


E cá vai Dica, para terminar por hoje, estão sempre a perguntar onde é que se arranjam aqueles micro-motores dos Quadracópteros de ter por casa, pois aqui está um Link para os poderem comprar, à fonte...
E atenção, no Site, página inicial, há muito mais, como armações, Baterias, Hélices, etc.  


CL-0820-17 "Dark Edition", motor set, direct drive 
(speed: insane)
 
compatible to:
- Hubsan 107C, 107D
- many other micro quads with 8.5mm motor holders
specifications:
speed: 17.000K
operating voltage: 1.5-3.7V
max. static thrust: 40g (direct drive, Hubsan X4 propeller)
3.2A max. load current at 3.7V  (Hubsan X4 propeller)
factory lifetime rating: 5-6 hours
can diameter: 8.5mm
can length: 20mm
shaft diameter: 1mm
shaft length: 5mm
weight: 4.9g
wire length: 8cm
plug: Micro-JST-1.25
housing: dark anodised

http://micro-motor-warehouse.com/


quarta-feira, 24 de fevereiro de 2016

Um Anel-Relógio! E Visão Nocturna, como vender Modelos 3D, controle com Pi, e Dobrem Tubo.

Ora aqui está uma pequena maravilha, um Anel-relógio, coisas que eram dos Filmes de  Ficção-Científica, há uns anos, agora, vocês fazem em casa, é só seguir as Instrucções!
Fenomenal. 


ATtiny85 Ring Watch

陳亮 
Based on the previous Instructables - ATtiny Watch Core and more, I have made a real gadget, an ATtiny85 Ring Watch.
MCU
Today core subject, ATtiny85. Someone suggest me to use SOIC version to reduce the watch size and I found the coin cell mAh calculation method will count the battery voltage down to 2.0 V, so this watch require a low voltage version MCU to keep it stable. So I have ordered an ATTINY85V-10SU. (much expensive $_$) 


Querem ver no escuro? 
Já podem, agora, com este Visor de Infravermelhos, que constróem em casa:


DIY Infrared Night Vision Device

eyebot117

 I've been involved with airsoft for about two years being affiliated with a large local group of people in our community who meet regularly and have scheduled games, ops, and events. Airsoft is a great sport and hobby that encourages teamwork, honor, respect, communication, and discipline (as well as how to wisely make purchases). I recently played a game at night and realized how cool it would be if I could utilize some form of night vision. The more I researched it, the more I wanted to see in the dark somehow.
Unfortunately, true night vision in even the lowest quality can cost hundreds of dollars just for the optic alone, excluding hardware necessary to mount the optic to a helmet or airsoft rifle. It's expensive technology. However, there are alternative methods for seeing in the dark. There are several versions of educational night vision viewers and toy spy binoculars available on the market for kids and...um...well, geeks like me. They utilize low-lux cameras, infrared illumination, and a display for a more affordable $50-$80 system that can still see in the dark. This is the system I chose to utilize.
Being inspired by DIY'ers like Kipkay, and reading books like 50 Spy Gadgets for the Evil Genius, I chose to invest the money to build my own infrared night vision viewer. Besides, both of those night vision builds use parts that can only be scavenged, not purchased individually. I wanted to show how to build a unit from stuff you can buy online easily or at the store. 
http://www.instructables.com/id/DIY-Infrared-Night-Vision-Device/


Eis uma data de Dicas sobre como desenhar, e vender os vossos Objectos 3D, que fazem sempre falta, juntamente com uma lista de Programas, e façam favor de aprender, que é de borla, uma oferta da Pinshape!


Pinshape 3D Printing Design Guide: Learn How to Sell Your Models

Bridget Butler Millsaps  
Sometimes the world of 3D printing still feels a bit like the wild, wild west. The rules are being made up as we go, and it’s still a fairly lawless frontier, as well as one where you, well, sometimes just have no idea how to pull off a particular concept, or no earthly idea why something went wrong when you were in the throes of creativity, bringing a supposedly great design to fruition. And of course, when things do go stupendously, we want to share. Thank goodness now for the talented—and generous—souls in the Pinshape community, who have offered up all of their tips, now compiled in their ­­­­­­­­­­­­­­­­Pinshape 3D Printing Design Guide. 


Podem controlar o que quizerem, lá em casa, com um Raspebby Pi!
Sim, controlam uma série de Relays, assim, e ligam e desligam tudo o que tiverem para ligar e desligar. 
Vejam agora como: 


Controlling any device using a Raspberry Pi and a relay module

julienrl 
The goal of this ible is to show how to get started with setting up a relay module on your pi and controlling it. My goal is to add scripts to my octopi to turn on and off LED lights, but anyway you decide to eventually control the GPIO commands, the setup is the same. 


Sem serem o Bender, já podem agora dobrar Tubo à vontade, o que abre toda uma nova Gama de possibilidades, para Estruturas de toda a ordem...
Um Achado! 


Tube bender

lecgo 
I would have liked it to make a new seat for my recumbent bicycle and for it was necessary some aluminium tubes and to bend those on proper shape. In our town I have not found a place to bend some tubes and I have decided to make my own tube bender for this work.