Blog Posts

Mostrar mensagens com a etiqueta injecção de plástico. Mostrar todas as mensagens

quinta-feira, 28 de março de 2019

Moldes! E a Shapeoko, uma CNC Modular, uma Escritora de Pavimento, e uma 3ª Mão!

A Impressão 3D demora muito tempo!
Mas os Moldes para Injecção de Plástico, permitem-vos produzir não uma ou duas, mas centenas de peças.
O que vos resolve uma data de chatiçes...
E vos dá muito mais DINHEIRO!


10 CAD Tricks for Mold Design
Michael LaFleche

Mold design is one of the most complex aspects of product design. Not only are the part geometries challenging, but the timeline to get jobs quoted and manufactured are tight. OEM design companies sending designs to contract mold designers is typically the last stage of the design cycle, and “tooling up” can be some of the most expensive parts of the project.
Luckily, there are some mistakes that part designers and mold makers can avoid to reduce time and cost.


Eis a ùltima Fresa CNC Shapeoko, e vem carregada de novidades, para uma máquina que já era uma maravilha, como estava:
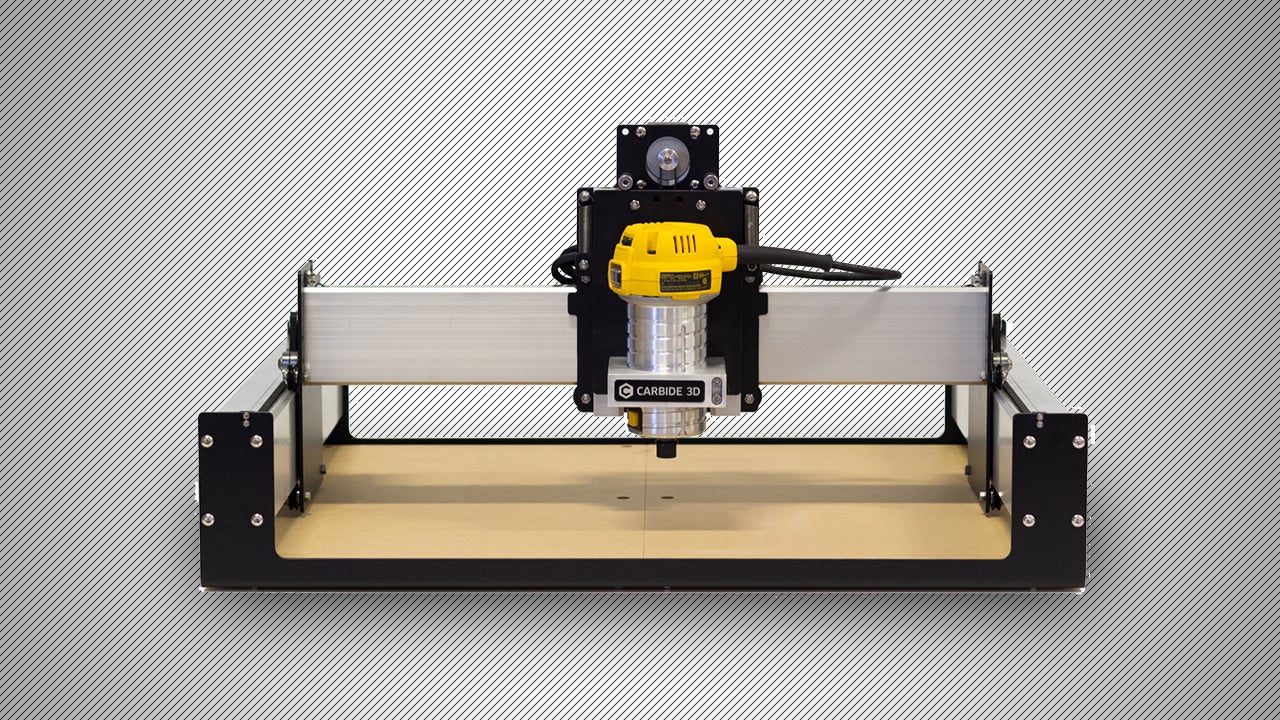


2019 Shapeoko 3 (XXL) CNC Kit Review – Editor’s Choice
Tyler Koslow

Arguably the most popular “desktop-sized” CNC router of the day, the Shapeoko 3 from Carbide 3D has origins waaay back in 2011, when its creator Edward Ford launched Project ShapeOko on Kickstarter.
A sub-$300 open-source CNC machine kit, Project ShapeOko was an affordable entry point into the world of CNC carving, achieving the fantastic feat of simplifying the procurement of parts for an open source project.
With a build comprised of electronics, plus other sundry items such as laser cut plywood sourceable from Shapeways and Ponoko (hence, ShapeOko) and one other provider, Ford’s original machine was a trailblazer.
Fast forward seven years, and much has changed. In 2014 Ford joined forces with CNC machine and CAD/CAM software company Carbide 3D, becoming a partner and VP.


https://all3dp.com/1/shapeoko-3-xxl-review-specs-carbide-3d/


...Mas esta máquina é impressionante, Impressora, Fresa, e Laser CNC, basta mudar as cabeças.
E fazem-na em casa!


Modular DIY CNC V2
jtaggard

I build my first CNC about a year ago and learned a lot from the process. As an engineer I'm always looking at ways to improve things, and my first machine was no exception. The process began with some small changes which quickly turned into the opportunity to overhaul the design even more to better suit my needs (an overview of these changes is detailed in the next step).


Uma Impressora, mas para escrever no chão, algo que suspeito, vai ser muito usado em MakerFaires...


StreetWriter
charlesglorioso

I started this project because I wanted to make my mark on the world but didn’t want to leave any aftereffects.
I also wanted a challenging project for my new 3D printer that involved some Arduino Programming.
Finally, I like to build things using as much “found” stuff as possible.
As the videos show, StreetWriter does all of that. It writes 8 inch high messages in water on the pavement as it moves, and leaves no trace once the water evaporates.
I have built two StreetWriters, with minor design differences between them, This Instructable, is based on the second build which is somewhat improved.
In StreetWriter, water is pressurized and fed to a manifold which carries 8 automotive fuel injectors. As StreetWriter moves forward, the Arduino controls the fuel injectors, squirting water onto the pavement. The message to be written is one of 8 that have been written onto an SD Card plugged into the Arduino. The operator can easily select among the messages and can create new messages on the SD card at a computer. There is no length limit on any one message other than the amount of water in the pressure tank. The longest message I have written so far is PI to 300 places.


...E acaba-se, por hoje, com esta 3ª Mão, para não terem uma crise de nervos, nem quemarem os dedos, quando estão sós, na oficina!


Magnetic 3rd Hand
lonesoulsurfer

Anyone who plays arounsd with elecronics knows how important a 3rd hand is. It gives you the ability to hold solder in one hand and the soldering iron in the other and easily add solder to a component.
I've been using some homemade 3rd hands for some time and can't imagine building a circuit without one. Recently I was using a couple of magnets for a project and a resister got stuck to it. I had a bit of an epiphany and realised that adding a magnet to a 3rd hand would be a quick and easy way to hold a part whist I add solder to it.
The project is an easy one and will definitely become a welcome addition to your solder station.

https://www.instructables.com/id/Magnetic-3rd-Hand/


quarta-feira, 2 de janeiro de 2019

TESLA! E Injecção de Plástico, um Órgão que aceita MIDI, Tiro-ao-alvo DIY.

Uma Bobine Tesla!!!
Será necessário dizer mais?
Podem montar a vossa, em casa, com este Instructable, para experiências, demonstrações...
E porque sim!


Easy Tesla Coil!
DrewPaulDesigns

Wireless electricity is here! From wirelessly powered lighting to wireless chargers and even wireless smart homes, wireless transmission of power is an emerging technology with innumerable applications.
A light bulb powered with no wires? A cell phone charger that doesn't need to be plugged in? A home with no plugs, no wires and everything just 'works'? It's not magic, it's no mystery, it's science!
The invention of wireless power transmission is typically attributed to 20th century inventor Nikola Tesla, though the technology may have been in use much earlier. Since then, however, improved designs and modern components make this an easy DIY project anyone can do with just a few simple parts!

https://www.instructables.com/id/Easy-Tesla-Coil/


Podem reproduzir Ad Infinitum as vossas Impressões 3D e tudo o resto, com este Instructable.
Porque vão ficar com uma Máquina de Injecção de Plástico...
E ainda por cima, custa muito pouco!

É bom!


Injection Molding Machine for under $100 in parts using less than $700 worth of machinery!
Wildman Tech

 Here I build an injection molding machine for less than $100 in raw materials! WARNING! I use some tools in this video that cost me less than $700, so don't go into hysterics about a multi-million dollar machine shop. See me build the same parts with nothing but a hand drill here....

https://www.youtube.com/watch?v=MlYdd5I33Oo


Eis algo de muito diferente, mas fascinante!
É um Órgão a Ar Comprimido, mas um com Teclado, e aceita ficheiros MIDI, o que o faz um incrível Instrumento Musical.
Bom para ouvirem em casa, pequenas Feiras, ou  Associações Recreativas, e, é claro, Reuniões e Congressos Steampunk!                                                                                                                  


Mini-Calliope Dec 1982 Popular Mechanics Part 1
Ronald Walters

My build will look similar to the 1982 Popular Mechanics project. However, my version will play from the keyboard or by midi files and will use an external air source.

https://www.youtube.com/watch?v=QDm6kBgTMq0


Para uns minutos de diversão, com uma pistola de Ar Comprimido, que fazem vocês mesmos, para pouparem dinheiro, terem o prazer de a fazerem vocês mesmos, e a fazerem como quizerem!
Porque, lembrem-se, podem ter apenas a pressão que sirva para disparar no vosso Quintal, sem chatices.
E é Steampunk à brava! 
Mas tenham muito cuidado, tanto com a Legislação vigente, onde vivam, quanto à Segurança necessária, para disparar o que quer que seja!


Muy poderosa arma de tiro de pistola de aire hecha en casa
xyx

Como Hacer un Arma Casera Facil y muy Potente

https://www.youtube.com/watch?v=dNo2IWdW6QM


Falando de Segurança, eis um Drone que podem voar onde queiram, sem perigo de serem cortados pelas hélices dos mesmos, destruírem a Mobília, ou aleijarem o Gato!
Para além de usarem Turbinas, mesmo essas, ninguém as vai tocar, nem um simples saco de plástico vos vai tramar a vidda...


Bladeless Drone: First Flight
Stefano Rivellini

With 4 ducted fans, and some carbon fiber, I built a bladeless drone that I think is one of safest in the world. It uses 4, 90mm ducted fan propulsion units buried deep inside what I call a “bent tube” propulsor. The fifth “leg” is a parachute can. Hopefully I will never need it. With some help from my dad, we built the entire airframe primarily out of carbon fiber and some balsa wood. I bought all the electronics on line and was able to design the drone so that it would operate with a standard DJI multi rotor flight controller even though it doesn’t have vertically oriented propellers. With its top mesh installed its virtually impossible to get fingers and objects in contact with the blades. I submitted a patent application for my invention. I think a drone like this could have industrial applications where a drone needs to operate close to people, objects, and in confined spaces to do inspection and other activities.

https://www.youtube.com/watch?v=5L6FSdUmEpg


sexta-feira, 10 de novembro de 2017

Moldes impressos em 3D? E uma Oficina arrumada, um Manual de Injecção de Plástico, Parafusos & Porcas, e Salvemos o Filamento!

Isto é que é explorar a 100% as possibilidades da Impressão 3D!
Porque é lenta e cara, a Impressão 3D deve ser usada para produzir Moldes para injecção de Plástico, o que só DEPOIS resulta na producção em série de objectos, como deve de ser...
Aprendam como é que o podem fazer, com estes nossos amigos da Pinshape, que aconselho a subscrever:


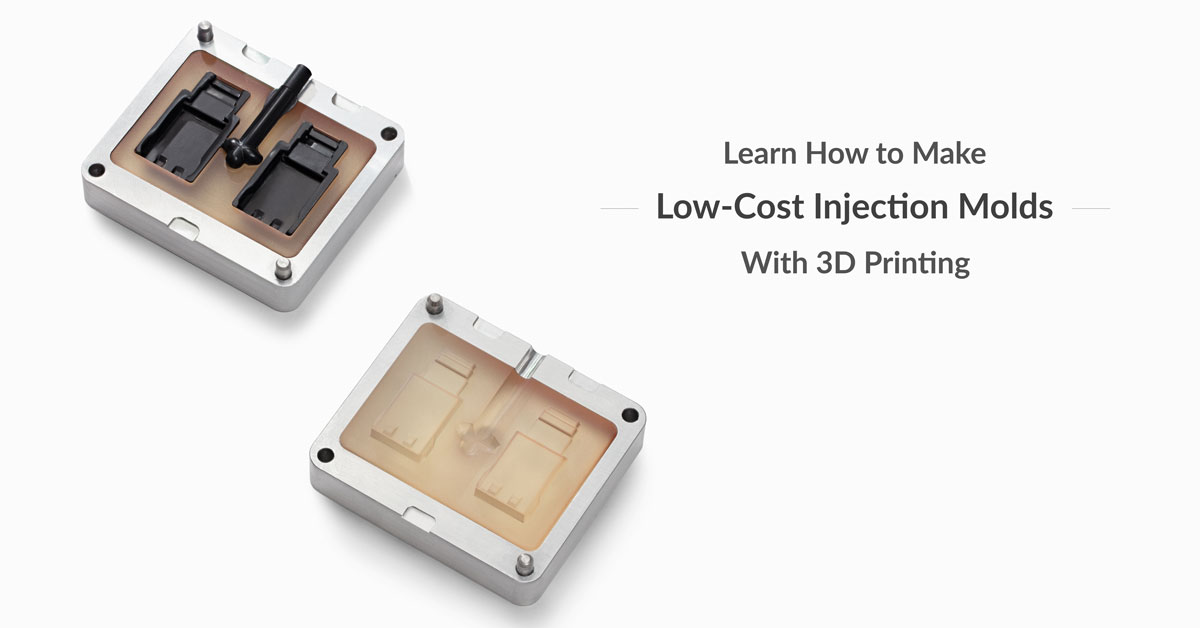
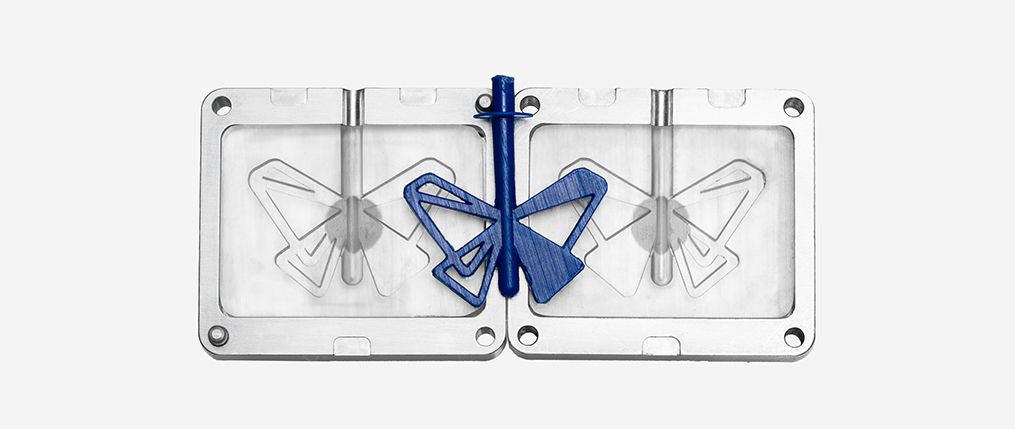
Low-Cost Injection Molding Using 3D Printing
Pinshape Blog

It’s no secret that 3D printing is a great tool for affordable production of custom objects. With new 3D technology like the Formlabs Fuse 1, there are a variety of options availible for small batch production needs that help manufacturers save on cost-per part. However, in some cases injection molding is still ideal for scaling production needs.
In this post, you’ll learn how to combine 3D printing and injection molding for small batch production. By using 3D printing to cost-effectively produce your molds and injection molding to rapidly produce identical copies, you leverage the benefits of both technologies. In this tutorial, we’ll go through the process of designing your mold, choosing a material, and producing injection molded parts. By the end, you’ll have the knowledge to access the speed and cost-efficiency of injection molding processes.


https://pinshape.com/blog/low-cost-injection-molding-using-3d-printing/


Prova brilhante da Graça e Génio Femenino, a nossa amiga darbinorvar mostra aqui como se pode ser Engenhocas sem deixar a casa num Caos, com este Instructable que ensina a ter uma ordem e organização invejáveis, sem ter medo, no entanto, de trabalhar nos vossos projectos...
Muito bom.


How to Create an Amazing Workspace at Home
darbinorvar

The idea is to create a functional and practical work area within the home that's accessible to all family members, friends, and co-workers. If you're looking to introduce your children to the world of making, or simply make it a bigger part of your everyday life, then there is a lot of appeal in creating a versatile area that automatically becomes the go-to place to fix broken things, learn new subjects, try out new projects etc.... While many people would automatically want to hide such a space in the garage or basement, it's a nice idea to make it a very central part of the home - by giving it such a prime location you communicate what an important part of your life this is or could be, and you make it easier for work to take place.

https://www.instructables.com/id/How-to-Create-an-Amazing-Workspace-at-Home/


Já aprenderam como fazer os moldes, então aprendam como os desenhar, para que a peça saia bem-feita, com este White paper que podem descarregar:


Injection Molding from 3D Printed Molds
FORMLABS WHITE PAPER:

Why you should download

The majority of plastic products in the world today are manufactured by injection molding. Download the white paper now if you want more information on:
 How desktop 3D printers can be used with injection molding machines
 Creating molds in-house to produce small, functional parts for final products

What you will learn

Machining custom-designed metal molds can be prohibitively expensive and time-consuming. Download the white paper now to learn:
 The steps and results of Formlabs' test with Galomb, Inc., a manufacturer of benchtop injection molding machines
 Recommendations and best practices for injection molding with 3D printed molds
 Suggestions for designing and 3D printing molds

https://formlabs.com/injection-molding/


Algo que paralisa muita construcção de Protótipos, é a necessidade de produzir uma caixa, ou o que seja, com parafusos, e porcas...
Pois cá vai um Tutorial sobre como desenhar as vossas Engenhocas para Impressão 3D, sem perderem a paciência a tentar imprimir uma rosca que vai eventualmente moer...
Porque usam Porcas em metal!
É bom.


Adding Screw Threads to 3D Printed Parts
Downloads , Tutorials

At Formlabs, we design lots of functional parts for printing on the Form 2 (our stereolithography, or SLA, 3D printer). These parts include things like internal prototypes used for R&D, jigs and fixtures that will be used on our manufacturing lines, and parts for design reviews before the final part is injection molded from a material like nylon.
No matter the application, we often find ourselves needing to combine multiple parts using screws, and now that we’ve released an improved formulation of our Tough engineering resin, the differences between “looks like” prototypes and functional prototypes are decreasing.
This article is a guide to using screws in 3D printed SLA parts. There are many other ways to attach multiple 3D printed parts together, but if you need to repeatedly attach and detach components and want robust mechanical fastening, there's no real replacement for genuine metal threads.

https://formlabs.com/resources/engineering-manufacturing/


Ainda não chegámos ao fim do Rolo de Filamento, e a Humidade e o Pó já fizeram estrago, tornando o Filamento numa porcaria que arruína as Impressões...
E a nossa paciência!
Mas já não acontece, se colocarem o Rolo dentro desta caixa à prova de àgua, com estas saídas para o fio.
Atenção, que a Licença destes objectos 3D não permite a venda,a penas o uso individual:


Filament dry box for 3-4 spools of filament
bummster

My dry box for 3 - 4 spools of filament. There are many dry box plans out there. This one is mine.
The rod is at a good height for most spools when using a pair of spool hubs on each spool
1 Sterlite 20qt air tight box.
24 3mmx10mm machine screws (3mm x 8mm will work but I like a little bit of thread sticking out of my nylocks)
24 3mm nylock nuts
24 3mm washers
1ft 3mm OD x 2mm ID PTFE tube.
1 12in 5/16 threaded rod

https://www.thingiverse.com/thing:961881


terça-feira, 25 de julho de 2017

Injecção de Plástico em casa! E Mindsets em saldos, uma Fonte de Alimentação regulável, partilhem com AddToAny, e desenhem Engrenagens

Eis uma maneira de terem uma Fábrica de Injecção de plásticos na Oficina, para terem pequenas séries de objectos realmente realistas...
Usando uma Impressora 3D!
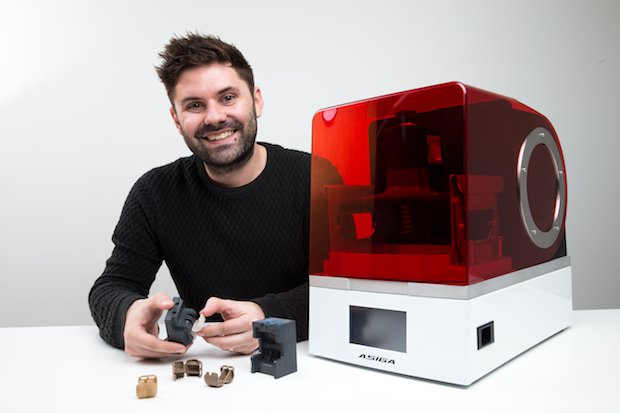
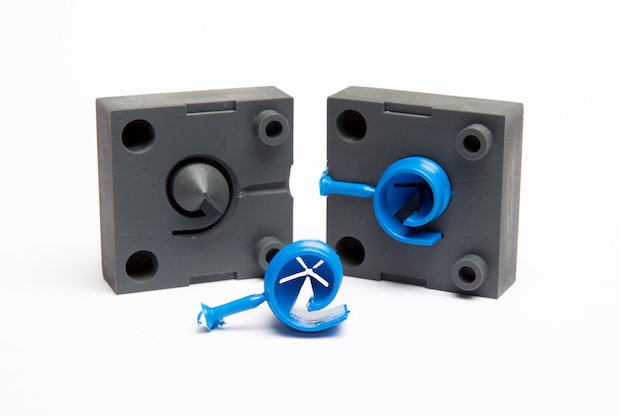
O "truque", é, para além de muita cabecinha ao desenhar os Moldes, uma Impressora Asiga, e a sua Resina especial, a Asiga FusionGRAY.
Leiam com toda a atenção, todo o atrigo, indo ao Link: 


Low-cost desktop injection moulding
Janie Barrett

Low-cost desktop injection moulding - here, Mitchell Brown from VERT Design, explains how they did it using Asiga's desktop 3D printing solution ...
Our product design company was engaged to develop a variation of a hose clip that is used on a high speed production line. The product works through the use of an integral hinge and flexible clipping geometry.
Traditionally we would test the design through the used of SLS 3D printed models, however, the results achieved were not accurate. We required the geometry to be proven in the actual production materials, which in this case was injection moulded polypropylene
Through the design phase, we developed multiple iterations. Eventually this was short-listed to two possible concepts. Producing a prototype tool in steel or aluminium would have cost many thousands of dollars and taken a minimum of 6 weeks. We turned to 3D printed tooling as it was faster and cheaper.


Só a página, é um espectáculo, mas estes artigos estão em Saldo, por isso, aproveitem, que esta quantidade de coisas boas, para Engenhocas, vai-se esgotar, e depois, é tarde demais:


CLEARANCE. NOT TO BE MISSED!...

See our range of Clearance items. Available whilst stocks last.
When they're gone, they're gone.
Making way for new and exciting ranges.


E eis mais uma Fonte de Alimentação que podem fazer em casa, cortesia deste engenhoso Engenhocas no Site Instructables.
Esta, tem como trunfos der de regulação contínua, tanto de Voltagem, como de Amperagem!
É bom.


How to Make a Bench Power Supply
deba168

A bench power supply is an extremely handy bit of kit to have around for electronics hobbyists, but they can be expensive when purchased from the market. In this Instructable, I will show you, how to make a variable lab bench power supply with a limited budget.It is a great DIY project for beginners as well as any one interested in Electronics.

https://www.instructables.com/id/DIY-Bench-Power-Supply/


Isto é porreiro, uma ferramenta para partilharem o que quiserem por toda a Net, e o que é melhor, é grátis.
Vejam todas as vantagens disto, no Site:


Share Anywhere

Share to any service, or add a custom service to share to. AddToAny gets people to the right destination to share or save your content, whether it's in a native app or on the web.
https://www.addtoany.com/


Isto é maravilhoso, não só porque é um bom Instructables para desenhar Engrenagens...
Mas também, com este Intructable, podem aprender como imprimir em 3D todas as peças mecânicas que quizerem!
Através deste catálogo de peças acessível ao programa Fusion 360:


The Easy Way to Design Gears in Fusion 360
Desktop Makes

One of the first things I ever made from a 3D printer was a gear. But it wasn't just any old gear. The beauty behind this gear was that it was a replacement part for the very printer that was making it. This still blows my mind to this day. I love printing gears and still get excited about this new world that 3D printers have opened up. The problem is that designing gears have always been a bit of a challenge for me. That is until I learned what I'm about to teach you.
In the last step I also include a video demonstrating the entire process.


quinta-feira, 18 de agosto de 2016

Façam o vosso UAV! E Transmissão de Energia Wireless, 10 truques com tornos, Moldagem de Injecção, e façam os vossos Logotipos

Eis como podem fazer o vosso próprio UAV, para  Pesquisa, ou Fotografia!
Em 8 passos, vão aprender como podem construír a vossa própria máquina voadora: 


Make a UAV for research and photography

McMagical Engineer 
You, yes you, can build and fly a personal UAV. Read this and see how!
If you like this instructable, consider voting for me in the RC contest.
I remember riding in the car when I was little, watching the shadow of our car float over the ground beyond the guard rail. I would imagine that the shadow was from a plane and would think about what it would be like to see the journey from the air. What if I had a little plane that I could fly from the car and explore the areas just behind the trees. What if I could launch a plane on a hike, and see the far peak on the other side of the glacier, or take a video of myself and friends waving from the top of a mountain?
These days, I live near the ocean and wonder what it would be like to capture video of sailboat races, darting in and out of the masts like the seagull scene in "Finding Nemo." What about a video of whales from the air? To see what the seagulls see as they float over the water, under massive bridges and over tiny islands...
Then I found FPV UAVs and the dream became a reality. 
http://www.instructables.com/id/Make-a-UAV-for-research-and-photography/


Para tirarem proveito do wireless, como forma de energia, e ainda por cima, usando Sucata, cá têem este Instructable, que vai dar vida a sei lá quantos mais Protótipos e Engenhocas:


Wireless Electricity Transmission (Simple things required to be collected from scrap)

Gursimran Singh 425

Wireless electricity is something new and exciting. While its core principles are fairly easy to understand it can quickly become overwhelming for the average person. I faced a similar problem, I found the whole thing rather overwhelming to understand due to the fact that there were many different things that I felt I needed to understand to be able to make one. So lets get to it! and here's a video of it working:- 


Segue-se uma série de Truques, para tirarem o máximo proveito dos vossos Tornos de Bancada...
E até a fazerem uma dessas Bancadas!
Cá vai:


Top 10 Vise Hacks!

Yonatan24 
Get the most out of your Bench-Vise!
After building three vises, I think I came up with enough tips, tricks, improvements, unusual uses, and hacks to stop you from getting screwed while DIY'ing (pun not intended!).
In this Instructable I will show:
How to make an improvised Drill-Press with a vise
How to save space- Clamp tools in your vise!
How to save money - Know if you should build or buy
How to make an improvised vise with a C-Clamp
And many, many more!
Let's get started! 


...Para fazerem Peças em Plástico magníficas, sigam o Instructable deste Mestre, que vos mostra como fazerem uma Moldagem por Injecção de Uretano, com Moldes de Silicone, sem falhas:


Urethane Resin Casting a Joby Gorilla Pod Hotshoe Camera Mount - Reaction Injection Molding (RIM) Part:2

botzendesign 
This is Part Two: how to Injection Cast Urethane low volume high quality plastic parts in a Silicone mold. Sometimes also referred to as Reaction Injection Molding (RIM), the process allows you to meet your low volume, injection molded plastic part needs with out aluminum or steel tooling. In my case I just need a few high quality parts, but they need to be as strong or stronger than an injection molded part.
In Part ONE of the Instructables I cover how to make the Silicone Mold that we will be injecting the Urethane resin into to make the plastic parts. Check it out here.
You will need the following for this project.
-Silicone Mold
-Two part resin, I recommend a Quality Urethane from Innovative Polymers I will be using IE-3076
-Digital cooking scale for accurate mixing of the resin
-Protective gloves to keep your body from getting sticky and absorbing harmful materials
-Mixing Cup
-Mixing stick
-Colorant, a pigment of some sort to make your parts a specific color
-Wax paper or Aluminum foil to keep resin off your work surface
-Kitchen Timer so you know how ling you have to work your resin
-An good place to work
-60ml syringe 


E para porem um Logotipo à altura destas Dicas, nos vossos Protótipos, Empresas, e Páginas, etc. que tal este Kit, com 60 peças,  para criarem o vosso Logo, totalmente Grátis?
Não quero que vos falte nada..


Logo Creation Kit 
Friends, today’s free design resource is a logo creation kit containing 60 vector elements in PSD format. Using these elements and mixing them together, you can easily create stunning logos. They are ideal for creating logos, badges and vintage elements. Don’t forget to resize the vectors to your likings.


quarta-feira, 6 de abril de 2016

Raspi 3! E Injecção impressa(!), controlar o Wi-Fi, fidelidade nas cores da Impressão, e um Luxo!

O fantástico e minúsculo Computador numa placa só, o RaspberryPi, não pára!
Desta vez, vem com ligação Wi-Fi, o que faz dele um Computador bem melhor que muitas carcaças que ainda andam aí...
Como o meu Computador! 
Vejam então esta análise aprofundada do "bicho": 


The Raspberry Pi 3, an in depth look...

vishal1502 
The Raspberry Pi 3 is here. The latest version of the credit card-sized computer comes a whole year after the launch of its predecessor, the Raspberry Pi 2 and four years after the launch of the original Raspberry Pi, has its own set of upgrades. Here’s the highlights: it’s faster, it has the exact same form-factor, and yes, it has wireless on it.
The Raspberry Pi 3, with four USB 2.0 ports and a 100mb/s ethernet, a 3.5mm audio jack with a composite video output over the same port via a non standard connector, a full size HDMI 1.3a connector, a micro USB type B(5V, 2Amp) connector for power, a micro SDHC card slot, a CSI camera connector, a DSI display connector, 40 GPIO male pins, shares its form factor with its predecessor, so much so, that it perfectly fits in any one of the cases made for the Raspberry Pi 2. The good news though, that it also includes onboard Wireless connectivity.


Desta, nem eu me lembrei!
Imprimir, em 3D, uma MÁQUINA DE INJECÇÃO POR MOLDE... 
Depois, será só imprimir os Moldes, e tem-se assim, UMA FÁBRICA EM CASA!!! 
Uma ideia de Génio, parabéns. 
Atenção, também, ao Site donde vem esta notícia, e em particular, ao Link que vêem no texto embaixo: 


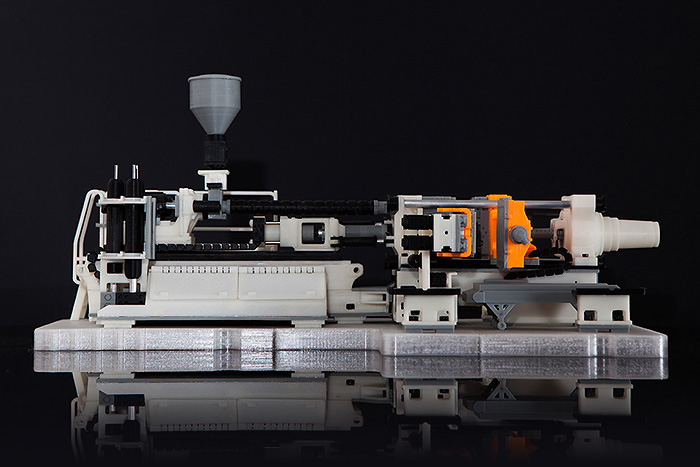
300-Piece Miniature of Injection Molding Machine 3D Printed on Zortrax M200

Ludmiła Rafalska 
Being aware of the high potential of the 3D printing technology, we can often see the examples of mold casts made on 3D printers. It shouldn’t be surprising at all as it is one of the easiest way of creating intricate mold shapes fast and cost-efficiently. True, but this time one of our users Luca Toson surprised us with his idea of making the Evolution of the Idea
In one of our previous articles we provided you with some essential information about the molding technology and how it can complement the 3D printing technology for the sake of achieving optimum results. We hope you found it useful as this particular way of plastics processing is one of the most popular technique that allows to produce a wide range of goods, starting from small household objects to automotive interior parts.  


Com este Projecto, podem não só ter sempre à vista a velocidade da vossa ligação Wi-Fi, como podem ver QUANTOS aparelhos se estão a ligar ao vosso Router...
É bom! 
Vem também com conselhos muito ùteis para evitarem que uns espertalhões vos ratem na Ligação. 


Smart router with WiFi Connection Visualization

Seeed Studio 
Here share my latest project, a router with acrylic shell and some leds.
This router has the below functions:
Let you know how many devices had connected to your router
Show you the real-time net speed by different color of the leds
If you like this router, please follow the below steps.
Cheers.
And thanks @Fiernocht and the other guys provide the ideas to protect your router, really useful
password protect it
set it to the highest encryption your devices can handle ie WPA2 and AES encryption.
Ban any unauthroized MAC addresses on connection
and final, Hide your SSID, by default it broadcasts to everyone 


Para alguns fins é indierente, mas para outros, uma Côr verdadeiramente fiel ao vosso Design, ao imprimirem em 3D, é essencial.
É de interesse, então, este Artigo, para vocês, nesse caso; 
A pensar nisso, a Stratasys, e a Adobe pensam que vos arranjaram uma solução: 


True colours

Tim Fryer
Getting colour into a 3D printed part is not easy. Ground has been broken, claim Stratasys and Adobe, who have partnered to find a solution.
Additive manufacturing is now regarded as a technology that most of us are familiar with. But it is not really a single technology; more of a set of technologies with different levels of relevance for different circumstances. Some of these technologies are more embedded than others, although still mostly in a prototyping environment. But the technology required to produce realistic colour 3D models has been noticeably lagging.
Part of the reason for this is down to the lack of suitable 3D printing equipment and partly, according to John Gould, Stratasys president, North America: “To really mass adopt 3D printing we have to simplify the workflow. Today 3D printing is still too complex. Many times you need to be a CAD engineer to really understand the end to end workflow, and many choose to not adopt.”  


E há pequenos Luxos que se revelam bem ùteis, como este Acessório, para as vossas Ferramentas, que levam para todo o lado, e vos organiza a tralha como outro nenhum!
Categoria. 


Leather Tool Roll

ElmarsM

Hi!
Lately I have been trying my skills at leather working. Because of that I have been buying (and making) more and more tools and that was a great reason for me to make a leather tool roll. Since it doesn't require a lot of tools, it is easy to make it and the roll is a very practical way of storing your tools!