Blog Posts

quinta-feira, 28 de março de 2019

Moldes! E a Shapeoko, uma CNC Modular, uma Escritora de Pavimento, e uma 3ª Mão!

A Impressão 3D demora muito tempo!
Mas os Moldes para Injecção de Plástico, permitem-vos produzir não uma ou duas, mas centenas de peças.
O que vos resolve uma data de chatiçes...
E vos dá muito mais DINHEIRO!


10 CAD Tricks for Mold Design
Michael LaFleche

Mold design is one of the most complex aspects of product design. Not only are the part geometries challenging, but the timeline to get jobs quoted and manufactured are tight. OEM design companies sending designs to contract mold designers is typically the last stage of the design cycle, and “tooling up” can be some of the most expensive parts of the project.
Luckily, there are some mistakes that part designers and mold makers can avoid to reduce time and cost.


Eis a ùltima Fresa CNC Shapeoko, e vem carregada de novidades, para uma máquina que já era uma maravilha, como estava:
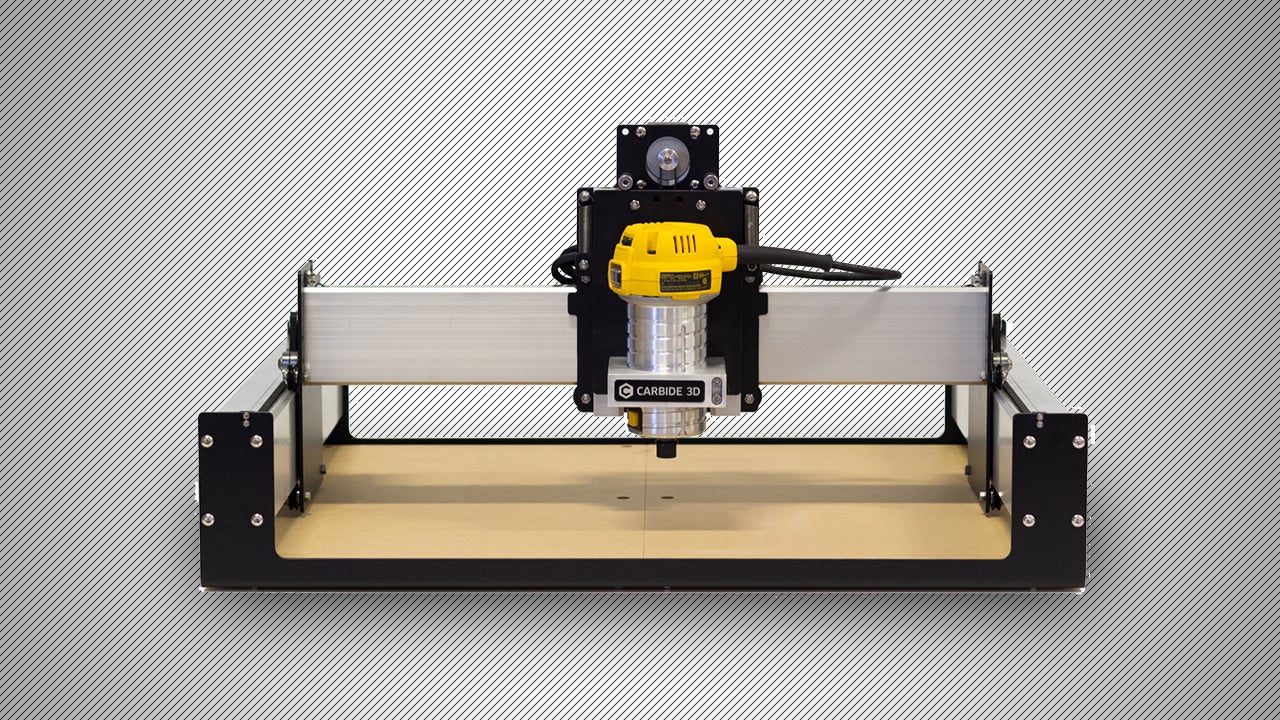


2019 Shapeoko 3 (XXL) CNC Kit Review – Editor’s Choice
Tyler Koslow

Arguably the most popular “desktop-sized” CNC router of the day, the Shapeoko 3 from Carbide 3D has origins waaay back in 2011, when its creator Edward Ford launched Project ShapeOko on Kickstarter.
A sub-$300 open-source CNC machine kit, Project ShapeOko was an affordable entry point into the world of CNC carving, achieving the fantastic feat of simplifying the procurement of parts for an open source project.
With a build comprised of electronics, plus other sundry items such as laser cut plywood sourceable from Shapeways and Ponoko (hence, ShapeOko) and one other provider, Ford’s original machine was a trailblazer.
Fast forward seven years, and much has changed. In 2014 Ford joined forces with CNC machine and CAD/CAM software company Carbide 3D, becoming a partner and VP.


https://all3dp.com/1/shapeoko-3-xxl-review-specs-carbide-3d/


...Mas esta máquina é impressionante, Impressora, Fresa, e Laser CNC, basta mudar as cabeças.
E fazem-na em casa!


Modular DIY CNC V2
jtaggard

I build my first CNC about a year ago and learned a lot from the process. As an engineer I'm always looking at ways to improve things, and my first machine was no exception. The process began with some small changes which quickly turned into the opportunity to overhaul the design even more to better suit my needs (an overview of these changes is detailed in the next step).


Uma Impressora, mas para escrever no chão, algo que suspeito, vai ser muito usado em MakerFaires...


StreetWriter
charlesglorioso

I started this project because I wanted to make my mark on the world but didn’t want to leave any aftereffects.
I also wanted a challenging project for my new 3D printer that involved some Arduino Programming.
Finally, I like to build things using as much “found” stuff as possible.
As the videos show, StreetWriter does all of that. It writes 8 inch high messages in water on the pavement as it moves, and leaves no trace once the water evaporates.
I have built two StreetWriters, with minor design differences between them, This Instructable, is based on the second build which is somewhat improved.
In StreetWriter, water is pressurized and fed to a manifold which carries 8 automotive fuel injectors. As StreetWriter moves forward, the Arduino controls the fuel injectors, squirting water onto the pavement. The message to be written is one of 8 that have been written onto an SD Card plugged into the Arduino. The operator can easily select among the messages and can create new messages on the SD card at a computer. There is no length limit on any one message other than the amount of water in the pressure tank. The longest message I have written so far is PI to 300 places.


...E acaba-se, por hoje, com esta 3ª Mão, para não terem uma crise de nervos, nem quemarem os dedos, quando estão sós, na oficina!


Magnetic 3rd Hand
lonesoulsurfer

Anyone who plays arounsd with elecronics knows how important a 3rd hand is. It gives you the ability to hold solder in one hand and the soldering iron in the other and easily add solder to a component.
I've been using some homemade 3rd hands for some time and can't imagine building a circuit without one. Recently I was using a couple of magnets for a project and a resister got stuck to it. I had a bit of an epiphany and realised that adding a magnet to a 3rd hand would be a quick and easy way to hold a part whist I add solder to it.
The project is an easy one and will definitely become a welcome addition to your solder station.

https://www.instructables.com/id/Magnetic-3rd-Hand/


quinta-feira, 21 de março de 2019

Impressora 3D Portuguesa! E uma fresa CNC económica, a Lista de Geller, solas à medida, e packs de baterias de Lítio!

A BeeVeryCreative, 100% Portuguesa, está de parabéns, com este magnífico Kit, uma sólida e inovadora Impressora 3D, que o nosso Amigo, Angus, revê, sem favores, mas com justiça, e muito positivamente:


This is an i3 KIT you'll want to check out - B2X300 Review
Maker0s Muse

The B2X300 is a Huge, Open Source 3D Printer Kit with 2019 smarts and a killer design - but is it right for you? Watch to find out!


Para poderem ter uma Fresa CNC em casa, por 500€:


LOW COST DIY 500€ CNC MILL
Vulcaman

Hi,
in this Instructable I want to show you, how you can build your own CNC-Mill for less then 500€. I designed this machine for CNC-beginners, who don't want to spend a lot of money for their first experiences with CNC machines but also expecting a rigid and professional looking CNC.
This machine is perfect for maker, tinkerer and everyone who wants to start CNC-Machining.
In the pricerange of sub 500€ you will not find any other CNC with these features:

  •  710 Watt spindle motor
  •  MGN linear-rails on all axis
  •  1204 ballscrews on all axis
  •  effective workarea of 250x220mm
  •  max. travelspeed of 3000mm/min (at 12V)
  •  high accuracy of 0.1mm in all axis
  •  super rigidportal frame (out of one piece of wood and aluminium extrusions)


https://www.instructables.com/id/LOW-COST-DIY-500-CNC-MILL/


Algo de muito útil, a lista dos tópicos dos fantásticos Vídeos de Dan Gelbart, um Génio da construcção de Protótipos, e penso TODOS os Engenhocas deviam ver os seus vídeos, para evitarem muita dor-de-cabeça, e fazerem muitas mais coisas do que pensam possíveis, com os meios de que dispôem:


Dan Gelbart : How to Build Stuff
Al-Hala

Dan Gelbart has an excellent and well-presented series on YouTube on machines and prototyping. It`s a short course on how to build stuff aimed at students, researchers and others who are not machinists by trade. It`s applicable to prototyping and limited production with enabling technology in 18 parts, which I’ve listed links to below. Note: the chapters were obviously shot out of sequence, as there is referral to `as we`ve seen before` when we have not. It`s not that bothersome.


Para o bem dos vossos pés, têem agora este Site onde podem desenhar solas para os vossoa sapatos, para imprimirem em Filamento flexível, e até, solas correctoras de defeitos!


What is Gensole?

Gensole is a browser based tool which allows you to design insoles, optimised for 3D printing using the FDM process and Filaflex (TPE/TPU) type materials. It will ultimately export .AMF files for importing into Slic3r for 3D printer toolpath creation.
It is free for makers, and researchers for non-commercial use :

http://gensole.com/


...E acabamos, por hoje, com este Instructable para os que precisam de uma série de Baterias de Lítio para toda a espécie de Enhenhocas!


How to Make a 18650 Li-ion Battery Pack!
Nematic!

18650 Li-ion cells are a great way to power Projects. Which provides a nominal voltage of 3.7V which is not sufficient for most of the application for let's say you want to power a BLDC motor with an ESC which requires 9V to start. So we need more voltage which can be achieved by connecting them in series. So in this tutorial, I will show you how you can make a 18650 Li-ion Battery Pack with a BMS circuit and all the things you need to know before you built one!


quinta-feira, 7 de março de 2019

Um Clone de Prusa! E um Escafandro feito em espuma(!), dobrar cartão, uma Empilhadora R/C, e um Gerador de Sinais de RF

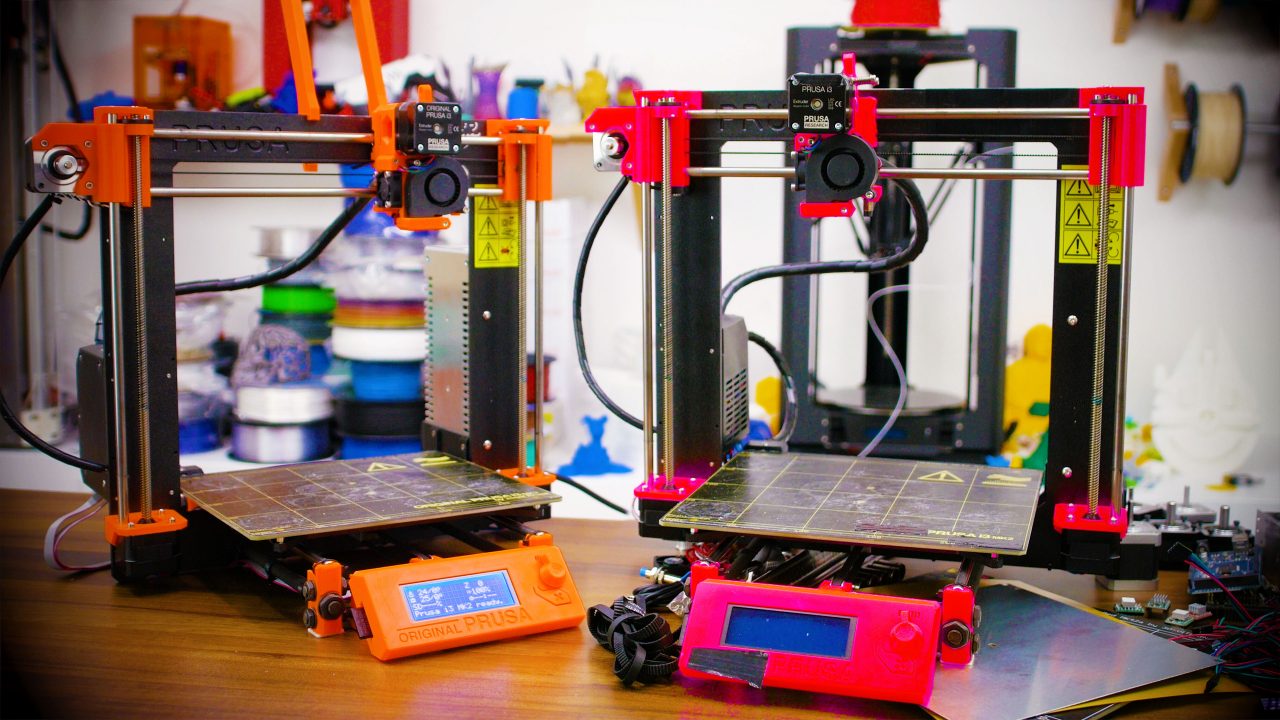
Um Clone da Impressora Prusa, e ainda por cima, o mais Económico possível?
É BOM!
Vejam aqui como se faz, e assim, mais gente poderá ter uma Impressora 3D...
Ou, os que já as tèem, podem ter ainda mais! 
LOL


Building the cheapest possible Prusa i3 MK2
Tom

What is the cheapest possible, real 3D printer you can buy without making one compromise after the other? That’s the question we’re asking by building a Prusa i3 MK2-style 3D printer that comes with most of the important features of the original one from Josef Prusa and requires a bit more work for sourcing and building the machine, but most importantly, we’re going to build it only with the most affordable set of parts.
This page will serve as a hub for part lists and build guides as the project moves along! All build videos and the accompanying project videos have been organized into a neat playlist!

https://toms3d.org/2017/02/23/building-cheapest-possible-prusa-i3-mk2/


Por incrível que pareça, podem fazer ISTO, com Placa de Espuma de Plástico, e por isso, é de aproveitar, malta!
Recriação Histórica, Carnavais e Espectáculos, Montras de Lojas, um sem-fim de usos...


Recreating an Antique Divers Helmet From Foam
LostWax

I love the ocean. I can sit on the beach all day just watching the waves do their wavey thing. Sadly, I happen to live in the middle of the Canadian prairies. No ocean to watch here. But there's always the world of make-believe, and what better way to get in the ocean vibe than with an amazing deep sea diver costume. I created this costume pattern to try and recreate the feel of the classic "Mark V" dive helmet which has become an iconic image of divers and the sea. It was used by the U.S. Navy from 1916 until 1984! Let's make one of our own.

https://www.instructables.com/id/Recreating-an-Antique-Divers-Helmet-From-Foam/


Eis mais algo de simplesmente espectacular, na sua simplicidade, uma Ferramenta para dobrar aquele Cartão que podem ter por aí, para uma série de novos usos:


Cardboard Bender
nml235l

A tool is something that makes life easier and more convenient. I have got a rather huge mass of cardboard (a cause of a new furnishings :-)) and appropriate number of ideas to make something with it (Bag for Containers). One problem is bend operations. Cardboard plates have a multiply layer (as usual) so I get clumsy splits during bending. To prevent such behavior I decided to flatten cardboard according the bend line. At this moment we get situation for a ... NEW TOOL. How to make flattening along the path? Certainly, using a one of the ancient inventions – the Wheel. We need only move the wheel (roller) along the path on cardboard surface with giving insignificant pressure. This principle we use in home preservation to connect bank and cover (or let's remember about the roller-machine for road construction). Concept of a tool is very simple: roller (wheel) and handle – nothing more.

https://www.instructables.com/id/Cardboard-Bender/


Este é um projecto que vai ser a alegria de muita gente, ainda mais porque é Open Source, todas as peças e planos à mão, para todos tentarem...
Uma Empilhadora em miniatura, tele-controlada, até a partir dos vossos Smartphones!
Dá para a mandar ir buscar os chinelos, do sofá...


Arduino Forklift
Leon van den Beukel

This is a video about making a remote controlled forklift car. I've used Fusion 360 to design and create the 3D printed parts and CNC machining templates. If you don't have a CNC machine you can also use a jigsaw to cut out the wooden parts. I've provided the cutting templates, sources and 3D printing STL files on my GitHub page:


Este Gerador de Sinais para Rádio-Frequência, vai fazer a alegria dos Macanudos, aquela malta dos Rádio-Amadores, um equipamento que serve para afinar os vossos emissores:


RF Signal Generator
Milen

The RF signal generator is a must to have tool when playing with radio receivers. It is used to tune a resonant circuits and adjust the gain of different RF stages. Very useful feature of the RF Signal generator is its modulation capability. If it can modulate the frequency amplitude or frequency makes it non replaceable tool for RF design works.
Some time ago I have designed an AM modulator, which could be used for such purposes. It works fine in some cases, but it has the disadvantage to be not able to work as standalone device. It requires additionally power supply module and two signal generators - for the RF carrier frequency and for the modulating signal. This makes it inconvenient to work with it outside the house. I decided to create an RF signal generator working as fully functional stand alone device. Instead to base the architecture on the modern DDS chip, I decided to use the analog approach. As a basis I have chose an existing RF signal generator published here. Similar design is described also here. The credits for this design go to their authors. I repeated mainly the first design adding additional digital frequency counter instead the not very precisely radial scale analog calibration.

https://www.instructables.com/id/RF-Signal-Generator/


sexta-feira, 1 de março de 2019

Fundição PLA! E um Cadinho eléctrico, um Stepper DIY, Acústica caseira, e segurem o Filamento,

Estou farto de dizer isto, a Impressão 3D pode ser grandemente amplificada, usando-a como Moldes, para  a Fundição de Metais!
E usando uma Àrvore de fundição, para produzir N peças de uma só vez!


Lost PLA Casting - making & using a Casting Tree #pla4
VegOilGuy

Casting Trees are a great way to produce a large number of castings in one pour. But can this technique be used with a 3D Printer in Lost PLA? Yes! Jewellers and Ornamental Casters have been using this approach for years and I wanted to try it. In my last video I tried to make 5 pendants in one casting, but only 1 turned out okay. This time I try for twelve and almost nail it. With just a 3D printer and a little imagination, it's possible to make some incredibly detailed castings using the Lost PLA method.


E se querem meter-se nisso, sem usar Gás ou Carvão, podem usar este Método, que se pode usar em qualquer parte, sem causar alarme!


Zero Cost Aluminum Furnace (No Propane, No Glue / Epoxy, No Welding, Individually Replaceable Parts)
quickshadow_2

NOTE: THIS ITEM CAN BE USED TO MAKE CASTINGS AS GIFTS FOR ANY HOLIDAY OR OCCASION!
As seen from the picture and title this instructable is about how to make a zero cost aluminum furnace from salvaged items from your local scrapyard or around the house.
Please be advised that though this aluminum furnace can truly be made at zero cost, for some steps you may want to substitute a tiny bit of money for less hassle and trouble, throughout this instructable i shall be pointing out these steps and how you could do so.
BTW this aluminum furnace build can seriously smelt down a lot of aluminum, but takes a while to heat up, so ensure that you have a large store of scrap aluminum before using, for maximum efficiency.

https://www.instructables.com/id/Zero-Cost-Aluminum-Furnace-No-Propane-No-Glue-/


Um Stepper não serve de nada, sem um Controlador, e cá está como o fazerem vocês mesmos, com este Projecto:


DIY Stepper Motor Controller
DIY KING 00

Remember those DC motors, all you need too do is to hook up the positive and negative leads to a battery and holla it starts running. But as we started doing more complex projects those DC motors doesn't seems to deliver what you need.... yes I mean efficiency, precision and above all torque without any gear reduction.
Well the story started as I planned to built a semi automatic drill press which can help you drill through objects like a usual drill press but with the help of a foot pedal so that you can hold the object with both your hands without the need of a helping hand. Long story short I need a motor that can move the drilling head up and down precisely and also offers a good amount of torque.
Failing to get all those from a simple DC motor I decided to use a stepper motor. Yes the one that has four wires and thats all I knew about them.So I in this instructables we are going to make a controller for these four wire stepper motors that enables us to control the speed and direction of the motor without using a micro controller.

https://www.instructables.com/id/DIY-Stepper-Motor-Controller/


Um Estúdio de Som no vosso Quarto?
Podem fazê-lo, assim, com estes Painéis Acústicos que aprendem a fazer, neste Instructable:


Scratch Built Acoustic Absorbers for Bedroom Studio
epicchum

Hey everyone! I'm in the process of converting my bedroom into a bedroom studio for music recording and production, so I thought I would teach Y'all how I made my acoustic absorbers!

https://www.instructables.com/id/Scratch-Built-Acoustic-Absorbers-for-Bedroom-Studi/


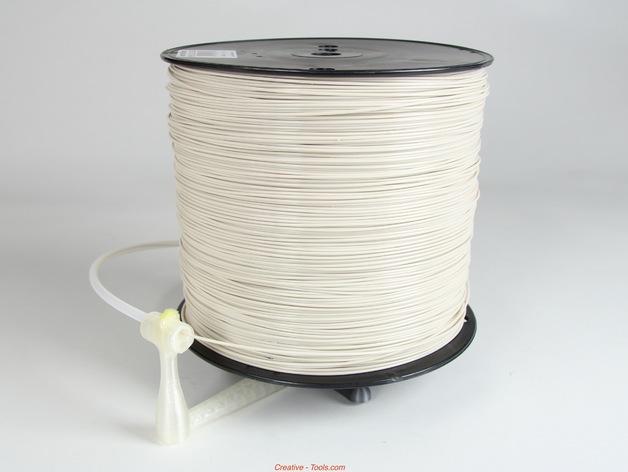
É bastante irritante, quando a Impressora está alegremente a imprimir coisa nenhuma, porque o Carreto de Filamento conseguiu encravar o fio!
Esta é uma solução impecável, para poderem mandar imprimir a Máquina, e irem às vossas vidas, com confiança! 
É bom!


CreativeTools Creates Most Unique, Innovative 3D Printable Universal Filament Holder Yet
Whitney Hipolite

...
The other day, I was printing out some toys for my son. I had to leave the house for two hours, and fully expected that when I returned I would have 3 little toys laying finished on my print bed. Unfortunately, when I returned to check on my prints, the printer had completely stopped printing halfway through. I couldn’t figure out what went wrong… until I looked at the filament and found that it had become tangle up upon itself, preventing its own flow to the extruder. The 3D printer had no other option but to shut down. This was completely my fault, as I had been provided with a sample of filament to try out, and because I was in a rush, I had just put the filament to the side, rather than on a spool. This allowed it to easily knot itself up and ultimately terminate my print job.

If you were to browse websites like Thingiverse, you would discover hundreds of filament spool holders, all of which are unique in their own right. However, none are as innovative, as comprehensive, and frankly quite as amazing as one which was just created by a company called CreativeTools, and its CEO Paulo Kiefe. Called the ‘Universal Stand-Alone Filament Spool Holder’, it is entirely 3D printable and its name simply does not do it justice.

https://3dprint.com/20280/3d-printer-spool-holder/


quinta-feira, 21 de fevereiro de 2019

Promo time!

Cá está mais uma das minhas Engenhocas!

Uma pistola NERF, que vai ter a força que os Ímanes que vocês escolham, por isso, escolham bem!


Como dispara:


Magnetic NERF pistol
EdgarInventor

As strong as the 10mm Neodymium magnets you can get! It re-sets back at the flick of the lever, as the piston magnet is turned around, and so gets repelled by the 2 side magnets. Files at: https://cults3d.com/en/3d-model/gadget/magnet-nerf-pistol

https://www.youtube.com/watch?v=_8K8uD0rQUw


Como se re-arma:


Repeat fire Neo NERF Shoot, turn, reset!
EdgarInventor 

No mater how strong the Magnets are, on this Neodymium NERF gun, you always reset them by turning the lever... Easy! 3D files at https://cults3d.com/en/3d-model/gadget/magnet-nerf-pistol


E como funciona:


The Magnet NERF, how it works
EdgarInventor


terça-feira, 12 de fevereiro de 2019

Uma caixa de todo o tamanho! E uma Liga impressionante, Ímanes Auto-Colantes, Mover coisas, e VIVER DAS VOSSAS CRIAÇÕES!

O Desenho Paramétrico é mesmo assim, pode-se ter toda uma espécie de tamanhos diferentes, a partir dum desenho básico!
Aqui têem uma caixa que podem usar para tudo o que queiram, é só mudar aa dimensões ao vosso gosto:


Designing a Parametric "Print in Place" Hinged Container Using Autodesk Fusion 360
gzumwalt

The eight different size and color 3D printed "print in place" hinged containers appearing in the cover photograph of this Instructable do have one thing in common; they were all printed from a single Autodesk Fusion 360 model using "parametric modeling".
In a CAD environment, a parametric model is a model whose size and / or shape may be altered simply by changing dimensional values. In this model, I specified the dimensional values in the Autodesk Fusion 360 "Change Parameters" menu for the Length, Depth, Height, Thickness and Tolerance dimensions of a simple "print in place" hinged container. I then designed sketches for the base, lid and ball and socket hinges, and extruded the various components, using the dimensional values I entered. Thus to change the length of the container, I simply change the Length dimension, to change the depth, I change the Depth dimension and to change the height, I change the Height dimension. When any of the dimensional values on the Change Parameters menu are altered, Autodesk Fusion 360 rebuilds the container to the new dimensions, creating a new model ready for 3D printing, thanks to parametric modeling.

https://www.instructables.com/id/Designing-a-Parametric-Print-in-Place-Hinged-Conta/


Esta Liga metálica é impressionante, pois pode-vos servir para ter peças quase táo resistentes quanto o Aço, mas que podem fundir sem um Forno Bessemer...
Cobre e Alumínio, que podem arranjar em Sucateiras, ou mesmo da vossa Sucata, e nem sei se não poderão fazer uma Impressora 3D como veve de ser!


Making Aluminum Bronze: Melting Copper and Aluminum
matt.e.jenkins

Aluminium bronze is a type of bronze in which aluminium is the main alloying metal added to copper, in contrast to standard bronze (copper and tin) or brass (copper and zinc). A variety of aluminium bronzes of differing compositions have found industrial use, with most ranging from 5% to 11% aluminium by weight, the remaining mass being copper. The alloy I made consists of 11% aluminum and 89% copper. I personally made these just for the joy of creating and learning how to make alloys. If you have the resources to safely melt metal, then give this a try.

https://www.instructables.com/id/Making-Aluminum-Bronze-Melting-Copper-and-Aluminum/


Algo de novo, para o vosso palmarés de Materiais à disposição, Ímanes Auto-Colantes, o que vos pode resolver muito problema irritante, quando fazem as vossas Engenhocas!


Magnetic adhesive tape for flexible attachments

If you want to attach something quickly and flexible to metal surfaces, magnetic adhesive tapes are very helpful. As if by magic they can attach objects to a fridge or metal shelf, for instance. You can remove them without residue whenever you like.
You can also stick the magnetic adhesive tape to the backside of decorative objects and make them your own magnets.
Manifold applications for the magnetic adhesive tape for private and business use:
  •  Hanging up of seasonal decoration, such as advent calendar, monthly calendar, etc.
  •  Mounting temporary signage, e.g. "We are on lunch break" for the store, office or practice


Que tal fazerem um Servo-Motor mesmo, mesmo, pequenino?
Podem fazê-lo, agora, com estes circuitos Integrados, o que vai libertar, quando quizerem fazer algo de minúsculo, mas com movimento:


Moving Things (and Lasers!) Using Printed Circuit Boards
marciot

In this Instructable, I will share my experiments in making a set of PCB electromagnets for motion control.
For about a year, I have been experimenting with dual-axis pointing mirrors for lasers. Initially, I build a laser steering module out of solenoids. Then, I acquired some Texas Instruments TALP1000B modules from a scientific surplus outlet and experimented with those.
The Texas Instruments module had the advantage of being fantastically small, but it was very fragile and is no longer available for purchase. My DIY module had the advantage that had a clear (rather than gold) mirror, allowing it to work with violet lasers and phosphorescent screens. The DIY module was also robust and could be made from easily sourced parts. The downside was the solenoids made the module large and heavy and they could only provide a pulling force, complicating the driver circuit and limiting control.


ISTO É IMPORTANTE!|
 
Se quizerem viver do que gostam mais de fazer, não percam esta Série de Videos, que vos vai dar umas belas dumas noções sobre como avançarem nesse caminho, com uma estratégia de geito, para maximizarem a lucratividade mais perfeita  e rápida do vosso talento:


Making A Living As A Maker: Ep. 1 Finding The Perfect Product
Artfully Rogue

I make a living as a maker and would like to share what I've learned with anyone that is trying to jump off the 9 to 5 hamster wheel and start their own maker biz. 
Keep in mind, there is so much information out there in the world, my way is not the only way by any means. It's what has worked for me. 
Thank you for taking the time to watch my video. I am a creator of things, a metal artist, a maker of stuff, a woodworker, a welder, and a bohemian traveler of the world. 
I hope to inspire, motivate, teach and be a part of the lives that seek to become creators of their own wonderful creations. I rely solely on creating and building custom projects from metal and or wood. If there is something you would like to have created, then you can either reach out to me here on YouTube, email me at rogueartist@artfullyrogue.com or check me out on my other social media platforms.


quinta-feira, 7 de fevereiro de 2019

Controlem os Steppers! E uma fresa CNC, motores PMDC, Maker como Profissão, e muita Fundição,

Eis algo de não muito barato, mas que vos permite controlarem os Steppers que tiram da Sucata, de 6 maneiras diferentes!
USB, TTL serial, I²C, porenciómetros, código de quadraturea, e até com consolas de Radio Controle!!! (RC)
Para os Engenhocas é algo a ter à mão, ou pelo menos, a saber que existe, para um dia que precisem...


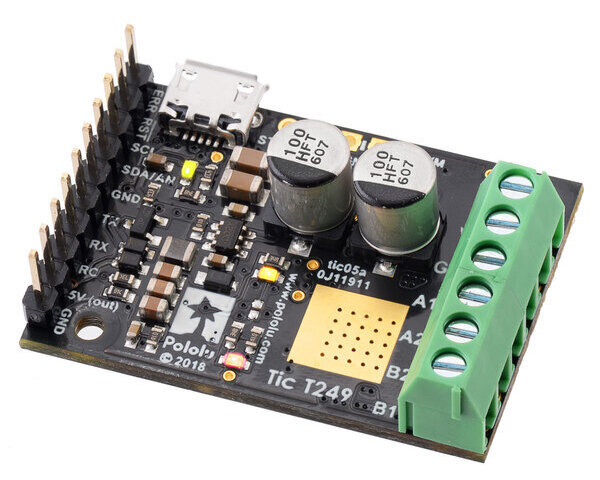
Tic T249 USB Multi-Interface Stepper Motor Controller (Connectors Soldered)

The Tic T249 USB Multi-Interface Stepper Motor Controller makes basic control of a stepper motor easy, with quick configuration over USB using our free software. The controller supports six control interfaces: USB, TTL serial, I²C, analog voltage (potentiometer), quadrature encoder, and hobby radio control (RC). This version incorporates a Toshiba TB67S249FTG driver with innovative and unique features that include Automatic Gain Control, and it ships with soldered header pins and terminal blocks. It can operate from 10 V to 47 V and can deliver up to approximately 1.8 A per phase without a heat sink or forced air flow (or 4.5 A max with sufficient additional cooling).

https://www.pololu.com/product/3138


Uma Fresa CNC, construída também com algumas peças impressas nas vossas Impressoras 3D, e explicado duma forma divertida, é o que vos apresento aqui:


3D PRINTED CNC ROUTER
Ivan Miranda

This week I started to make a CNC router with 3D printed parts and leftovers found around the shop, I know that it might seem odd that I claim that I had those guides and all lying around the shop, but the fact is that those were going to be to make a big 3D printer that is no longer an incoming project. We need to go metal!!

https://www.youtube.com/watch?v=MfYmT3Reoz4


Conheçam aqui os Motores PMDC, e como escolher o motor certo para o que precisarem de motorizar!


Spinning the wheels: Selecting a PMDC motor
Bill Marshall

My recent post Spinning the wheels: interfacing PMDC motors to a microcontroller, covered interface hardware and the use of PWM for speed control. In response to a comment from a DesignSpark member, I thought I would go through the basics of choosing a PMDC motor for a particular project. What follows is a highly simplified design process which should yield the ‘ballpark’ parameters of the motor needed.

https://www.rs-online.com/designspark/spinning-the-wheels-selecting-a-pmdc-motor


E como viverem só de construírem Engenhocas, ouçm as dicas importantes deste nosso amigo, de como viverem disso. 
Não é fácil, mas se se empenharem, dá certo!


Making A Living As A Maker: Ep. 1 Finding The Perfect Product
Artfully Rogue

I make a living as a maker and would like to share what I've learned with anyone that is trying to jump off the 9 to 5 hamster wheel and start their own maker biz.
Keep in mind, there is so much information out there in the world, my way is not the only way by any means. It's what has worked for me. Thank you for taking the time to watch my video. I am a creator of things, a metal artist, a maker of stuff, a woodworker, a welder, and a bohemian traveler of the world. I hope to inspire, motivate, teach and be a part of the lives that seek to become creators of their own wonderful creations.

https://www.youtube.com/watch?v=EaGUTbpnTqw


Aqui vai uma página, com links para uma data de Projectos sobre Fundição feita em casa, para escolherem o que ais vos serve!
É bom.


Backyard Metal Casting and Homemade Forges
blkhawk

For thousands of years, man has worked metals. Although some of the technology to work metals is relatively recent, the initial human drive to create is still with us.

https://www.instructables.com/id/Backyard-Metal-Casting-and-Homemade-Forges/