Blog Posts

Mostrar mensagens com a etiqueta soldar. Mostrar todas as mensagens

quarta-feira, 11 de abril de 2018

Corte Laser, na Impressora 3D! E DLP acessível, Espelhos poderosos, 3D transparente, e soldardeira de bolso!

AVISO

Devido à cada vez maior Censura, muitas vezes descabida, da Facebook, apagarei a página Engenhocas.
E aproveitei para mudar o Link, que era, aparentemente, difícil de decorar. 


TOMEM NOTA DESTE NOVO ENDEREÇO,


https://gizmosandstuff.blogspot.pt/ 

E PASSEM PALAVRA!


Que tal, terem um Laser na Impressora 3D?
Esta é a proposta da Endurance Lasers, que capacita uma simples Impressora 3D a cortar e gravar, fazendo das vossas máquinas, multi-máquinas! 
Vem com um Teste de Calibração do Foco do Laser, e é uma muito boa ideia.
Vejam o Vídeo, abaixo:


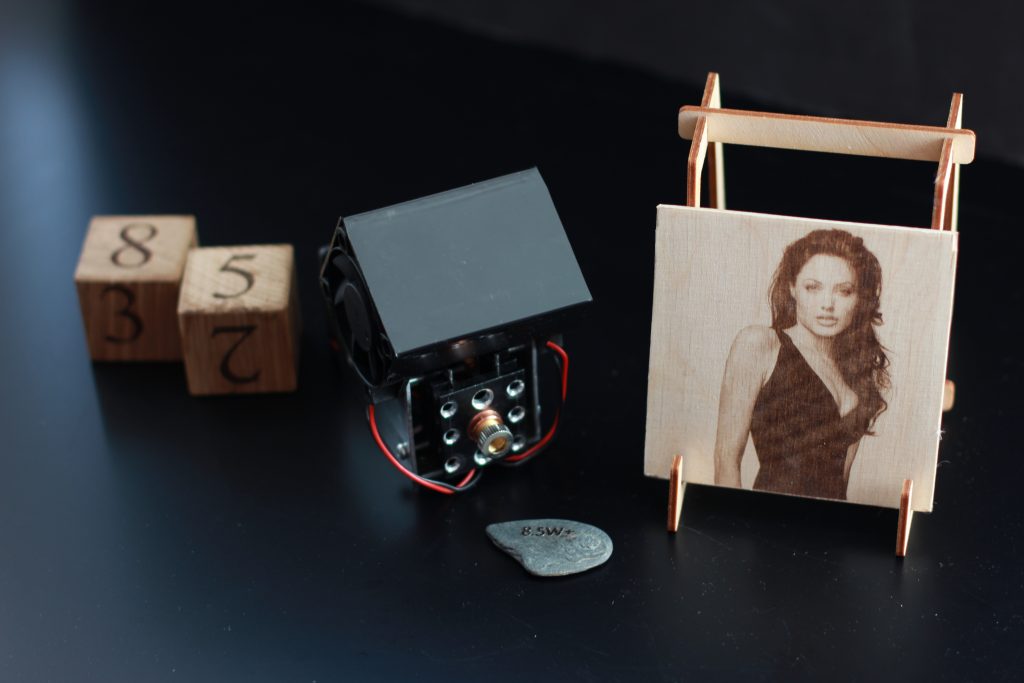
Get a discount as Endurance Lasers put metal engraving to the test
Beau Jackson

Endurance Lasers gives makers the ability to upgrade 3D printers, CNC routers and other DIY machines with multi tool functionality. By installing a laser diode, these machines become cutting tools and engravers, capable of writing on acrylic, wood, leather and metal, maximizing workshop productivity.
The lasers can be installed on any 3D printer or CNC machine to extend capabilities.
Read on for an exclusive discount.
The 8.5W+ laser, exclusively available to order from the company’s website, is the second most powerful diode in Endurance Laser’s arsenal. Providing “infinite continuous power,” the 8.5W is capable of writing on all manner of surfaces, from stone and wood to leather and sheet metal.
In a series of Endurance experiments, we see how the 8.5W+ makes short work of matte & hard steel, and glossy & composite aluminum.
https://3dprintingindustry.com/news/get-discount-endurance-lasers-put-metal-engraving-test-131135/


Não hajam dúvidas, a Impressão DLP é o melhor que há, em fidelidade ao Modelo 3D.

Este Modelo, até é melhor que os anteriores, porque em vez dum Laser a andar, usa uma Imagem por camada, e são camadas ínfimas, o que, claro, dá numa fineza de acabamento, de fazer chorar as pedras da calçada... E a menos de 500 Dólares!

Mas, menos de 500 Dólares, também significa um volume máximo de 11,5 x 6,5 x 15,5 Cm, e atenção, há uma cura do Objecto a fazer, e limpezas a executar, porque isto de resinas, é mesmo assim.


Anycubic Photon Review: A DLP 3D Printer For Less Than $500
Anatol Locker

Too good to be true? Not at all! Read our Anycubic Photon DLP 3D printer review and follow us on the journey from unboxing and assembly to the first prints.
As far as low-cost desktop DLP 3D printers go, the new Anycubic Photon DLP 3D Printer has emerged as one of the most appealing options on the market. Anycubic has a reputation for building reliable and affordable printers like the Anycubic i3 Mega FDM 3D printer. When it comes to the price, the Anycubic Photon is no exception – it’s one of the cheapest DLP 3D printers out there.
Don’t miss: 20 Best Resin (SLA/DLP) 3D Printers 2018
We recently got our hands on the Anycubic Photon, and decided to give it a test run. Although this isn’t a full-fledged review, we wanted to document our first experience with this unique 3D printer, as well as the unboxing and assembly process. We will continue to update this review as we get more familiar with this beastly little machine.
The Anycubic Photon DLP 3D printer is generating some serious buzz across the community, and for good reason. Priced right around $450, this machine is a potential game-changer for the SLA/DLP desktop 3D printing sector. But talk is cheap; we wanted to see this 3D printer in action.

https://all3dp.com/1/anycubic-photon-3d-printer-review/


Querem um Espelho para queimar coisas com a luz do Sol?
Muáháháhá!

Mas também pode servir para Telescópios de Reflexão, e o que mais for de Óptica, esta ideia fenomenal, de usar espelhos acessíveis, de Camião, que são convexos, e utilizar A PARTE DETRÁS, removendo a tinta protectora, para obter...

Um espelho Côncavo!
E como nessa parte, não há vidro, a potência de reflexão é ainda maior.
Muito bom. 


How To Make Solar Concentrating Mirrors (super HOT focal point)
NightHawkInLight

In this video I show how to convert inexpensive truck mirrors into powerful first surface solar concentrators. Check out my sponsor Brilliant for a really fun way to learn! https://www.Brilliant.org/NightHawk First surface mirrors are an extremely efficient way of concentrating solar energy, much more efficient for their size than a fresnel lens. This type of mirror is also essential for optical applications. Check out the video about making first surface mirrors over on GreenPowerScience: https://youtu.be/IaEaaeajCSI


Isto é muito, muito útil!
Objectos 3D que podem ser tão transparentes, que sirvam de LENTES?
As possiblilidades são infinitas. 
Como tudo está ligado entre si, isto de Lentes, só se produz com Impressão DLP...


Learn How to Make Your 3D Prints Truly Transparent
Pinshape Blog

3D printing continues to advance in its ability to create visually accurate prototypes, but most machines are still unable to produce optically clear parts. In this post, you’ll learn why 3D printers struggle to make objects clear straight off the build platform, and you’ll discover 3 techniques for making optically clear parts.

Why Aren’t 3D Prints Clear?
A smooth lake reflects surrounding objects, but when agitated the image warps and distorts. On a smaller scale, this is the effect that causes 3D prints made in a clear material to appear slightly opaque. Layers of a 3D print take on a slightly oval shape creating small gaps between layers that refract light and distort the image.

The above graphic from Taulman3D shows how light travels and bounces inside the layers of a 3D print. The purpose of the techniques you’ll learn today is to either add or subtract material from the print in order to flatten the layers and allow light to pass through without refraction.

https://pinshape.com/blog/learn-make-3d-prints-truly-transparent/


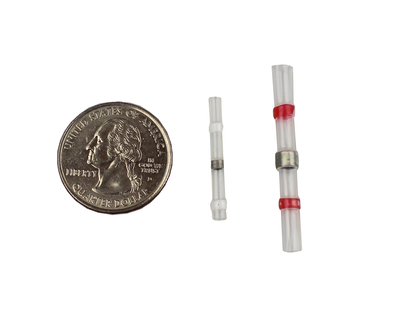
E para os Fabbers, os Entusiastas da Electrónica, e os Sucateiros de Ocasião, eis uma pequena caixinha para soldarem e des-soldarem em todo o lado...
É bom!


The Back Pocket Soldering Kit
Bean_MD

As a budding electronics enthusiasts, I made alot of things on my farm autonomous. With that came the problem that my soldering skill is a bit dodgy.
Recently I had to repair a few of these dodgy solders, which means I had to disassemble and take the part with me to the workshop.
This is a 10km + drive.
So as it is said, necessity is the mother of invention.
This is my kit I can drop in my back pocket, in my cabby hole, I even have one in my sun visor.

https://www.instructables.com/id/The-Back-Pocket-Soldering-Kit/


terça-feira, 5 de janeiro de 2016

Ferramental! E Libertar o Inventor, do Blender para a Impressão, e Técnicas de des-soldagem

Ferramentas, é a minha Praia! 
MUAÁHÁHÁHÁ!

Prós lados da Matinha, em Lisboa, encontrei esta Loja porreira, onde, para além dum mundo de Lubrificantes, para Maquinação e outros, e um sem-fim de produtos para a Indústria, encontrei estes dois achados, uma linha de ferramentas como deve de ser, mas a um preço impecável, e um Serrote de Fita que parece feito para os Engenhocas, porque é maneirinho, potente, MAS acessível às nossas bolsas!


Sobre nós 
A Fonseca Matos & Ferreira, Lda foi constituída e iniciou a sua actividade em 1979 através da comercialização de ferramentas e produtos de manutenção para os sectores industrial e automóvel. Em 1992 alargamos a nossa actividade para Angola com a abertura da nossa subsidiária Angoferraria-Ferramentas de Angola, Lda. situada em Luanda.
Em 1995 adquirimos a Euromáquinas - Sociedade internacional de máquinas e ferramentas, Lda. uma das mais antigas e prestigiadas importadoras e distribuidoras de máquinas - ferramentas no mercado Português, tanto em máquinas convencionais como em máquinas de comando numérico (CNC). 


Esta Marca de Impressoras 3D, DWS, vem-nos propor libertar o Inventor em todos nós... Tinha de figurar aqui! 
Impressão Profissional, para qualquer um, é o que eles prometem, em vários Materiais, e com um Software como deve de ser, ainda por cima. 
Vejam o Vídeo, gravado no MakerFaire de Roma:


XFAB® FEATURES
The first high-end 3D printer at a consumer price
PRINTING YOUR DREAMS
Turn materials into solid
Our patented technology can turn a much wider variety of materials into solid: acrylate resin, ABS, polypropylene, rigid opaque, transparent, rubber, castable wax and ceramic. 
Intelligent material changing 
Quick material change: intelligent cartridges,
no leakages, no need of handling liquids, no tray consumption costs. 


Neste simpático Post, a Sculpteo vem ensinar aos adeptos do blender como usar esse Programa para a Impressão 3D, o que é uma Dica bem a jeito...


Prepare your model for 3D printing with Blender 
This tutorial was made for Blender users with an interest in 3D printing. It covers the essential information for taking your 3D model and turning it into a 3D object using the free CAD software.
Through this tutorial, you will learn some of the best practices for modeling, correcting and exporting a 3D file for 3D printing with Blender 2.7. Specifically this tutorial covers the following points:
Modeling for a 3D print with Blender
Optimally exporting and analyzing your file for a 3D print
Correcting possible modeling problems
Blender is a free 3D modeling software which is optimized for 3D animation and rendering using polygonal modeling techniques. This tutorial is based off of version 2.7 of Blender - the most recent version of the software can be downloaded from the Blender website.
You don't need to be an expert in Blender or 3D modeling in order to understand this tutorial. However, it is important to understand some of the basic functionalities of the program as we will be covering the best practices to take your model from the program into a 3D printer. The basic functionalities of Blender will not be covered in this tutorial.


Soldar, é uma chatice!
Des-soldar, ainda é pior...
Pois aqui estão 9 maneiras diferentes de o fazer, sem estragar nada, de preferência, para Entusiastas e Sucateiros.


9 Different Desoldering Techniques

Proto G 
In this instructable, I'll show you 9 different methods for taking electronic components off of circuit boards. Whether you're repairing boards or salvaging parts, it's a necessary skill. 


sexta-feira, 4 de setembro de 2015

Shapesmith! E um Quadracóptero em Papel, soldar Alumínio sem Soldador, e marquem com um Isqueiro!


Do Grupo Impressora 3D Brasil, vem o nosso amigo Cláudio Luís Marques Sampaio dar-nos esta estupenda Dica, Shapesmith, um Programa 3D, paramétrico, e online!
Categoria!
Uma boa solução para imprimirem sem problemas.


Shapesmith 
Parametric, Open source, 3D modelling- in your browser 

Parametric
Shapesmith is parametric, so it's very quick and easy to modify your models. You can also use variables with expressions to quickly change models, like changing the radius of holes:
3D-print ready
Import STL models and edit them, and export your models to STL and print it on your 3D printer:
Browser-based
No install required - if you have a WebGL-capable browser you can use Shapesmith. Shapesmith is built with pure HTML5 and Javascript, and makes use of various new web technologies.
Open source
Shapesmith is completely open source under a permissable license (MIT). You don't have to worry about the hosted version disappearing, you can always run your own server. You can also run you own server in your school or business to keep your models private.
Shapesmith is on Github.
http://shapesmith.net/


Eis algo de igualmente fantástico, o vosso Quadracóptero em PAPEL! 
E com as Instrucções para construírem este, vem também um Link para um Site só dedicado a construír 'Cópteros em Papercraft!
É bom! 


PaperQuad DIY Quadcopter

YoseiI 
A few months back, my friend, Kevin, came up with the brilliant idea of melding the art of papercraft with his newfound interest in quadcopters. Naturally, being an engineer myself, I quickly fell into the rabbit-hole that is the multirotor hobby and together we began developing paper frames for our small micro-scale quads.
The basic idea went something like this: After flying the factory-built quads for a while, we began to get curious about altering the configuration -- what would longer arms do? What if we flipped some motors upside down and ran them backwards? What if we made a long and narrow quad? Short and wide? We figured that folding up some paper and gluing it together would be a great way to test these different configurations quickly and cheaply.
After some tinkering, we thought that this could actually become a great activity for kids of all ages (including distinctly adult-looking ones) -- it's inexpensive, offers endless possibilities for customization, and is incredibly fun! What's more, if the quadcopter crashes and breaks, you aren't dead in the water -- just recycle the old frame, print out a new one and you're off to the races again.
This Instructable is meant to be a getting-started guide to making paper quads. Feel free to share designs, knowhow, and let's see what comes out of it! Kevin and I have started a website dedicated to this project where we will post more PaperQuad-related content: PaperQuad.com 
http://www.instructables.com/id/PaperQuad-DIY-Quadcopter-Background/


O Alumínio é um Metal fácil de fundir, cortar e maquinar, mas um Pesadelo de soldar, ao que parece...
Mas se seguirem este Instructable, umas barritas e um bom Maçarico, resolvem-vos este problema bicudo, atenção, Malta das Impressoras, maior rigidez significa maior precisão na Impressão... 


How to "Weld" Aluminum Without a WelderDrunken Woodworker 
Using a propane torch and some aluminum brazing rods is a quick way to bonding aluminum without using a welder. It makes for a very strong bond and with a little practice can be done quickly with great looking results. 
http://www.instructables.com/id/How-to-Weld-Aluminum-Without-a-Welder/


E ficam a saber que com um Isqueiro Bic, também podem marcar, isto é, marcar a Ferro! 
Madeira, Couro, Plástico, etc, e tudo, apenas com esta Inovação bacana!


Make a Custom Bic Brander
JamesH76
In this Instructable I will show you how to 3D print your very own custom Branding Iron that snaps onto a Bic lighter!
You don't need a 3D printer, just an image, an image editing program like Pixlr and Shapeways.com to print your brand in real steel.
Disclaimer:
Yes, this is a branding iron, they get hot! Don't do anything stupid with one of these, like burn yourself or an animal! If you do, please don't blame me! :)
Second Disclaimer:
I am the designer of the branding iron, I 3D modeled the base file that your custom image gets extruded from on Shapeways, as the designer of the brand I get a bit of the profit for the sales on Shapeways ;) Don't hate me, your dollar is like a high five and makes my day more awesome :)


segunda-feira, 11 de maio de 2015

Soldar, sem solda? E um Computador a 9 Dólares(!), uma Injectora de Plástico para Fabbers, e Alívio para a Dor, mais uma Câmara de Infravermelhos

Eis como fazerem algo em Electrónica sem as chatices do Fumo e da Solda...
E ainda ficam com uma ligação à prova de àgua!
É bom!


Solder Sleeves
Solder, heat shrink and waterproof your splices in one operation.

This is the easiest way to make soldered splice in your wiring. It is our favorite way to extend the wires on stepper motors.
This part combines a low temperature solder ring inside a piece of clear heat shrink tubing. It also has rings of hot melt glue at each end. You strip each wire, insert one from each end and cross the stripped ends inside the solder ring. You then heat the tubing with a heat gun. The solder and glue melts and the tubing shrinks. You get a reliable, insulated, waterproof and soldered connection in one operation.
It is also great when you need to fan out one wire to several wires. This often happens when you have one ground terminal, but four wires coming to it. Place the four wires in one end and one in the other end.


Um Computador por 9 Dólares? 
Com ligação Wifi, e gestão de Bateria?
Sim, se só precisarem de computadorizar uma Engenhoca, ou terem um Smartphone ou Tablet feito à vossa medida, porque este liga-se a um Televisor, ou Écran de Smartphone, com Monitor é mais caro.


Next Thing Co. Releases “World’s First” $9 Computer
David Scheltema

Snuggly situated in an industrial section of Oakland, CA is Next Thing Co. a team of nine artists and engineers who are pursuing the dream of a lower cost single board computer. Today they’ve unveiled their progress on Kickstarter, offering a $9 development board called Chip.
The board is Open Hardware, runs a flavor of Debian Linux, and boasts a 1Ghz R8 ARM processor, 512MB of RAM, and 4GB of eMMC storage. It is more powerful than a Raspberry Pi B+ and equal to the BeagleBone Black in clock speed, RAM, and storage. Differentiating Chip from Beagle is its built-in WiFi, Bluetooth, and the ease in which it can be made portable, thanks to circuitry that handles battery operation.


Ter a vossa própria Fabriqueta na Garagem, passará certamente, mais cedo ou mais tarde, por terem uma Máquina de Injecção de Plástico, para os vossos Projectos.
Pois aqui vai uma que podem fazer em casa, baseado no Ilustre trabalho da casa Gingery:


Make Your Own Injection Molding Machine
John Hannon

Tried, true, and totally doable. Start cranking out solid thermoplastic parts.

Sometimes there’s a tool you want to buy, but you can’t justify the cost. In that case, why not make it? For me, a plastic injection molding machine fell into that category — and it turns out they’re not hard to make.
I wanted to make solid plastic parts for some of my amateur science experiments. There are a number of ways to make things out of plastic, each with its advantages and disadvantages. Often just cutting raw material to the desired shape works best. Some plastics can be cast by pouring a liquid resin with hardener into a mold (see “DIY Rotocaster,” Make: Volume 41). Vacuum forming works well for making things out of thin sheets of plastic (see “Kitchen Floor Vacuum Former,” Make: Volume 11). I considered making a 3D printer, but for the few plastic parts I envisioned needing, it wasn’t worth the time and money.
Plastic injection molding has been around since thermoplastics were invented. It’s a great way to make many copies of a part quickly, and what I like best is that it’s easy to reuse old plastic objects to make new ones.
So I built an injection molder based on the plans in Vincent R. Gingery’s book Secrets of Building a Plastic Injection Molding Machine. David Gingery could be considered a forerunner of the Maker Movement — he and his son Vincent have written a whole series of books on building tools for the machine shop.


E aqui vai mais uma Engenhoca para os que sofrem com as Dores, uma máquina que vos alivia o Sofrimento...


LumiWave: A Breakthrough for Injury & Pain Relief

Campaign Highlights
If you want to feel better every day; move better every moment and compete at the highest level, support this crowdfunding campaign. We need your help. 
Your contributions will jump start our new manufacturing process to reduce our costs –costs which we will pass on to you as lower pricing. For a limited time, pre-orders are offered at $199. That’s 60% off our current price.
Your Pain may be after skiing, running, competitions or workouts. 100 million of you experience chronic pain – all day, every day.  Your pain may be an ankle, knee or shoulder. Some of you may have back and neck pain. Your pain may be caused by athletics, auto or work related injuries. Or it could be the result of Arthritis, Osteoarthritis, Multiple sclerosis, Shingles or Nerve damage (neuropathy).


Eis a FLIR C2, uma Câmara de Infravermelhos de Bolso, para a Construcção Civil, mas é claro que os Ẽngenhocas a irão usar para uma Miríade de outros fins...


FLIR C2 Thermal Imaging Camera, Temperature Measurement Range: -10 → +150 °C

The FLIR C2 is the world’s first full-featured, pocket-sized thermal camera designed for building industry experts and contractors. C2 features FLIR's unique MSX® that adds key details from the onboard visible light camera to the entire infrared image in real time.

IR Sensor: 80 ´ 60 (4,800 measurement pixels)
Field of View: 41° x 31°
3" Display (Color) 320 x 240 pixels
Auto Orientation
Touch Screen
Object temperature range: -10°C to +150°C (14 to 302°F)
Storage Media: Internal memory stores at least 500 sets of images
Image file format: Standard JPEG, 14-bit measurement data included
Digital Camera: 640 x 480 pixels
Size (L x W x H): 125 x 80 x 24 mm (4.9 x 3.1 x 0.94 in.)
Weight: 0.13 kg
Supplied with

Infrared camera, battery (inside camera), lanyard, power supply/charger with EU, UK, US, CN and Australian plugs, printed getting started guide, USB memory stick with documentation, USB cable.

    Application    Building
    Best Temperature Measurement Accuracy    ±2 °C
    Detector Resolution    80 x 60pixel
    Dimensions    125 x 80 x 24mm
    Display Resolution    320 x 240pixel
    Display Size    3in
    Field of View    41 x 31°
    Focus Type    Fixed
    Height    24mm
    Horizontal Detector Resolution    80pixel
    Horizontal Display Resolution    320pixel
    Horizontal Field of View    41°
    Length    125mm
    Maximum Temperature Measurement    +150 °C
    Minimum Focus    0.15 (Thermal) m, 1 (MSX) m
    Model Number p    FLIR C2
    Refresh Rate    9Hz
    Storage Media    Internal Storage
    Temperature Measurement Range    -10 → +150 °C
    Thermal Sensitivity    <0 .1="" br="">    Vertical Detector Resolution    60pixel
    Vertical Display Resolution    240pixel
    Vertical Field of View    31°
    Visual Camera    Yes
    Weight    0.13kg
    Width    80mm


segunda-feira, 2 de março de 2015

Papercrete! E a Turbina 3D, ligar Micro-controladores pelo telefone, Fita de carbono, soldar sem electricidade, e um Gancho à maneira

Papercrete!
Uma mistura de Polpa de Papel e Cimento, e faz-se de tudo um pouco com este Material fácilmente moldável...
Facilita a vida, quando se faz, por exemplo, uma Oficina, no Quintal e metade do Material é Papel que iria pró lixo.
Tomem nota da Maquineta de que se fala neste Artigo embaixo, porque acho que se podem fazer muitas mais coisas, com essagigajoga, sabe-se lá se não se usa para mil e um fins no Quintal, como preparar a uva pró Morangueiro, e transformar a Mata em lenha:


Everything You Need To Know About Papercrete

Expert Prepper 

For all those who aren’t much familiar with it, Papercrete, in essence, is a type of fibrous cement (cement with a certain proportion of fiber in it). Because of its unique composition, papercrete is lightweight and strong, hence a perfect fit for a multitude of tasks. But more on that later – let’s first begin with,
The Ingredients in Papercrete

The ingredients that make papercrete can vary wildly based on what it’ll be used for. From cotton, wool and hemp to paper (wood fiber), flax and jute, different fibers can be used to make papercrete. For example, papercretes for building the walls of a house are usually composed of basic formula of cement and plastic. However, for any load bearing platforms or walls, a small amount of sand can boost compressive strength even further.

The addition of fiber to the cement results in a much stronger mixture – more or less the same way as the addition of fiber fibers boost the strength of fiberglass.


Já apareceu numa data de lugares, mas para os que ainda não viram, eis uma Turbina impressa em 3D!


Researchers create world's first 3D-printed jet engines

Ben Coxworth 

Working with colleagues from Deakin University and CSIRO (Commonwealth Scientific and Industrial Research Organisation), researchers from Australia's Monash University have created the world's first 3D-printed jet engine. While they were at it, they created the world's second one, too. One of them is currently on display at the International Air Show in Avalon, Australia, while the other can be seen at the headquarters of French aerospace company Microturbo, in Toulouse.


E se sempre quizeram ligar o Smartphone ao RaspberryPi, ou as vossa maquinetas entre elas, ligação 2G ou 3G, ora cá está, podem agora, com isto:


Cellular Connectivity Comes to Microcontrollers With The Spark Electron

David Scheltema

Meet Electron from Spark, the new board that puts GSM cellular connectivity directly on the microcontroller.
With its onboard cellular antenna, this diminutive board will offer a huge range of deployment options and alleviate the hassle of using a custom cellular breakout board with your micro controller projects. They’re offering two versions, with either 2G or 3G connectivity.
It thankfully also reduces the frustration of dealing with mobile carriers — more on that in a moment.


A Fita de Fibra de carbono serve para uma data de usos invulgares e vejam só estes 6 usos, para sobreviver no Mato:


Carbon tape to survive. 6 in 1

Shenzhen 

What is your the minimum kit to survive? Maybe a big knife and reliable lighter? We found one more thing - carbon fiber tape.
Using one piece of carbon tape you can make:
1. Water filter
2. Gas-mask
3. Torch
4. Oil lamp or stove
5. Care of open wounds and burns
6. Fiery sign
------------------------
6 in 1
I really love this stuff!


Eis como soldar mesmo no meio dum Apagão, ou no descampado, fora da Rede Elèctrica!
É bem pensado!


How to Solder Without Electricity (or a Soldering Iron)
DIY Hacks and How Tos

Soldering is a valuable skill. There are a lot of situations where the ability to repair or modify electronics can really save the day. But most people don't carry a soldering iron around with them. And even if you did have a soldering iron, there is a good chance that you might not have access to electricity.
So today I am going to show you how to solder using random objects that you might find lying around (and a little bit of solder).


E eis um Gancho de Génio, agarra obectos no chão, e serve para apanhar de tudo um pouco, ou atirar a Àrvores e telhados:


High Performance Grappling Hook
Mrballeng

We carry a lot of different things. Sometimes we drop them. Instead of leaving your everyday carry items out of reach, get your grappling hook!
This is the sequel to the original grappling hook I posted. The first one worked great but didn't stow so well. Here's what I'm working on now. It's a cross between a mechanical claw and grappling hook. When it touches down, gravity pushes the jaws open. Lifting it closes the jaws around your prize. Now I feel better about all the quarters I've lost in claw machines.
This is funding on Kickstarter right now of you'd like check it out. And for all you DIY folks, once the project closes I'll attach the file in step 4.