
Blog Posts

Mostrar mensagens com a etiqueta Impressoras 3d. Mostrar todas as mensagens

quarta-feira, 18 de setembro de 2019

A Slide Rule! A melhor impressão em PETG, Imprimir em 3D, MESMO(!), uma 3 em 1 para a serra, e uma Peça para a carpintaria, impressa 3D!

Se precisam deste Instrumento de Cálculo, a Régua de cálculo pessoal, versão Circular já o podem fazer, com um humilde CD!
É bom!


CIRCULAR CD SLIDE RULE

cparedes2302  
Hello Everyone!
Keeping it up with my math helping tools and after I finished my straight Cardboard Slide Rule, I decided to make another slide rule but of much easier and fast construction. I decided to go for a simple circular slide rule. Just as the previous slide rule, the intention is to have middle school students built their own and use it to get numeric ability. I know there are several apps that emulate a straight and a circular slide rule, but if you are using your phone it would be much easier to use the calculator instead of the slide rule. My dream is to have the students “thinking and reasoning” again instead of relying so strongly on technology.
The advantages of a circular slide rule is that the computing scales (C and D) of a 9.5 cm (3 3/4”) diameter tool are equivalent to a 30 cm (almost 12”) straight slide rule! So you can get a more accurate reading! The disadvantage is that as your scale is located closer to the center of the Slide Rule, the scale becomes very short and difficult to read. 


O Petg, enquanto Filamento, está a ser muito mais utilizado, por isso, vai como o imprimir o melhor possível:
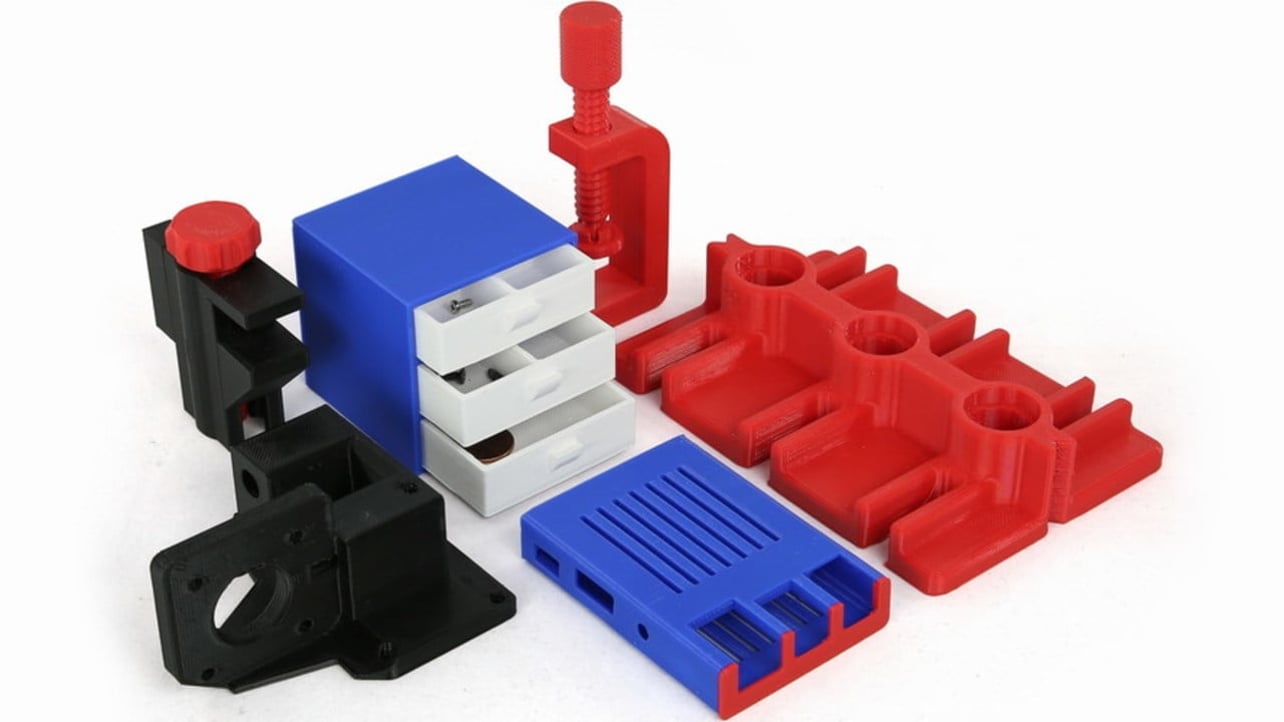


PETG Print Settings – How to Find the Best Settings for PETGMiroslav Sarcevic  
PETG is short for polyethylene terephthalate glycol-modified. That could mean something to you if you’re into chemistry, but for the rest of us, it’s simply the most used type of plastic on the planet (in the form of PET). You can find it in plastic bottles, food containers, packaging, toys, kitchen utensils, and more common plastic products. In addition, this recyclable plastic can be injection molded, blow-molded, thermoformed, bent, cut, and in recent years, 3D printed.
We won’t go into the details of PETG chemistry in this article but will instead concentrate on 3D printing with it. Before we dive into printing tips, here are a few of the material’s characteristics:
  • Glass transition temperature:  80 °C
  • Density: 1.27 g/cm3 (which is higher than PLA and ABS)
  • Resistant against most chemicals (such as acids, alkali, and solvents)
https://all3dp.com/2/petg-print-settings-how-to-find-the-best-settings-for-petg


Ao contrário das Fresas 3D, as Impressoras não imprimem em 3D MESMO, porque o Extrudor só move uma camada de cada vez, toda ela, sem a possibilidade de estrudar, e descer, e subir, num acompanhamento duma superfície curvada.
Mas está-se já a começar a fazer REAL Impressora, já, já!

Fantástico!


Achieve true 3D printing with non planar slicing

Teaching Tech
This is the most interesting thing I’ve done with my 3D printer in some time. Instead of printing in a series of 2D planes stacked up to form a 3D shape (2.5D), this non planar technique creates geometry with true 3D tool paths that can eliminate the steps often seen on shallow surfaces. Based on the amazing Masters Thesis of Daniel Ahlers and the University of Hamburg, this development can be tried yourself if you are willing to put in some time to setting it up.
In this video I’ll lead you through step by step on how to setup a virtual Linux machine on your PC, compile the custom version of Slic3r and then share with you my results. The future is bright and I thank people like Daniel Ahlers  and Moritz Walter for leading the way.


E cá vai esta 3 em 1 para a Serra Circular, que vos vai ampliar a Ferramenta, com estes 3 Cortes adicionais, tão úteis, vejam o vídeo!


How to Make a Three in One Table Saw Sled || Taper Cuts- Jointer Sled - Miter Cuts
penaltyboxwoodshop


This video shows you step by step on how to build a three in one table saw sled. With this sled you can make taper cuts for table legs, edge joint wide boards, and make 45 degree cuts for projects like making picture frames. This sled can be helpful to any skill level woodworker!

https://www.instructables.com/id/Three-in-One-Table-Saw-Sled-Taper-Cuts-Jointer-Sle/


Mais Carpintaria, agora, uma coisa feita nas Impressoras 3D, está tudo inter-ligado, no mundo da Engenhocas...
Não quero que vos falte nada!


CNC Clamps 2mm (0.08 Inch) to 18mm (0.7 Inch)PatrickH101 
Clamps for holding down your workpiece on a cnc router. The
clamps are designed for holding down materials with a thickness of 2mm to 18 mm.
I designed the clamp using Fusion 360.
There are 4 different sizes for the bolt that goes through, M5, M6 or 1/4 inch and for a special request M8 (The M8 version is not tested but should work though the sliding distance is a lot shorter).
Best is to use a washer on top.
The actual foot to hold your workpiece can rotate to adjust to the thickness of your material. 
https://www.instructables.com/id/CNC-Clamps-2mm-to-18mm/


terça-feira, 9 de abril de 2019

Ganda Impressora! E uma Laser CNC, uma Cana de Pesca portátil(!), Moldagem sem falhas,

O nosso amigo Angus traz-nos esta Bizarma desta Impressora, da Hungria, País surpreendente, e há muitas boas razões para o entusiasmo dele...
E para o meu entusiasmo, também!
Maravilha.


CraftBot 3 3D Printer Review - Heavy Duty IDEX Beast
Maker's Muse

Today we're checking out the CraftBot 3! A huge, heavily built 3D Printer with Independent Dual Extrusion (IDEX) from CraftUnique, Hungary.


Da enigmática Empresa J&R Technology vem-nos este vídeo duma Laser CNC de Fibra, caso sério, pois corta METAL!
Boa!
O link para a Empresa está no vídeo:


Fiber Metal Cutting Demo Video from J&R
J&R Technology

J&R specialized in design, R&D and production of CO2&fiber laser machines for cutting, engraving, and marking.

https://www.youtube.com/watch?v=kaEVkuYJVi0&t=6s


Algo de fantástico, uma Cana de pesca Portátil, que podem imprimir, nas vossas Impressoras, para exibir à Malta...


PortaReel Portable Fishing Pole
MechEngineerMike

This is our originally designed "PortaReel" Portable Fishing Pole! Its the smallest full function fishing rod available, a super useful tool to add to your fishing toolbox!


Isto é importantíssimo!
Tanto pela Técnica de produdcção de excelentes peças de fundição usando vácuo;
Quanto pela Cera de moldagem, que é mesmo superior;
Como, até, pela própria BOMBA DE VÁCUO que pode servir para N engenhoquices diferentes!
Fenomenal.


EASY build Vacuum Casting machine system for Lost Wax / PLA Casting - DIY chamber & Pump : lwc #6
VegOilGuy

Vacuum casting machines are expensive. But can you make one? YES… here’s a easy, simple construction, low cost vacuum arrangement to assist with you lost wax or lost PLA casting. Many of the parts you may already have lying around and the rest are cheap as chips. Building a vacuum system has literally saved me thousands and just as importantly it’s dramatically improved the quality of my metal castings… beautiful, clear and precise details matching exactly the original wax pattern, with no pockets, no porosity and no sand. This really is a cheap and simple solution to better lost wax casting!

https://www.youtube.com/watch?v=EGNnH_xbjR4


Só coisas boas!
Agora é esta pequena maravilha de Fresa CNC, da qual, que podem Imprimir muitas das partes!
Toca a fazer uma, e mais nada!


DIY 3D Printed Dremel CNC
Nikus

When I got my first 3D printer I was extremely happy with all the new possibilities to create things but after some time I noticed the limitations of 3D printing. Plastic is easy to melt, sometimes it's not mechanically resistant enough and most importantly sometimes doesn't look good. Don't take me wrong here, I love 3D printing and I like plastic (except plastic waste) but there are things that look, work or feel way better when made out of nonplastic material. Imagine all your furniture made out of plastic. Sometimes I prefer wood, when I need strength, metal (mostly aluminum) is a way to go. That's where CNC milling machines are used. Usually, the cost of such machine is really high, most of the hobbyist, small makers can't afford such expensive equipment. That's why the idea of building my own CNC machine sparked in my head.


E terminamos por hoje, com esta ideia Estratosférica, atenção, malta das Universidades, como fazerem os vossos próprios Balões Estratosféricos, para o bem da CIÊNCIA!
MUÁHÁHÁHÁHÁHÁ!


How to Make a Picoballoon
Jakub_Nagy

What is a picoballoon and why would I want to build it?! I hear you ask. Let me explain. You all probably know what a HAB (High Altitude Balloon) is. It's a bunch of weird electronics stuff connected to a balloon. There are soooo many tutorials regarding HABs here on Instructables.
BUT, and that's a very big BUT what they don't tell you most times in the tutorial is the cost of the filling gas. Now, you can build a decent HAB tracker under 50€, but if it weighs 200g (which is a pretty optimistic guess with the batteries, cameras, etc.) the helium to fill the balloon can cost you 200€ or more, which is just too much for many makers like me.
So, as you can guess, picoballoons solve this problem by just not being bulky and heavy. Picoballoon is just a word for a light HAB. Light, what do I mean by light? In general, picoballoons are lighter than 20g. Now, just imagine that a processor, transmitter, a PCB, GPS, antennas, a solar panel and also a battery with a mass same as a disposable coffee cup or a spoon. Isn't that just insane?


sábado, 20 de janeiro de 2018

DIY Nintendo! E uma Bancada/CNC(!), uma Impressora 3D feita com corte Laser, Bender, e cortar com uma Lata!

Já era tempo da Nintendo criar algo de mais conducente à Criatividade!
Podem, agora, pôr os Miúdos a contruir coisas mesmo no Mundo Real, com Cartão pré-cortado, e que podem colorir...
Mas os mais Engenhocas vão usar a Electrónica para cortar e colorir coisas feitas por ELES!


Nintendo Labo Lets You Build DIY Cardboard Creations
Anatol Locker

Nintendo has always been good for surprises. Today, they are presenting “Nintendo Labo”, a gaming system that combines the fun of making things with playing video games.
”Nintendo Labo” will be a series of DIY kits you made mostly from cardboard. In the box, you’ll find preconfigured cardboard sheets, strings, rubber bands, stickers and a digital assembly guide. Your goal is to piece together the creations first and then bring them to life via the Nintendo Joy-cons.
They are crucial to Nintendo Labo: The interplay between the toys and the game console can only be done due to the Joy-Cons. The controllers are mounted to the cardboard projects; they pick up movement by their sensors and send the data to the console.

https://all3dp.com/nintendo-labo-lets-build-diy-cardboard-creations/


Se têem pouco espaço em casa, e ou têem uma Bancada de Trabalho, ou uma mesa CNC...
Podem agora ter AMBAS!
É só virar a mesa, e já está.
Maravilha. 


Flip-Top CNC Table
JON-A-TRON

Space is expensive, space saving is not. With this table in my garage, I have a 30 square foot work table and on the under side, a 33" X 33" Shapoko XXL CNC machine when I need it.
The CNC machine is screwed to the underside of the table top, which is attached to two side shelves with shafts and bearings. Four set screws keep the table rigid when it's in either position.

https://www.instructables.com/id/Flip-Top-CNC-Table/


Querem uma Impressora 3D?
Comprem as Placas de Acrílico, e arranjar as partes restantes, e têem a vossa Impressora, por muito menos:


Laminated 3D Printer (from Laser Cut Parts Only)
Core3D

When I wanted to build my own first printer, I of course went with the Prusa I3 design. I joined a Makerspace so I could print the components to make it.
Turns out, Makerspace 3D printers are fickle and down an awful lot. So instead of printing a 3D printer I decided to Laser cut my first printer. In effect I’m using the laminate printer method to create an FDM printer.
The embedded video will give you an impression of what components are made up of.
You can download the entire model at: https://grabcad.com/library/laminated-prusa-i3-printer-1
All components can be laser cut using 12x28 inch Acrylic sheet (3mm thick).
In this instructable I will not go into the wiring of the Ramp 1.4 setup but instead focus on Printer frame and mechanics.

https://www.instructables.com/id/Laminated-Prusa-I3-from-Laser-Cut-Parts-Only/


Poder dobrar Tubo cria uma infinidade de possibilidades para Estruturas e o que mais, e por isso, com esta simplicíssima Gigajoga, já podem criar muitas mais Engenhocas:


Tube Bender
lecgo

I would have liked it to make a new seat for my recumbent bicycle and for it was necessary some aluminium tubes and to bend those on proper shape. In our town I have not found a place to bend some tubes and I have decided to make my own tube bender for this work.


É preciso ter Lata!
Literalmente. 
Eis uma solução de improviso que pode-vos algum dia poupar a muita dor-de-cabeça, com esta serra Craniana (Hé-hé! Trocadilho.) feita com uma simples lata de conserva:


Tin Can Hole Saw
ShakeTheFuture

I needed a large hole saw for one of my projects. I already had a smaller hole saw, therefore I did not want to buy another one....?
You see, a hole saw is not something I use very often. Last time I bought a hole saw for around 10 - 15 USD only to used it once or twice.
I did not want to spend another 15 USD for a tool that will not be used.
In this Instructable, I demonstrate a way to make a hole saw out of a tin can.
It can cut plastic, acrylic and drywall.


quarta-feira, 10 de janeiro de 2018

Reprap.pt! E um Laptop Steampunk(!), YouMagine & uma peça 3D grátis, Pinterest tem how-tos, e Filamento ASA

Sou um Engenhocas feliz, já posso ir comprar N tipos de Impressoras 3D, filamento e acessórios, a uma LOJA física, não uma Roleta Russa dum Site online, e o que é melhor, uma loja dedicada só a isso mesmo, com malta que sabe o que vende.

É a Reprap.pt, do nosso amigo Pedro Emanuel, no Centro Comercial do Cacém, 2º Piso, loja 2.02, e assim, dá gosto.
Claro, podem sempre ver o que lá está, e encomendar pela Net, Link acima, e eles enviam pelo Correio, mas eu quiz ir lá, mesmo...
E valeu a pena ir ao Cacém num dia de chuva.


O homem da Idéia:
3D é que é...

reprap.pt - Quem Somos?
 

Esta página foi inaugurada por Pedro Emanuel - atualmente docente de multimédia e administrador da projetos3d.
Após uma visita à 3D Print Show 2014 no Reino Unido constatei que a maioria das impressoras 3D comerciais não são muito diferentes da que Adrian Bowyer inventou. A maioria funciona com o mesmo sitema de "Fused Filament Fabrication" (FFF).
Ao perceber isto decidi estudar o processo e montar uma impressora de raíz por mim próprio.
A criação desta página advém de uma série de dificuldades que tive de ultrapassar para encontrar algumas peças necessárias para montar a impressora 3D em Portugal.
Após uma série de estudos, decidi partilhá-los via web e foi desta forma que esta página surgiu- para todos aqueles que pretendam montar uma impressora 3D em português!
Neste site além de expor o processo de montagem também disponibilizo as peças necessárias tendo o valor das mesmas, a finalidade de ajudar no melhoramento deste projeto em Portugal. Pode também participar neste melhoramento submetendo as suas sugestões de melhoramento da página para o mail@reprap.pt


https://reprap.pt/


Fazer um Laptop dum Raspberry Pi é bom.
E fazê-lo Strampunk, é òptimo!
Eis aqui está como opodem fazer:


Steampunk Raspberry Pi Laptop
phrazelle

This was a really fun project. I wanted to make a unique backup computer for my girlfriend's birthday and decided to run with a Raspberry Pi-based system because her main needs are internet and word processing. I've seen a lot of variations on Pi laptops, but I wanted to make something unique. Steampunk seemed the way to go and I'm glad I chose that direction!

https://www.instructables.com/id/Steampunk-Raspberry-Pi-Laptop/


Cá vai algo grátis deste vosso amigo, eu, uma peça 3D que podem descarregar, deste Bacano Site, Youmagine, onde podem pôr também as vossas criações:


É baseado nesta peça que une um tubo de alumínio a uma vatera do mesmo material, vem duma dessas armações para secar roupa, mas fácilmente pode ser usado para as vossas armações, e engenhocas, em vários tamanhos:


 É só descarregar do Link embaixo:

Tube end connector
edgarinventor
 
Attribution
Junked stuff as in the photo, gave me the idea

A 3D part to connect tubes and rods or bolts, to make assemblages with cheap tubing, saving a lot of 3D printing.

https://www.youmagine.com/designs/tube-end-connector


No Pinterest, também há How-tos!
À maneira do Pinteres, uma série de imagens que rolam para baixo, mas dá para ver bem como se faz...
Por exemplo, vão ao Link deste impecável Rocket Stove:


Rocket Stove

https://www.pinterest.pt/pin/133067363973584129/


Este novo, ou antes, pouco conhecido Filamento, o ASA, é mais ou menos como o ABS...
Mas sobrevive melhor às condições do meio ambiente, ou seja, não amarelece tão depressa ao Sol.
Mas tem truques, e o Matterhackers explica-o, a seguir.


How To Succeed When 3D Printing With ASA Filament
Alec Richter

For most people, ASA filament is relatively unheard of within the 3D printing community. While is may not be too common, it’s an excellent material when you need to 3D print something that’s intended for outdoor use, like a planter, garden gnome, or for any random outdoor fixture. ASA is very similar to ABS filament, and prints about the same too, but what it holds over ABS is that white ASA takes a lot longer to start yellowing in the sun or to start deteriorating and losing its strength. If you’ve never printed with ABS or ASA before, there’s a couple tips and tricks you want to know before you get started, and with this guide, you’ll be printing with ASA 3d printing filament in no time.

https://www.matterhackers.com/articles/how-to-succeed-when-3d-printing-with-asa-filament


sexta-feira, 7 de abril de 2017

Imprimir A CORES, na vossa Impressora! E o Zero Terninal, tricotar a 3D(!), um Sistema de Segurança Pi, e rodízios retractáveis!

Uma das tais ideias que são simples...
Mas só DEPOIS de se lá chegar!
Dica de Helga Pushkina:
Imprimir a cores, multi-materiais, numa só cabeça de Impressão, sim, sem mais do que uma Cabeça de Impressão, com a Impressora que já compraram?

Fácil... 
Se se cortar, e enviar, por sequência, de N Bobimas de filamentos diferentes, uma série de segmentos, conforme a impressão decorre!
Tempo para levar a mão à testa e dizer, "porque é que eu não pensei nisto?"


Palette takes up to four filaments and combines them into a single filament strand. This strand is then fed to your printer, enabling your one extruder printer to create multi-filament prints! 

HOW IT WORKS

  • Drive: Palette’s all-metal drive systems, inspired by those on industrial FDM machines, accurately controls filament to ensure the right lengths are driven from each input.
  • Cut: A rotary cutter system slices filament to ensure a clean, low-resistance cut, time after time.
  • Connect: Palette’s patent-pending splicing system connects filaments together end-to-end before passing them through a machined Teflon channel and splicing them together.
  • Cool: Combining both active and passive cooling systems, your newly spliced filament is re-hardened to ensure it keeps tight dimensions before being passed to your printer.
  • Calibrate: Our patent-pending synchronization systems continually monitor and adjust for filament usage, allowing Palette to modify filament lengths to ensure perfect calibration over thousands of feet.
https://www.mosaicmanufacturing.com/


Para os Geeks e Coders, ora aqui está um belo dum Projecto a seguir, acessível, e um Computador portátil por mérito próprio, com Linux lá dentro:


Zero Terminal is a Tiny Linux PC in a 3D Printed Case
Bulent Yusuf 
The Raspberry Pi Zero W is a computer with wifi and Bluetooth that’s the size of a stick of gum. It’s cheap, cheerful, and staggeringly significant in democratizing computing. But you still need to hook it up to a monitor and keyboard to make use of it.
Enter the Zero Terminal, created by a mysterious character known only as “Node”. This homemade project combines the Pi Zero W with a slide-out QWERTY keyboard, touchscreen display, and a 3D printed shell. The result? A small, all-in-one computer that’s both portable and usable.
The PC runs stock Raspbian, which is a Linux operating system for the Raspberry Pi. The limited processing power of the Zero W means operations like running a web browser are slower than molasses. For basic tasks like working in the command line, meanwhile, or even word processing and running games in an emulator, the Zero Terminal should be adequate. 
https://all3dp.com/zero-terminal/


Mais uma ideia insólita, tricotar em 3D!
Porque pode tricotar em CNC, de forma a imprimir uma Camisola, por exemplo, e não só linearmente.
Vai ter futuro...


Ready-to-knit meets ready-to-wear: Kniterate is the new 3D printer for knitwear
Julia

Kniterate, the 3D printer for Knitwear, has taken Kickstarter by storm with its new crowd-funding campaign. The digital knitting machine, which first crossed our radar back in June 2016, has recently resurfaced, catching the eye of design bloggers, knitters, and knitwear enthusiasts alike. And all the buzz may be just what Kniterate needs to hit the market: with almost $250,000 already pledged, the Kickstarter campaign has more than doubled its initial goal of $100,000.

http://www.3ders.org/articles/20170403-ready-to-knit-meets-ready-to-wear-kniterate-is-the-new-3d-printer-for-knitwear.html


E se já estão sem mais ideias sobre o que hão-de fazer com um Raspberry Pi, que tal, um Sisteme de segurança para as vossas casas?


R-PiAlerts: Build a WiFi Based Security System With Raspberry Pis

imjasonc  
While working at your desk, suddenly you hear a distant noise. Did someone just come home? My car is parked in front of my house, did someone break into my car? Don't you wish you got notification on your phone or at your desk so you can decide whether or not to investigate? Well question no more! R-PiAlerts is here!
What is R-PiAlerts?
R-PiAlerts is a Raspberry Pi3 based security system built around Firebase's Cloud. If movement is detected, the system will notify the user of a potential break-in with a text message and a blinking LED display (silent visual alarm of sorts). Once user receives a notification, he or she can investigate. All detected movement will be logged to the Firebase database. Besides viewing the movement log on a web browser, the user can also access the movement log via an iOS app. I decided to build this due to the recent rise in break-ins to both vehicles and homes around my area. 


...E termina-se com este Projecto, que vos permite construírem os vosso próprios rodízios retractáveis, para mesas que podem re-colocar em qualquer parte, mas que ficam fixas, quando no sítio que querem, mas também podem apreciar um pouco da metodologia que este nosso amigo usa para fazer estas e outras Engenhocas:


How to Make Retractable Casters!

Marsh  
Like many makers, I have a lot of everything except space. To make things more accessible, I put everything on wheels. My tablesaw was a real problem until I saw retractable casters on a work bench. Once I saw how easy they were to make, my mission was clear. 


3D, auto-suficiência, faça você mesmo, faz você mesmo, home made, fabricação, fabbing, Impressoras 3d, raspberry pi, instructables, tecnologia,