
Dica de Paulo Costa, através dos nossos amigos da DIGI-FAB USP, eis Codeable Objects, de Jennifer Jacobs, para fazerem Atrefactos usando Computação Geométrica, para adicionarem estructuras à vossa Impressão 3D:

Codeable Objects
Codeable Objects is a library for Processing that enables novice coders, designers and artists to rapidly design, customize and construct artifacts using geometric computation and digital fabrication. The programming methods provided by the library allow the user to program a variety of structures and designs with simple code and geometry. When the user compiles their code, the software outputs tool paths based on their specifications, which can be used in conjunction with digital fabrication tools to build their object.The first case study for the Codeable Objects library was conducted with a set of methods that facilitated the creation of a laser cut lamp. To test the library, I held a workshop at the MIT Media Lab. Over the course of a day, participants used the library to design, and construct lamps of their own. All of the lamps displayed in the images were created by people in the workshop.
Um Instructable para Fabbers, Engenhocas, e fâs do Arduino, eis uma Scanner 3D, feita usando Lego Technik, um Stepper, e o tal Arduino:

Let's cook: 3D scanner based on Arduino and ProcessingEver wonder of copypaste method, usable in real life, not only in virtual reality? Me too. It is 21th century, and those are nearer than most of all can imagine! This is possible thank to 3d scanners and printers. So let's try to scan something!

Eis, apresentado pelo Blog da Shapeways, uma ideia que eu também tive, e falei dela aqui, algumas vezes, usar um pantógrafo 3D, para reproduzin N vezes um Original feito dum Obecto Impresso em 3D...
E numa Figurina absolutamente... Re-vigorante!

3D Printing Reinvigorating Wood Sculpture
We get to see a lot of amazing uses for 3D printing here at Shapeways, but this technique is new to me! Ben Godi from Italian company 3D Wood shares a really interesting technique that combines 3D printing and traditional wood turning.In his words...Hi I'm Ben and I would like to share a production process I have developed this year, together with a local wood carving company 3D Wood. We already use this production pipeline daily now, because it has so many advantages and Shapeways plays a major role! (how could it be otherwise!) I'm going to explain the steps with the help of two models that are for sale on my website.http://www.shapeways.com/blog/archives/1800-3D-Printing-Reinvigorating-Wood-Sculpture.html
Muáháháháhá! O sistema contraptor oferece-nos esta pequena gema de Vídeo, para além, é claro, de toda uma discussão e dados sobre um Mini CNC feito com as suas peças... É muito bom!
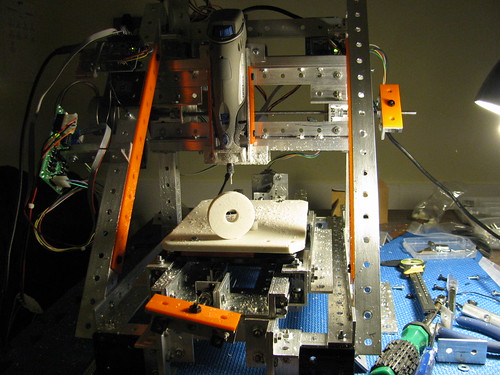
Mini CNC case studyAlbanetcThis is what I made tonight. This is just a wheel. I wanted to test how it would come out before cutting the inertial damper wheels for steppers. It took about 10 minutes to cut, using tungsten carbide bit, speed setting 2, pass depth of 0.02" and feedrate of 12 IPM. I got these parameters from earlier mini router experiments/tests.
E como está o que os Especialistas chamam de... Frio comó caraças, aprendam como instalar uma Sopradora de Neve, nos vossos Tractores, nest caso o popular Tractor Kubota!

Installing snowblower on Kubota BX tractorFist snow of the year this morning and more is forecast for tomorrow so I got the snowblower on just in time. This rear mounted Kubota snowblower does a good job clearing snow but getting it installed is always a bit of a challenge, especially as it's something done just once a year so you don't get much opportunity to develop smooth installation techniques.
I stored the snowblower and 3-point hitch parts under a tarp all summer, but even with that, a lot of oil and grease evaporated and some rust set in. I live in a damp climate so that doesn't help any.
The photo above shows the snowblower fully installed, adjusted and lubricated.
E para que os Canitos não vos arranhem a porta toda, eis uma ideia simples e eficaz, para poupar a Porta:

Sliding Dog Gate Protects Door from ScratchesAnyone with a dog knows that if you let them out to do their business you better be waiting by the door when they want to come back in. If you're not, it's a sure bet that they will be scratching at the door trying to get your attention and, the bigger the dog, the greater the damage. This instructable is a classic example of my "closing the barn door after the horse got out" but, hopefully, it will save your door before it meets the same fate as mine.
Sem comentários:
Enviar um comentário