Blog Posts

quinta-feira, 20 de maio de 2021

Jactos!


Engineer Builds a Miniature TurboJet Rocket Engine


Turbojets are used to power many commercial aircraft today, and they allow aircraft to travel at supersonic speeds. First invented in 1921 by Frenchman Maxime Guillaume, the jet engines slowly began being implemented into aircraft. If you're a fan of jet engines, then you are going to love this mini jet engine that was built by an engineer. Not only does it look impressive, but it puts out quite a bit of heat and thrust, even burning the linoleum floor below.


https://interestingengineering.com/video/engineer-builds-miniature-turbojet-rocket-engine


An Intro to Air Dry Clay Jewelry

In today's Instructable, I am going to guide you through the beginning steps of learning to make jewelry from air dry clay. Clay has been a hobby of mine for a while now, and I wanted to share the joy with others and hopefully help them by clearly laying out things that took me months to learn. Air dry clay is a simple medium that can produce great results.

*This Instructable will be in sections. The "supplies" numbers indicate where to find what in each section, so feel free to skip to what you need to know.


https://www.instructables.com/An-Intro-to-Air-Dry-Clay-Jewelry/


https://www.instructables.com/Rubber-Band-Bullroarer/


https://www.instructables.com/How-to-Make-Your-First-Ceramic-Teacup/


https://www.instructables.com/Wax-Roses/


https://www.youtube.com/watch?v=eFrSeppuGZg


https://www.instructables.com/ECG-Display-With-Arduino/


quarta-feira, 24 de fevereiro de 2021

Torcer a 90º! E uma data de engrenagens, Radio WiFi, e um pantógrafo para fresa

Algo para espantar os amigos e família, uma engranagem a 90º, mas sem dentes! 
sim, há maneiras de criar engrenagens sem rodas dentadas...


Twisty Toy

 rschoenm

I designed this simple twisty toy based on an epicyclic bar angular transmission. It's a cool little fidget toy that looks like it shouldn't turn. Works well as a stress reliever!

You can make this toy with either a wood lathe, or a 3d printer, or a laser cutter.


Supplies:

Hardwood like maple and cherry

1/8" brass rod

3/8" dowel

CA glue, wood glue

https://www.instructables.com/Twisty-Toy/


Ora aqui está um curioso projecto para ouvir Rádio do WiFi, para a vossa criançada, que ainda não têem idade para acessar o Spotify:


RFID Internet Radio
tars.vanhoof 


Hello fellow makers,

This Instructable describes how I made an RFID internet radio for my kids. They like to listen to music but since they're too young to start Spotify and cast to the TV themselves, I decided to make an easy and hopefully fun interface for them. This was a Covid-19 project so I took my time.

The player is built with a Raspberry Pi, a HiFi module and an RFID module. The tags are put in a base on which wooden puppets are glued which are easily identifiable for the kids as containing a certain playlist. I also designed and built a nice enclosure because it will be visible in our living room and therefore it has to look good.

I made a lot of personal choices during the development but because it's built around a Raspberry pi it's very customizable. I'll try to describe my progress and all the problems I encountered as detailed as possible.

I've already got a few upgrades in mind such as removing the (need for) buttons to make it even simpler, I'd like even better full-range speakers, playlist programming via a smartphone, maybe in the long run easier set-up of WiFi and Spotify for non-Raspberry-savvy family members...

I'd love to see what others make of it! Can you guess which song the puppet on top is for?

https://www.instructables.com/RFID-Internet-Radio/


Uma enorme quantidade de engrenagens e rodas dentadas!
É preciso dizer mais?


Gears 

Fred Peyerl

https://www.pinterest.pt/fredpeyerl/gears/


E para terminar, um Pantógrafo para Fresa 3D


The Pantograph Welder 
MegaLoceros 3D


https://www.pinterest.pt/pin/806003664562273251/


domingo, 17 de janeiro de 2021

Desinfectem co UV! E um Smartwatch Arduino, Uma Fresa CNC de 5 eixos, dobrar Acrílico, Técnico de Electrónica em casa, e PINAS

Isto é muito importante! 

Fazer um Desinfectante em casa, e para os Idosos, por meio de Ultra-violetas, é uma salvação para quem precisa, mas não pode comprar...

Atenção, é um Desinfectante, não um Esterilizante! O que quer dizer que elimina "só" 99,9% dos organismos:


DIY Ultraviolet Sterilization Device (UVClean)

henrydmayne


Introduction

Hi all and welcome to my very first instructable! In this step by step guide, you will learn how to create your very own ultraviolet sterilization device that can be used as either a wand, or as an automatic sterilization chamber. The device, called the UVClean, uses a special UVC bulb that can sterilize nonporous surfaces in a matter of minutes.

Features include:

-Sturdy and ergonomic design

-Genuine 253.7nm 3.5W UVC bulb

-Bi-color OLED display

-Passcode protected interface

-Comprehensive menu system

-Continuous handheld mode, and automatic timer mod

 2) This device is in fact a sanitizer, not a sterilizer. Sanitizing is the process of removing most organisms from a surface 99.9%, while sterilizing is the process of removing ALL organisms from a surface. This device is not medical grade, and it should not be perceived as such.

https://www.instructables.com/DIY-Ultraviolet-Sterilization-Device-UVClean/


Podem fazer o vosso próprio SmartWatch, com estes Circuitos Integrados Atmega, uma versão minúscula do Arduino:


How to Make Arduino Smartwatch With Custom PCB

 Aarav G

Tinkercad Projects »
Hi all, in this instructable you will see how a smartwatch can be made using an Arduino board and a few other components. We are going to design and get a custom PCB fabricated which will be the motherboard of our watch housing the main circuit and the brain of the watch ATmega 328P which we will salvage from an Arduino Nano board.

I have chosen the Arduino Nano and not the more commonly used Arduino UNO because the Nano features a Surface Mount chip so it's much more compact and in this project, space is key because we need to fit all the components in the least space possible.

I am going to use a 160 mAh Li-Po (Lithium Polymer) battery which will easily be able to power the watch on regular use for at least a week which is quite good enough. We will use a USB battery charging module for charging the battery. This will also have a USB port in it to charge the battery!

I have designed the body of the watch in a 3d design software and you can easily get it 3d-printed anywhere. This was we can keep the watch completely personalised according to your need. The watch will be activated by using a push-button present at the side of the watch.

The watch will have Bluetooth functionality and will be connected to an app that can be used to track data. It can count the steps, distance and the calories burnt using an accelerometer module. With the same components and in some iterations in the code and the app, we can also easily track messages and calls received on the phone through the smartwatch! The watch will also have a heartrate measuring sensor in it which will be able to measure your pulse and I have tried it out.It's pretty accurate!

https://www.instructables.com/How-to-Make-Arduino-Smartwatch-With-Custom-PCB/


Uma fresa CNC de 5 eixos!

É preciso dizer mais?

Com este bicho, podem produzir uma série de objectos que antes apenas sonhavam fazer!


DIY Desktop 5-axis CNC Mill

i_nerantzis


OK, you bought your router and you are happy with it. If you are an artist.

But... if you are an engineer... you probably are not so happy.

You cut some 2D stuff. Then try some 2.5D and start getting excited. And then, there comes a day when you start wondering... What if I can make something more out of my 3-axis router?

Then it comes to your mind that you can always convert one of the axis from linear to rotary! Yes this is it! You start doing it... you succeed, but deep down inside you know it.

You have to go all the way to the end and do it properly. You need to make the conversion to a full 5-axis machine to be satisfied! If you feel like it, then follow my lead.


 https://www.instructables.com/DIY-Desktop-5-axis-CNC-Mill/


Mais uma séria ampliação das vossas máquinas, com isto, o Acrílico pode ter uma 3ª dimensão, dobrando as peças, fazendo assim concretizado mais outro sonho Geek!


Acrylic Bending Tool

diyperspective

In this instructable / video I am going to show you how you can make simple, cheap and very useful acrylic bending tool. It opens new possibilities and ways you can work with acrylic.

Provided Amazon links are affiliates

https://www.instructables.com/Acrylic-Bending-Tool/?linkId=65457606


Ganhar a vida a fazer o que se gosta, Electrónica e Reparações, e em casa?

Isso é muito bom!

Eis o necessário para começarem uma carreira Geek-.


Getting set up for working from home as an electronics engineer.

Andrew Back

There are often times when it would be convenient to work from home, such as when we need to be physically present for some reason or given the current situation, when remote working might help limit the spread of coronavirus. Not to mention that it’s also handy having a setup to work on spare time projects and the inevitable, “I wondered if you could fix this?” jobs.

This post takes a look at getting a home workspace set up with the typically essential tools and equipment for working on electronics. Of course, what may be required in practice is going to vary depending upon the precise nature of the work and replicating a production line or advanced laboratory capabilities, for example, may prove a little more challenging.

https://www.rs-online.com/designspark/the-wfh-engineer


Mais Geek, PINAS é útil para muitas coisas, sistemas de Ficheiros, Redes, e Mecanismos de Segurança, por isso construam e aprendam:


PiNAS - the Raspberry Pi NAS

araymbox 


Intro:

This instructable describes the build of a very compact Raspberry Pi powered two bay network attached storage (NAS).

Features:

Super small

Easy to build

Simple setup

Cheap

Perfect for learning about network, file system, security mechanisms

Raspberry Pi 2 or 3 can be used (Pi 4 with some tweaks)

Powered by a single USB cable

Can use WiFi

Uses notebook hard drives

hard drives are hotswappable

Two USB ports for further hardware

Easy to open case

instructables.com/PiNAS-the-Raspberry-Pi-NAS/


sábado, 19 de dezembro de 2020

Bola de Natal. E cópias sem fim (!), Estlcam, para toda a CNC, às curvas com a Fresa, Thangs com tudo, Moldes com pistolas de cola, e Ovos!


Podem imprimir esta simpática bola de Natal, com o Presépio, para pendurar na Àrvore de Natal, obra deste vosso amigo, juntamente com muitos outros:


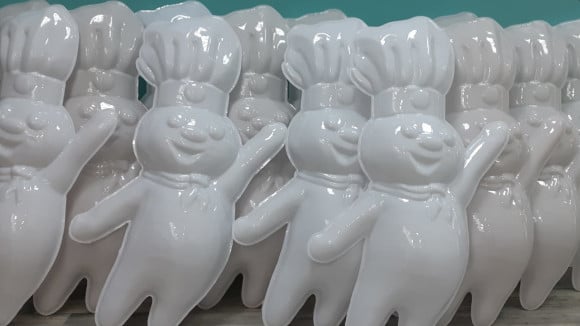
Para replicarem objectos sem fim, têem esta fenomenal técnica, e depois de criarem o DMolde, podem até usar a placa da Impressora 3G, só ela, não o extrusor, claro, para aquecer as placas de plástico para termo-formação:


NOW YOU CAN DELIVER DOZENS OF DUPLICATES WITH INEXPENSIVE 3D-PRINTED MOLDS FOR THERMOFORMING

Ira Somers

3D Printing Molds For Thermoforming Short Runs: Quick, Easy, and Inexpensive
 
Businesses call owners of Massivit 3D printing solutions to bring their most creative ideas to life. Now they can call when they need multiple copies of displays, signs, or props.

Massivit 3D makes short run molds for thermoforming possible—and even profitable.

Thermoforming is a cost-effective process when you need multiple copies of the same product. Take a mold, place a thermoplastic sheet on top, add heat and a vacuum and voilà! The sheet takes the form of the mold. Lather, rinse, repeat until enough copies are created.

https://massivit3d.com/blog/now-you-can-deliver-dozens-of-duplicates-with-inexpensive-3d-printed-molds-for-thermoforming/


Ponham as vossas criações, 2D ou 3D, neste programa, Esticam, e ele deita cá para fora o G-code nessessário para os 2 casos...
É bom!


CAM Lite
ALL3DP

Estlcam is a computer-aided manufacturing (CAM)  program that allows users to turn 2D drawings and 3D models into machine-readable G-code. This brilliant project was created by Christian Knüll, and its popularity has skyrocketed since it debuted in 2014. Perhaps the most attractive characteristics of Estlcam are its simplicity and low price.

If you’re a beginner in CNC milling, you’ve probably been frustrated by the complexity (and ungodly prices) of many CAM programs. Estlcam solves these frustrations by presenting users with an extremely intuitive user interface at a price of around $60.

The program sticks to the basics. Simply import a 3D file (such as an STL) or a 2D file (such as .dxf, .svg, .png, .gif, or .jpg), generate toolpaths, export the G-code – which is referred to as a “CNC program” in Estlcam – and start cutting. In this article, we’ll guide you through Estlcam’s basic features and provide tips on settings along the way.


Sigam de perto este Bacano de poucas palavras, mas MUITAS idéias, o Alex Laiho, porque para além desta maravilhosa Ferramenta DIY, tem um sem-fim de outras criações magníficas!


Uploaded by 
Alex Laiho


Em Thangs, vocês encontram um sem-fim de Ficheiros 3D, podem carregar os vossos Objectos, colaborar com outros criadores, e encontrar o que querem, devido ao seu poderoso motor de busca, o que estão à espera? Vão lá!


Let's find Thangs. 
Thangs is the fastest growing 3d community with over 1,114,093 available models to search, store, and collaborate.

We created Thangs for one reason: our community members. With powerful search, collaboration tools, model sharing and unlimited storage, we are the fastest growing 3D community.


Ora aqui está uma bela ideia para a escola, para vender, ou para o que quizerem, fazer com a cola da pistola de cola toda a espécie de coisas, em série pequenas:


The Secret to a Perfect Hot Glue Mold
SophieBdoesart

I've been making molds for a while now, but I often found myself frustrated by the high costs of materials. I love the quality that silicone molds like Smooth-On give, but I wanted to find a cheaper alternative for small casts. Hot glue was the obvious choice for me because of its price, its flexibility, and its incredibly quick cure time. The one major problem with hot glue is that it sticks to almost everything. I needed to find a mold release that would fill any small pores in the positive, allow the object to de-mold easily, and be as inexpensive and readily available as hot glue to avoid defeating the purpose. I tried everything. Oil, petroleum jelly, even some Smooth-On mold release as a test but none of them worked well enough to not damage the molds when I removed the object. I didn't figure it out until we had a power outage and I was digging through my collection of scented candles. The liquidy, melted wax was perfect for coating objects. Hot glue doesn't stick to it but it goes on thin enough to not obscure the details of the mold. Here's how I finally got the perfect hot-glue mold:


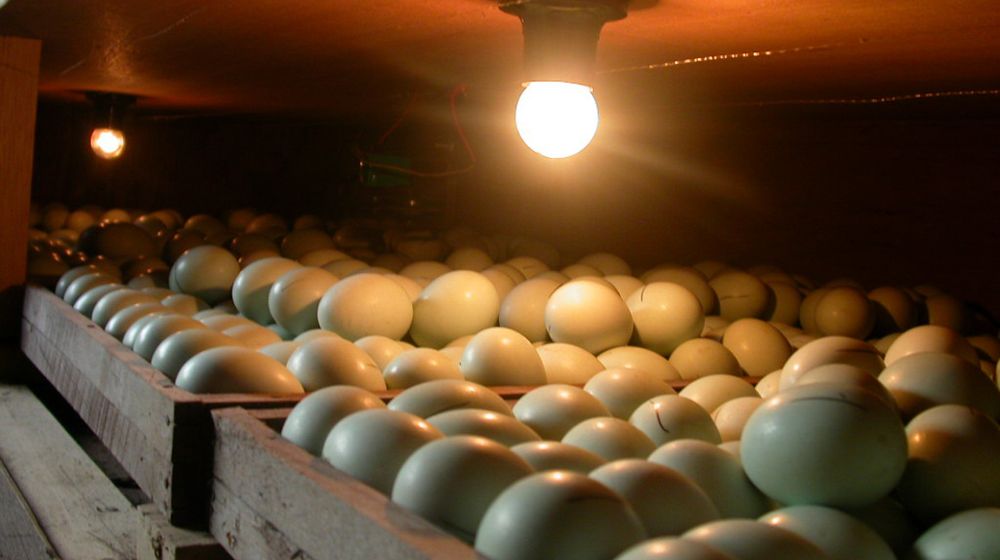
Como aqui há de tudo para todos, cá vai este Projecto para a malta que nos alimenta, uma bela Incubadora para chocarem os ovos da vossa exploração Pecurária!


DIY Homemade Incubator
DIY Dave 
Branded and commercial incubators can be expensive for DIYers. A homemade incubator, on the other hand, can also hatch eggs successfully, and you don’t need to spend a lot of money on it.

https://diyprojects.com/homemade-incubator/


quinta-feira, 12 de novembro de 2020

Uma Forja! E um sem-fim de metal!, um Ukelele, uma Fundição, uma Mala, dum Jerry-can (!), Automação Industrial, Corte Plasma CNC, e um compressor de Plástico para blocos!

Jumbo Post!

Post Jumbo! 


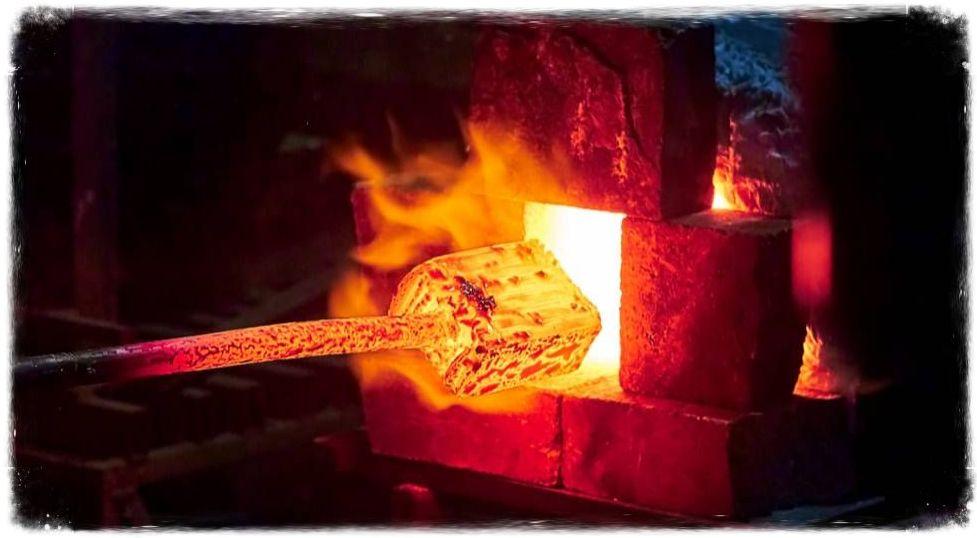
Build A DIY Forge To Create Useful Items For Your Home

DIY Projects

Hello, DIYers!

No DIYer arsenal is complete without a very own DIY forge, a crucial tool in changing a metal’s shape, strength, and hardness. Gather all your metalworking projects around because we’ll teach you how to make a blacksmith forge perfect for all your DIY projects here.

https://links.diyprojects.com/a/156/preview/9131336/39389255/e8ef2e12599482fede048fcdc700afbef28d2795


Muito Metal!

...E não só Metal, mas também, Carpintaria! Uma grande quantidade de ambos, nesta página do Samuel Lee Steel, algo a ver com atenção:


Woodworking and Metalsmithing

Samuel Lee Steel

https://www.pinterest.pt/rustysteel98/woodworking-and-metalsmithing


Algo de altamente Artesanal, cmo fazer um Ukelele, a partit dum Tronco!


Soprano Ukulele (From a Log!)

Rob Salmon

There was a glorious old apple tree in my garden. It was right in front of my kitchen window, blocking all of our light... but it would be sinful to cut down.

October 2014 - The tree was laden by a burdensome overload of apples. It was a barely noticeable, mildly windy day, and down came the tree! As, the clean up began, I cut the tree into manageable pieces. There was one piece, that for some reason I liked the look of, I kept it in my shed, and said, one day I will make something out of that.

Fast-forward to 2018. I had bought a cheap set of carving chisels, and started to look at this log, and imagine what fantastical shapes I could reveal, when I started to carve.

I had never made a musical instrument, at this point, though I have since had a number of adventures. As I threw my tape across the log, my mind began to wander. My daughters 4th Birthday was impending, and I had been considering getting her a Ukulele. A quick google to check the size of a soprano ukulele...it looked like there may be a ukulele hiding in the log.

It is almost impossible to write a "step by step" for this project, without volumes of text, as such the photos on each step do a lot of talking. Furthermore, this instructable is really about providing inspiration for others for future projects. The instructable is generally written in the first person, I have no doubt that there are better ways to do some of the steps. There may even be steps or advice that is just plain wrong! - Its really about inspiration ...and fun. For the most part (except for fretting!) this is simply good fun, with a happy biproduct of a working musical instrument!

ttps://www.instructables.com/Soprano-Ukulele-From-a-Log/


Aqui, trata-se duma Fundição para a vossa Oficina, eléctrica, com um Lid Switch, e que vocês fazem em casa.

Diz que éde 120V, mas é por isso que há Transformadores 120/220...


120v Metal Foundry With Lid Switch

IJustLikeMakingThings 

I have been wanting to build a metal foundry for some time but was torn between going electric or propane until I came across This Instructable that was electric but was only 120 volts. All the other builds I had seen had been 220 volt builds or used electric elements from stoves but I wanted to use120v and a heating coil. I also liked the ability to precisely control the temp because then I could also use it as a heat treater. I came across This Build which had a nice design and some great tips that I utilized in my design. I was able to use aspects of both of these designs to create my foundry.

I tried to design this to use tools that most makers should have or give you options for those with limited tools. At most, this can be made with a hacksaw, file, snips, and drill.

I wanted to include some safety measures to protect myself. I added a switch to cut the power if I lift the lid to prevent any chance of contacting the live heating coil wires. I also added a cover over the electronics, including the heating element wires. All other designs I saw had exposed wires and nothing preventing contact with the live heating coils.

https://www.instructables.com/120v-Metal-Foundry-With-Lid-Switch/


Isto é inesperado!
Fazer uma mala rodinhas a partir duma lata Jerry-can! Alguém tinha de pensar nisto, é uma boa ideia...


A Suitcase From Jerry Can
Well Done Tips in Craft

It is no matter your profession or your age, this suitcase from a jerrycan will ensure that you travel in style.

How I did it - you can check by looking DIY video or you can follow up instructions below.

For this project you will need:

https://www.instructables.com/A-Suitcase-From-Jerry-Can/


A Vention oferece este Controlador de Automação Industrial, para pequenas Indústria e não só, que é a simplicidade em pessoa, de operar:


Vention Demo Day | Machine Motion V2

Vention

MachineMotion Gen 2 is the centerpiece of the evolution of Vention’s industrial automation capabilities. And with it comes a complete ecosystem of plug and play devices.  Actuators, Pneumatic system, Digital IO module, Analog IO module,  safety relay, light curtain, teach pendant, and push buttons. Such simplicity is unheard of in our industry and I’m so excited to watch the possibilities it will create for the Vention community

https://youtu.be/2xnhCdfbnmM


Podem cortar com isto, o que as Laser Cutters não conseguem...

METAL!

É boooom!


Home Built 4x8ft CNC Plasma Metal Cutting System

Customfabricated

What is a CNC Plasma Cutting System? These are computer controlled machines that can cut through any electrically conductive material (steel / stainless / aluminum / copper). The machine takes a 2D computer generated sketch and translates it to a computer numerical control (CNC) system that is coupled with a Plasma Cutter. The Plasma Cutter uses an electrical arc and compressed air to cut through the conductive material.

I designed and built this system in my personal shop utilizing several off-the-shelf components along with some custom fabricated assemblies.

Check out the following steps for a detailed overview of my custom CNC Plasma build! 

https://www.instructables.com/Home-Built-4x8ft-CNC-Plasma-Cutting-System/.


...E para acabar este Post em beleza, uma Prensa para fazer tijolos de Plástico, a partir de lixo de plástico.

Um Projecto meritório, para ajudar muita gente... Inclusive nós os Engenhocas!

MUÁHÁHÁHÁ!


Plastic Brick Compressor

Rehaan33

Background

This is my IB HL Design Technology major project. It is a product that takes plastic waste and transforms it into bricks. This product was specifically designed for rural (developing areas) environments and as such, requires no electricity to operate. The production of plastic bricks in these communities can help to not only clean up their environment but also educate them on the plastic issue, provide sustainablebuildingmaterials as well as promote social entrepreneurship in these areas.

This is, unfortunately, a very specialized project as requires access to quite a few resources as you might notice when you read through this Instructable. If you have any questions, please do not hesitate to ask them in the comments, and lastly, please vote for this instructable in the Plastics Contest if you enjoyed it!

https://www.instructables.com/Plastic-Brick-Compressor/