Blog Posts

terça-feira, 19 de junho de 2018

Peças em Metal, a partir de PLA? Segurem os Phones! E imprmir o voso Tubo Hilsh, fabricar o vosso Filamento(!), alisar as impressões,


Não queriam imprimir em METAL com as vossas Impressoras 3D?
Também eu!
Mas enquanto tal não for possível para os nossos Bolsos, têem esta maneira indirecta de o fazer, usando, com eu já vos tinha dito muita vez, as peças em PLA como Moldes perdidos.
É bom.

Everyone and his dog wish for a Metal 3D printer at home, and so do I, but since that is VERY expensive, here's a workaround that uses PLA parts as Lost Molds, for Aluminum Casting :


Metal Casting at Home Part 77 Lost PLA/Greensand Casting for the Myfordboy 3D Printer
myfordboy

This is to be my extruder body to replace the printed one. Extra material was added to the open source Prusa file to allow for machining and shrinkage. Holes were deleted and will be drilled in the casting. As the pattern has a flat bottom greensand was used for the cope.

https://www.youtube.com/watch?v=HVgPM1ojyLw


Não estão fartos de perder os Auriculares do vosso Smartphone?
Nunca mais o farão, se usarem este Instructalbe, para ter uma bela Engenhoca que desenrola e enrola os fios, que tanto atrapalham!
É bom.

Haven't you lost your earphones, yet? A nuisance, that's what they are, but not with this thingamajig, that reels the wires into a small, portable size:


DIY - Earphones Holder
Techgenie

Earphones have become an essential accessory for a mobile phone. Earlier there were only wired earphones available but now the market is flooded with variety of wireless earphones as well. Although a vast number of people use wireless earphones but there is still a majority of people using wired earphones. The most common problem with wired earphones is the frequent entangling of wires and the frustration to untangle the wires every single time before using them.
In this Instructable, i decided to make a simple earphones holder at home that will completely eliminate the need to untangle the wires forever and you will be able to use wired earphones with relatively more comfort.

https://www.instructables.com/id/DIY-Earphones-Holder/


Para impressionarem a malta, e terem uma maneira de aquecer e arrefecer o que seja, osando Ar Comprimido, cá vai este Projecto fácil de imprimir, de preferência em ABS, e é só fazer o Download do Objecto, e mais umas peças fáceis de comprar:

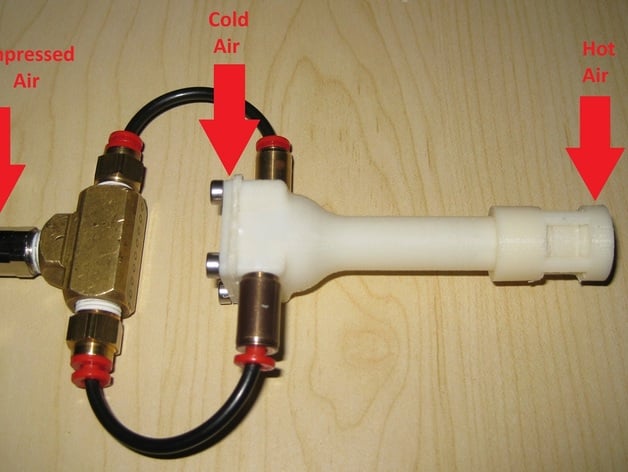
 Hot air from one side, cool air from the other, the wonder that is the Hilsh Tube can now be 3D printed!
Works with compressed air, and it's up to you to go and download this.


Vortex Cooler (Ranque-Hilsch Vortex Cooler
makedave
This is my rough version of a vortex cooler. When putting compressed air into the inlet tube cold air will exit from one end and hot air will exit from the other. This takes a lot of air. You will probably need at least a 5 gallon air compressor as this requires a large amount of flow at about 90 psi air. With 90psi air the cold exhaust will be about 25 degrees cooler than the input air and the hot side will be about 15 degrees warmer. The temperatures can be adjusted a little by pushing the hot end cap in or pulling it out slightly.
https://www.thingiverse.com/thing:250168


O Filamento gasta-se depressa, quando estamo-nos a divertir...
Por isso, resulta mais barato fabricarem o vosso próprio, a partir de Pellets, com esta Jigajoga bacana, dica dos nosso amigos do Mewe 3D printing Group:


Filament flies, when you're having fun...
So save a lot with this Thingamajig, this tip, courtesy of my friends on the Mewe 3D printing Group, a machine that uses Plastic pellets to extrude your own Filament.
Neat.


Filastruder Kit

Are you frustrated with the high cost of filament for your 3D printer? Do you desire the ability to produce filament on demand, as it is needed, in the color and size appropriate for your 3D project?
The Filastruder filament extruder meets these needs and more, because it is a filament-making machine. The reason for starting this project is simple - raw plastic pellets are cheap costing only a few dollars per kg, while filament for 3D printers is much more expensive - $30/kg and more.

https://www.filastruder.com/products/filastruder-kit


...E se estão a pensar, "-Como é que vou alisar o resultado em escadinhas da Impressão 3D?", seja para os tais Moldes para Fundição em Metal, seja para um Objecto como deve de ser, uma novidade, a 3D Gloop!


...And if you're wondering, "-How do I smooth out my prints?", be it for those Metal Casting Molds, or for a slick-looking Objest, something new, 3D Gloop!


PLA Smoothing 3D Prints with 3D Gloop!
Make Anything

A lot of people know about Acetone smoothing for ABS parts, but what about smoothing PLA prints? Here are my results using 3D Gloop, as well as Brasso and a Rustoleum Gloss coat. Things. Got...Shiny.

https://www.youtube.com/watch?v=vQc5TBPF8uw


terça-feira, 5 de junho de 2018

Façam o vosso Smartphone! E desenhem a vossa roda de Genebra, aprendam Soldadura,


Isto é porreiro.
Faça o vosso próprio Smartphonne, seja por carolice, seja por estarem faltos de pagar um exagero...


Don't wanna pay trough your nose, for a Smartphone? 
Build one!


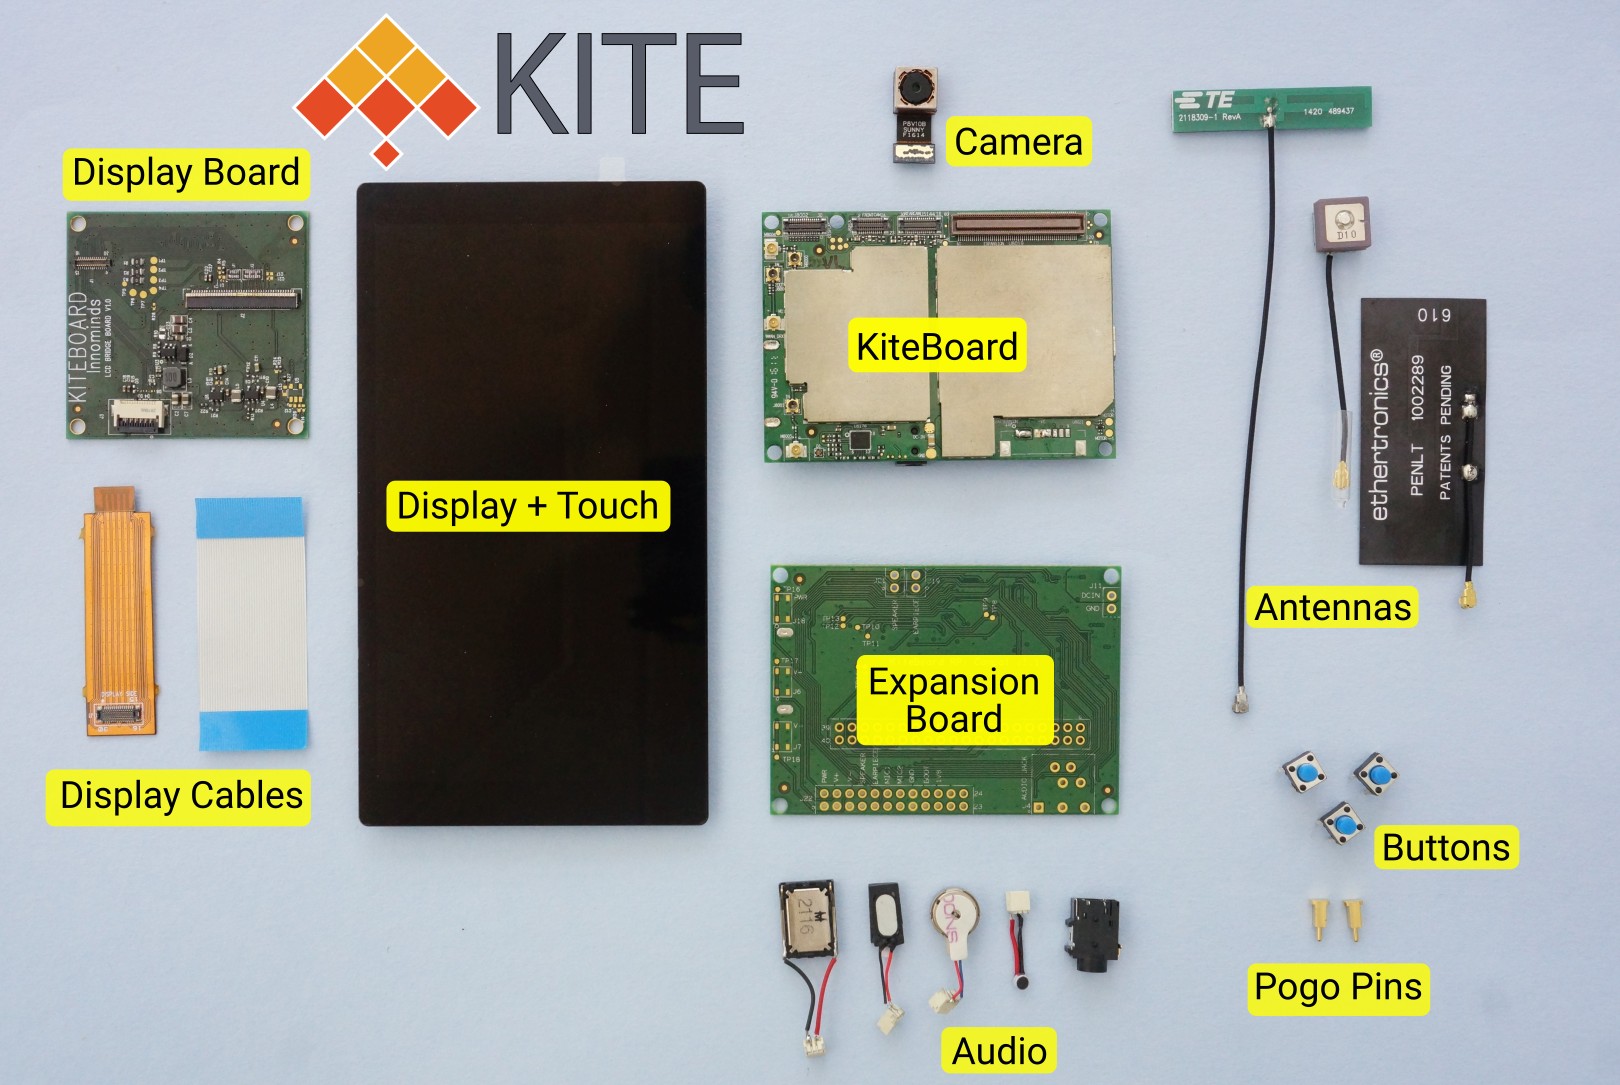
Building Poorna, your first KitePhone
Shree Kumar

A KitePhone is simply a phone built using the Kite Kit. Consumer phones go through a teardown, so that folks can understand how they are built. Kite is built for makers, so we take a "build" approach here.
In this post, I will show you how we’ve put together a minimally complete model of a phone. We call this model, “Poorna”. Poorna is a Sanskrit word, commonly meaning “complete”. It can also mean “zero”, and there are philosophical interpretations too, but then I digress. Poorna is a complete phone providing functionality like the smartphone in your pocket. No additional bells & whistles, just pure Android.
Here is a short overview video (exactly 2 minutes, 17 seconds) of how to build Poorna, starting from Kite:

http://www.kiteboard.io/blog/building-poorna-your-first-kitephone


Uma Roda de Genebra, não há quem não acabe por querer fazer uma...
Portanto, aprendam como desenhar uma, como a quizerem!


You'll end up by wanting to make some kind of Geneva Wheel, soo...
Design your own, as you want it.


Make Geneva Wheels of Any Size in a Easier Way
iGreeny

It's not so hard to find the formulas and diagrams if you want to design a Geneva wheel of your own, and you can do it following this article: Make Geneva wheels of any size and this video.
but I feel it's not very friendly to non-engineer readers - at least it took me quite a while to pull out the math and geometry I've learned back in high school. So i decided to translate the formulas into plain English and clearer steps. I also made 2 videos simply recording how I designed it in Fusion 360.
Variables you can decide freely (within a reasonable range)
  •  the quantity of the slots on the Geneva wheel;
  •  the radius of the drive pin;
  •  the Geneva wheel radius;
  •  drive pin clearance.
You and use any CAD software you feel comfortable with because we only need basic sketch functions for designing.


https://www.instructables.com/id/Make-Geneva-Wheels-of-Any-Size-in-a-Easier-Way/


Sem Soldadura, ficam muito diminuídos, quanto a fazerem engenhocas em Metal, por isso, aprendam, neste Curso, só para vós:


Without Welding, there's no real Metal-made gizmo building hability.
So, get to learn, on a Welding Class, just for you:


WELDING CLASS
audreyobscura

Metal has been worked by humans for thousands of years. Over time, the techniques and technology used to produce and shape metal goods have been driven by the innovations of science and technology.
Before we dive into some of the technical processes available for welding metal together, let's first take a moment to define a weld. A weld is a fabrication process that joins materials, usually metals or thermoplastics, by fusion. Fusing materials is distinctly different than other kinds of lower temperature metal-joining techniques such as soldering, which do not melt the base metal.
Metal welding is the fusing of two pieces of metal to create one solid continuous piece. All welders work on the same principle: A gas torch or electric welder is used to generate precisely directed heat to melt material, and a filler material is introduced by the operator to complete the fusion.
As these processes became more accessible, we've come so far that you - yes YOU! - can learn how to weld easily.


Um Molde para um Molde! Estou farto de dizer isto, a Impressão 3D foi feita para Moldes!
Por isso, vejam como se faz, para poderem fabricar algo em números de jeito:


3D Printing a Mold for a Mold! I keep telling you, 3D printing was made for Molds!
Watch how it's made, so you can produce anything in decent numbers: 


3D Printing a Mold for a Mold
Charlotte_J

I have always loved the 3D model of the 'Vaas met oor' (Cup with ear) by Joris Van Tubergen. A couple of years ago I did my first attempt to make ceramic cups of the model. I succeeded and love drinking my coffee from these cups.
Recently I wanted to make some more of them. Only thing: I did not like the handwork that was needed to create the mold.
Inspired by the option 'Mold' in the software for my Ultimaker 3D printer (Cura) I started to think about printing a mold for a mold.
This Instructable shows what I did to print a mold for a mold and how I was able to use it.

https://www.instructables.com/id/3D-Printing-a-Mold-for-a-Mold/


ESTE, parece que não é um Motor Lingrinhas, comparado com os de Explosão...
Quase 4 vezes mais Torque do que o melhor já feito, até agora!
Leiam.


Seems Electric Motors are leaving the Wimpy League...
Have a read, a new Motor, almost 4 times more torque than the best there was, so far!


Magnax prepares to manufacture radically high-powered, compact axial flux electric motor
Loz Blain

After nearly a decade in development, Belgian startup Magnax claims it has developed an ultra-high power, lightweight, compact axial flux electric motor with performance figures that blow away everything in the conventional radial flux world. Crucially, it says it's worked out how to manufacture them too.
It might not have the romance of combustion engine tuning, but it seems a bit of a battle is brewing to develop the kinds of high-performance motors that will power the electric cars, motorcycles, aircraft and industrial equipment of the future.
A week ago we wrote about Equipmake's spoke motor design, which allows it to pump out some 9 kilowatts per kilogram with exceptional cooling and continuous power production ability.
To put that kind of power production in perspective, the ludicrously fast 193-horsepower BMW S1000RR superbike of 2011 – a power-to-weight beast that would slay just about anything in the automotive world – has a lightweight motor that makes a puny 2.4 kilowatts per kilogram. So 9 kW/kg is no joke.


terça-feira, 29 de maio de 2018

Waterjet em casa? E aulas de Metal, um Cão-Robot(!), Caixas para Electrónica, e uma Engenhoca sem-fim


Fenomenal, como se vai,  aos pouco, democratizando a CNC.
Agora, podem comprar uma cortadora CNC de Jacto-de-Àgua, e cortar tudo aquilo que as máquinas Laser não podem!
Isto corta tudo, Metal, Cerâmica, Plástico, Policarbonato, uma limpeza...
Corta até 6 mm em aço Inox, e pode cortar até 25 mm, em tudo o resto!


Yup, an affordable Waterjet CNC, so you gan go where no Laser CNC has gone befoooore! 
6 mm in Stainless Steel, up to an Inch in other Materials.


Tinijet — Affordable Waterjet Cutting At Home
James Hobson

While laser cutting remains the dominant force for rapid prototyping anything made of plastic, MDF or wood, the real holy grail is the ability to cut metal — something most laser cutters are just not capable of.
In the industry, this is done using extremely high-powered laser cutters, plasma cutters, or water jet cutters. All of which are very pricey equipment for a hacker. Until now anyway. Introducing the Tinijet, the missing tool for affordable water jet cutting.
We first covered this project a few years ago when it was just a university research project called Hydro — it’s since evolved immensely, and will be available for sale very soon.


Um Engenhocas que não mexa em Metal, é apenas Meio-Engenhocas!
Aprendam, em 5 Lições, como se faz, para evitarem muita ferramenta estragada, cortes vários e etc...

5 free Metalworking Classes, so you can spare your Tools and fingers... Ouch!


METALWORKING CLASS
randofo

Working with metal is a challenging, yet rewarding, skill.
In this class, we will go over the very basics of metalworking including, cutting, drilling and finishing.
This class is designed for people with absolutely no prior experience ever working with metal. It will give you the knowledge and confidence to move on to more advanced metalworking topics.

https://www.instructables.com/class/Metalworking-Class/


O vosso Arduino não ladra, nem faz companhia?
Ora cá vai um Canito-robot, para que não vos falte nada!


You can make your Arduino, your own Pet, with this DoggoBot.
Kewel! 


DoggoBot Version 1
makerinchief

Ever since I started programming Arduinos, I wanted to build a robot using one. I also want a dog. However, living in NYC makes it tough to take care of a dog. So after hours of watching videos of robots and dogs, I decided to put my phone down and build myself a pet!
I present to you find readers, DoggoBot Version 1! I created a 4 legged walking bot which can be build with cardboard and hotglue. The electronics are simple and can be ordered from Amazon. However, I noticed the links from Amazon tend not to last very long so the links provided are from websites which routinely carry the items. If you want to get them from Amazon, simply enter the name of the item in the Amazon search bar. You can definitely get a lot of these items cheaper on Amazon then directly from the websites provided.

https://www.instructables.com/id/DoggoBot-Version-1/


Electrónica sem uma caixa que a envolva, é apenas desleixo... 
E acidentes à espera.
Evitem muita fumarada, encapsulando as vossas obras-primas numa caixa bem-construída:


No use making your wonder-thingamajig, just to have it taken apart or shorted...
To avoid the magic smoke, learn how to make an adequate encasing:


Your Guide To Making Electronics Project Boxes
DJ Harrigan

Designing And Laser Cutting Electronics Project Boxes Just Got Easier With This Must-Have Tutorial
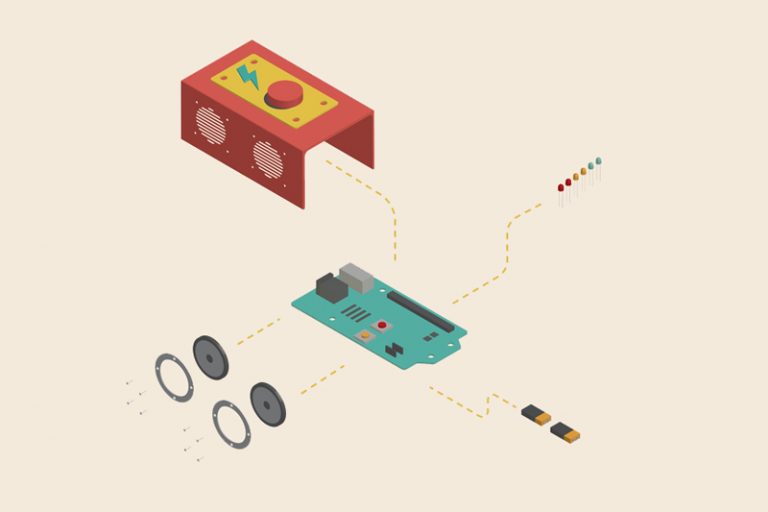
You’ve just made something great: It blinks, it whirrs, it speaks in tones, it’s voiced-controlled and it’s “cloud connected” (of course). And now this assembled heap of your own design is waiting on your desk for the final touch.
Whether you are making a product for sale or prototyping your brand’s next show-stopping piece of promotional swag, you probably want to not only keep this electronic creation alive for years to come but also add context and personality to your product and draw fewer eyes as you ferry it through airport security. How? By making a robust electronics project box to house and protect your hard work, of course!


Uma Máquina de berlindes que podem imprimir em 3D?
É preciso dizar mais? MUÁHÁHÁHÁHÁ!
FAÇAM UMA!


A Marble Machine you can 3D print!
Need I say more? MEWAHAHAHAHAHA!
GO THERE!


Marblevator Mini, Loop.
gzumwalt

I had to dust off my physics textbook for this one...
How fast is too fast for a marble machine? Well, check out the video "Marblevator Mini, Loop, High Speed Test", at 324,000 marble runs per day, it is indeed the fastest marble machine I've ever designed.
"Marblevator Mini, Loop" is not quite as "mini" as my previous Marblevator Mini designs, but is still quite small, and features a 7.5mm radius loop with a tapered auger lift. Using a few relatively simple physics equations, the height of the entrance ramp (H) is determined by the simple equation H = 2.7R (where R is the radius of the loop). My desire to keep the model small determined the loop radius (7.5mm) and ball bearing diameter (8mm). And to add friction compensation, especially for a 3D printed track printed in this orientation, I increased the height of the ramp over the calculated height of (2.7 * 7.5mm) or 20.25mm.
In the video "Marblevator Mini, Loop Stress Test", the stress test ran over 29 hours and is still running. The auger rotates at approximately 75rpm which in this test translates to 75 marble runs per minute. At this rate, Marblevator Mini, Loop has executed (29 * 75 * 60) or 130,500 marble runs without loosing a marble.