Blog Posts

quarta-feira, 10 de maio de 2017

Impressão 3D ao Metro, Non-stop 3D! E impressão 3d Híbrida, Um Torno económico, e um Teclado Faça-você-mesmo

Imprimir em 3D, sem suportes, e ao Metro?
Sim, ao Metro!
Ponha-se a Impressão a 45 graus, e faça-se um dos eixos, uma correia sem-fim.
Parece fácil de imaginar... Mas ninguém o fez!
Até agora:


Blackbelt 3D: Printing Ideas That Are Larger Than Life
Tyler Koslow
On Friday, another 3D printer will join the lengthy list of Kickstarter campaigns involving additive manufacturing. While some projects fail and others become forgotten, the Blackbelt 3D printer might just end up “changing paradigms” of FDM 3D printing technology.
Marketed as an industrial production machine, this printer is capable of creating extremely lengthy parts without the need for supports. These prints are easily repeatable thanks to a specially designed conveyor belt system.
Blackbelt 3D: Printing Ideas That Are Larger Than Life
The most unique concept of the Blackbelt is the high-precision conveyor belt that replaces the typical Z-axis. While the X-Y actuation system remains the same in theory, it has a slant of 45-degree. This modifiable angle will allow the user to print support-free overhangs.
The build volume allows for prints of up to 340mm x 340mm in the x and y direction. For prints that measure out to 1300mm or longer, Blackbelt recommends utilizing their roller table to provide additional print support.
Once the print process is complete, the machine will be ready to start producing the next object almost right away. The conveyor belt allows prints to roll right off of the print bed and into a container, eliminating the hassle of removing objects. 


Embeber o que queiram numa Impressão 3D, é agora possível graças a este novo método, THREAD, e isto, sem sequer aumentar o tempo de Impressão!
Brutal!


THREAD: The Hybrid 3D Printing Process That Does It AllTyler Koslow 
According to AMRC development engineer Mack Cocking, the inventor of this technique, the process is a “potential game-changer.”
Although THREAD is still patent-pending, Cocking is sharing a few details about the hybrid system.
For starters, the process offers full automation. It’s able to embed stands of materials like copper, fibre optic, steel, and also nitinol into the printing process. Additionally, the technique allows seamless connectivity through X, Y and Z axis directions.
This means that single or multiple strands of material can be embedded without impacting the original build time of the component.
The THREAD system will be ideal for applications with an intensive focus on weight and size of components. It will also prove valuable for systems that require integrated data transfer and protected sealed connective tracks.
Thus far, the AMRC team is testing the process on machines used for 3D printing polymer. However, they claim that their technique will be functional with different additive manufacturing platforms. 
https://all3dp.com/uk-engineers-thread-hybrid-3d-printing/


Este Site, Fine Woodworking, está sempre cheio de coisas boas, tal como este Torno bacano, feito com a Sucata que qualquer Engenhocas acumula, e 2 ou 3 artigos comprados na Ebay!
E o melhor, é que a ideia serve para muitas outras Máquinas, que queiram fazer à vossa própria maneira, e mais nada....


Homemade Lathe on a Budget
Matt Berger  
Retired engineer builds a bowl-turning lathe from scrap parts and a headstock purchased on eBay
When George Archer decided to upgrade his Shopsmith lathe to something that could handle larger projects, he didn’t browse the tool catalogs. Instead, he built his own.
“It does great,” said Archer, a retired engineer from Savannah, Georgia, who cobbled together a heavy-duty bowl turning lathe from $100 of purchased and found parts. “So far, so good.”
What inspired Archer to build his own lathe rather than buying a commercial one? “Probably the $2,000 difference in cost,” he said. Another likely contributor is his engineering prowess. The hobby woodworker spent many years engineering parts for air-conditioning systems. 


Ora aqui está mais uma ideia impecável da Rs-Online, não têem de fazer uns "monos" de teclados, podem-nos fazer como deve de ser, Teclas mesmo a sério...
Assim:


Building a Custom Keyboard
Andrew Back 
Assembling a high quality custom keyboard with Cherry MX switches
What could be more joyful than a keyboard featuring keys with a satisfying travel and characteristic sound as they bottom-out, topped off with solid, colourful keycaps of your own choosing.
In this post we take a quick look at the custom and collectible keyboard scene, before moving on to the sourcing of parts and assembly of a custom “ortholinear” keyboard with Cherry MX switches. 


segunda-feira, 1 de maio de 2017

3D Flutuante, support-less 3D! E Blue Stuff, Instrumentos Musicais DIY, poupar na Gravação Laser, e uma 3ª mão

Dica de Maurício Martins, e muito obrigado, eis uma das tais ideias que mudam uma Indústria inteira, imprimir em 3D, SEM GRAVIDADE!
Como?
Uma seringa esguicha material num Gel;
A Gravidade não influencia a Impressão, logo, impressão sem suportes!
não é camada-por-camada, é desenhar em 3D por isso, é mais rápido, e em tamanho gigante.
É bom!


steelcase X MIT create customized furniture by 3D printing into liquid gel 
up until now, 3D printing has been a desirable yet limited tool for manufacturing. whilst great for creating small, one-off objects, the technique has long needed to be adapted to be used on a large, commercial level. with this in mind, scientists at the MIT self-assembly lab have collaborated with the global furniture brand steelcase and acclaimed product designer christophe guberan to yield a 3D printing breakthrough—piloting a new process dubbed rapid liquid printing. the technique allows for the creation of large scale objects in just minutes, and is poised to make large-scale manufacturing of customized furniture a reality. 


Blue Stuff, pode ser-vos útil em muitas coisas, para moldar plàstico a frio.
Usando Oyumaru, ou Blue Stuff, basta aquecer o produto em àgua quente, e moldar em volta do que querem duplicar.
Mas pode servir para muitos outros fins, como pivots de estruturas provisórias, etc.


Blue Stuff/Oyumaru - How to cheaply cast miniatures or plastic models - new version

David Damek 
Only for personal use.
Blue Stuff 

part1 - How to paint cockpit - 


...
part2 - Self-made improvements - 


...
part3 - How to Use Washes Oil https://www.youtube.com/watch?v=FXerp...
part4 - Riveting and Rescribing Panel Lines - 


...
part5 - Weathering using aquarelle crayons - https://www.youtube.com/watch?v=JfRcJ...
part6 - How to paint and create stencils RAF roundels - https://www.youtube.com/watch?v=r_J0J...
part7 - Airbrush tutorial, tips for better airbrushing - https://www.youtube.com/watch?v=jH5OH...
part8 - How to paint inline engine - https://www.youtube.com/watch?v=wYGQz...
part9 - Resin accessories - https://www.youtube.com/watch?v=k_Mbc...

David Damek


Com ou sem Impressora 3D, eis 15 maneiras de fazerem os vossos próprios Instrumentos Musicais, por isso, mãos à obra: 


15 Groovy Ideas for Homemade Musical Instruments to DIYTyler Koslow 
Playing instruments is fun, but building them yourself is even better. Why not DIY your own homemade musical instrument?
They say that music makes the world go round, but spending money on new instruments will often make your bank account go down. For those who are passionate about making music, it’s usually a worthwhile investment, but not when you can DIY your own homemade instrument.
If you have some spare time and enough maker spirit, you can skip the pricey trip to the music shop and construct your own DIY homemade instrument.
We’ve collected a number of projects designed for beginners, intermediates, and experts.
Whether you own a 3D printer or not, there are a number of projects for you to delve into on this list. In a matter of hours, you can print or build some of these homemade instruments, bringing joy and sound right into your home. 
https://all3dp.com/1/homemade-instruments-ideas-diy-3d-print/


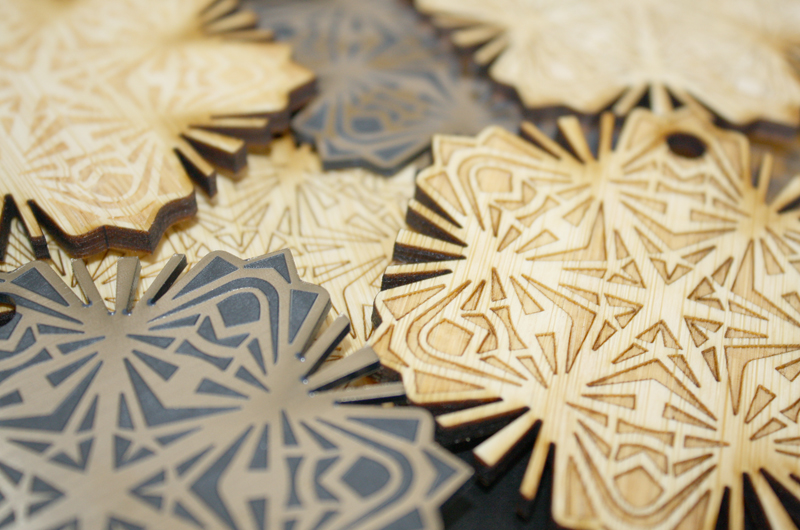
Saber qual a maneira mais económica e eficiente de gravar por Laser CNC, é o propósito deste Tutorial da Ponoko, por isso, se querem lucrar com as vossas Gravadoras 3D, vão lá:


Take The Mystery Out Of Laser Engraving Costs With This Price Comparison Tutorial

Lisa Horn 
Laser engraving: It turns basic laser cut designs from ordinary to extraordinary. But this added style, beauty and impact can significantly increase your design costs. To be able to achieve excellent design while staying on budget, you’ve got to get smart.
This means you’ve got to get smart with how files are built…and this may take some detective work to determine exactly where there are opportunities to tighten up a design that saves time—and money.
But does getting these laser engraving costs just right seem like a mystery that can’t be solved? You don’t have to be Maxwell Smart, Inspector Clouseau or 007 to solve this case. We’ve done all the legwork for you…and it didn’t require a clandestine impossible mission or an enigmatic decoder machine to get the files. 


Muitas vezes, uma tarefa simpres torna-se um pesadelo, se não houver alguém à mão, para segurar numa peça, ou o que mais...
Todos passámos por isso!
Por isso, cá vai este Instructable que vos dá uma terceira mão, e fazem assim de tudo, sem ajudas!


Ultimate Third Hand

Franklin7993 
What is a third hand?
A third hand is a devise used to hold something in place while work is being performed. It is essentially a third hand to aid your two hands. It is like having someone else’s hand to help hold something that you are working on. With the aid of another hand to steady your work you can perform the task that you are doing with a steady hand.
You can use a third hand to hold parts while using a torch to heat the parts and solder them together.
A third hand is useful to hold parts in place when using a soldering iron to make a join.
A third hand is very helpful when gluing parts together. There are dozens of other uses.
Essentially a third hand holds items in place while you work on them. 
https://www.instructables.com/id/Ultimate-Third-Hand/


quarta-feira, 26 de abril de 2017

Aprendam! Cursos Tech às Pázadas, e Design para Impressão 3D. E um Quadrópode Pololu-Arduino, imprimir Metal mais rápido, e consertem a Honda!

Um Site de onde podem aprender online, actualizar-se e testar o vosso nível de conhecimentos, e ainda por cima, com um Trial Grátis, é de lá ir a correr!
E isto com uma catrefada de Cursos, que podem ver, abaixo...
É muito bom.


Welcome to Pluralsight. The on-demand technology learning platform you count on to stay relevant, with tools that measure your skills and solve your problems—faster
OUR MISSION: TO DEMOCRATIZE PROFESSIONAL TECHNOLOGY LEARNING
We believe everyone should have the opportunity to build a career they’re passionate about. We’ve gone beyond the traditional education model to put the power back in your hands, because we believe learning shouldn’t be confined to a classroom, rigorous schedule or select minority.


Uma profissão de Futuro, certamente, será o Fabbing, e Designers que saibam desenhar em 3D, e ainda por cima com conhecimentos que os capacitem para a Impressão 3D do que criam, vão ter uma vantagem adicional...
Por isso, se puderem investir 2.695€ neste Mini-curso de 3 dias, é de arriscar:


Learn About Design for Additive Manufacturing with Wohlers Associates

Hanna Watkin 
Wohlers Associates and Materialise are offering a three-day course in design for additive manufacturing (DfAM) in Leuven, Belgium.
Would you like to learn more about designing for 3D printing? Consulting firm Wohlers Associates have teamed up with additive manufacturing specialists Materialise for a special course teaching valuable skills.
The three-day course is called Design for Additive Manufacturing (DfAM), and is intended for people who work in aerospace, automotive, medical, and industrial machinery.
The course will cost €2,695 for three days. This price includes both instruction and hands-on learning, as well as refreshments. It will take place at the Materialise headquarters location in Leuven, Belgium from May 31st to June 2nd, 2017.
“We are very happy to collaborate with Materialise, a company with an outstanding reputation and extraordinary track record,” said Terry Wohlers, principal consultant and president of Wohlers Associates. 
It will be the third such course from Wohlers and co; which was previously offered at the NASA Marshall Space Flight Center. 
https://all3dp.com/additive-manufacturing-wohlers-associates/


Cortesia da Pololu, eis um projecto que prova que se podem construír Protótipos e Projectos de Pesquisa bem sérios, com os Kits da Pololu, e o Arduino!


Semi-autonomous 14-DOF quadrupeds using Mini Maestro
Ryan 
Customer Lujing Cen’s team built two semi-autonomous 14-DOF quadrupeds using Mini Maestros for their high school class project at the California Academy of Mathematics and Science. The project syllabus includes making two separate robot designs and three total robots that work together. These quadrupeds were the “pack robots” described in the syllabus. An 18-channel Mini Maestro USB servo controller controls the twelve leg and two head servos. The project code includes a rewrite of Pololu’s Maestro C# USB SDK library in Python. The robot uses a camera and an RFID scanner to track its targets. 


Tinha alguém de pensar nisto, e os bacanos da Universidade do Arizona, e da Pensivânia, pensaram, então, porque não imprimir em Metal com estruturas de suporte solúvies, com n Impressão 3D de Plástico?
E foi o que fizeram:


Metal 3D Printing is About to Get Faster Thanks to Dissolving Supports
Hanna Watkin

An assistant professor at Arizona State University has developed a method of printing dissolvable metal support structures. This breakthrough could make end-to-end metal printing faster.
Metal 3D printing is fast on its way to becoming a mainstay option for heavy duty industrial 3D printing. But, it can be a laborious process involving copious amounts of post-processing.
However, an assistant professor of 3D Nanofabrication at Arizona State University (ASU) might have a solution. The man behind this development is Owen Hildreth., who has a mechanical engineering degree and Ph.D. in nanofabrication materials engineering.
However, he didn’t turn his mind to it until dropping in on a talk by visiting professor, Timothy Simpson, who posed: “If anyone knows of a water-soluble metal we could use for metal AM support structures, talk to me afterwards.”
Simpson is a research professor at Pennsylvania State University’s Center for Innovative Materials Processing through Direct Digital Deposition. 


Ora está algo de diferente, para acabar, por hoje, como consertar os assentos das vossas Motas, principalmente as que são Clássicos, ou seja, caríssimas de reparar:


Vintage Motorcycle Seat Restoration - CB200
bekathwia  
This Instructable is about creating a new seat for my motorcycle, a 1975 Honda CB200T.
I picked up a trashed old seat on eBay because my current seat is in good condition, and there's no sense in tearing apart a perfectly good seat. Plus then I wouldn't be making my bike inoperable while working on this project.
The main reason I wanted to change my seat is to lower standover height, since I'm extra short. I also welcomed the opportunity to customize any aspect of my bike, since I am a motorcycle beginner.
If you are new to sewing, check out Mikaela's Machine Sewing Class and Jessy's Hand Sewing Class to get up to speed on the basics.


quarta-feira, 19 de abril de 2017

A vossa própria Cortadora, DIY Laser CNC! E 16 modos de bem imprimir em 3D, uma Impressora 3D por 75 Dólares, outra, económica E rápida, e mais outra, enorme, mais um Órgão-Caixa de Música!

Em vez de gastarem uma Fortuna, apostando, às cegas, numa Cortadora Laser CNC Chinesa, que parece barata, até terem de pagar as Tarifas Extorcionistas da Alfândega, façam mas é esta pequena maravilha, que fica por menos, e é algo que vos vai ser bem mais ùtil...
Bravo!


Make Your Own High Quality CO2 Lasercutter! With Touch Control!MichielD99 
Hello everybody
About a year ago, I wanted to buy a CO2 lasercutter to make my workspace complete. One problem was that lasercutters aren't cheap, especially not for hobbyists who want a large cutting area. Of course, for that price you also get awesome software and customer support when you buy a lasercutter, but I only turned 17 when I started this project and I just didn't have that money. That is why I built my own machine. I had already made a machine like this, so I thought: "Why not do it again?". Of course this one wouldn't be made out of MDF sheets.
I made this machine together with my friend Thibo as it was our integrated project for school (we are in our last year of industrial sciences). He focussed on the research about lasers and cutting with a laser, because it's amazing that you can cut objects just by using light. I focussed on building this machine. In this instruction, there will only be talked about the lasercutter itself. This is a full step by step instruction on how to build your own lasercutter! I've included every file you need for building it in this instructable.
https://www.instructables.com/id/Make-Your-Own-High-Quality-CO2-Lasercutter-With-To


Imprimir em 3D, não sai sempre uma maravilha...
Mas isto ajuda!
16 maneiras da vossa impressão saír bem, e económica, e resistente, cortesia da all3dp, a aior parte grátis, todas uma boa maneira de não perderem a paciência, com as vossas pobres Impressoras, que não têem culpa...


16 Best 3D Slicer Software Tools for 3D Printers (Most are Free)
Anatol Locker 
Do you want to get the best results from your 3D printer? Here are the best 3D slicer software tools – most of them are free.
At the end of this guide, we answer some essential questions about 3D slicer software:
  • What does a 3D slicer software do?
  • Why is a 3D slicer software so important?
  • What separates a good 3D slicer software from the bad?
  • What are the best 3D slicer settings? 


Uma Impressora 3D de qualidade, por 75 Dólares, é o que propôe Tarkun Gelstronic, neste seu projecto, e uma Impressora de qualidade:


Man Creates a 3D Printer for Under $75 - And you can too!Monica Aderholt  
It was just last week that we saw the cheapest assembled 3D printer become available to consumers around the world. That was when New Matter’s MOD-t 3D printer launched their Crowdfunding Campaign. Priced at $149 for the first 500 backers, $199 for the next 500, and $249 for the rest, it proved that 3D printers could be cheap enough for most consumers to at least consider purchasing.
One man, by the name of Tarkun Gelstronic has taken this a step further. He put himself out on a mission to create a 3D printer for less than $100. What he came up with was really quite amazing.  Gelstronic didn’t just want to create any 3D printer that he could; he wanted to create a quality 3D printer that could print in multiple materials and include a heat bed.

https://3dprint.com/4903/3d-printer-under-75-dollars/


Uma Impressora 3D enonomica E rápida, ora aí está algo de muito bom... Até a 1 Metro por segundo!
Não será para qualquer um para construír, mas por isso mesmo, é completamente expansível e flexível, vejam se é para vocês.


Cheap 3D Printer Pops Out Parts With Blazingly Fast Speed
James Mulroy 
The ORD BOT is a simple 3D printer platform kit that uses an extruder to "print" 3D objects, just like the Cube or the MakerBot. However, unlike the MakerBot, the ORD BOT can only print using one color at a time (for now, anyway). But what it lacks in color it gains in speed: Its print speeds exceed 400mm per second and can reach up to a whopping 1 meter per second. This is considerably faster than the MakerBot's output speed of 33mm per second. The ORD BOT comes with two different print areas with the largest, called the Hadron, being about 200 square milimeters.
Now the ORD BOT isn't for just anyone--it's made with serious makers and DIYers in mind. This platform kit is just that--a platform: You have to provide your own electronics and build the whole thing from scratch (this does make it highly customizable and flexible), but according to a spokesperson at the ORD BOT booth you can order one with the electronics included for about another $200. 


40, por 40, por 40 Cm de Volume de Impresssão, é muito bom!
Vejam o Instructable desta, com vídeos e tudo:


D Printer - Working Area 40x40x40cm
Thomas Workshop 
Hello everyone, in this project I want to show you how to make a 3D Printer.
I always wanted to have a diy 3d printer. The easiest way to make it is print frame parts and coonnect it with aluminium profiles or somethink like that. But I didn't have acces to any 3d printer. So, I used my cnc machine to make all nessesery parts and when 3d printer was almost assembled I printed plastic parts whitch were hard or imposible to make on cnc machine. And now i have a 3d printer with working area around 40x40x40 cm :)
I made a video and step by step instruction how to make it.


E terminamos esta viagem pelo Mundo 3D, com este encantador Órgão, que é uma Caixa-de-Música, ou será, Caixa-de-Música, que é um Órgão?
De qualquer maneira, é uma Engenhoca porreira de montar e admirar:


Four Whistles Version 2gzumwalt 
Four Whistles Version 2 is my first attempt at a "calliope" (well, sort of calliope) design utilizing the primitive knowledge I gained from the original Four Whistles Instructable (https://www.instructables.com/id/Four-Whistles/). Not being a musician and being "slightly more than hard" at hearing, while it may not sound like it this model is attempting to play "Mary Had A Little Lamb" using a balloon to power the whistles and a hand crank to power a cylindrical sequencer.
In order to play "Mary Had A Little Lamb", I incorporated four whistles in the design of this model, each controlled by one of four air valves. Each of the air valves are controlled by a rotating cylinder containing small 2.5mm "bumps" that activate the valves in the correct sequence (the "cylinder sequencer"). In order to minimize air loss and maximize play time, I designed the valves with a 3 degree preload (to increase the compression of the valve gaskets on the valve body valve plates), designed the valve "axles" using a virtually airtight membrane with torsion bars, and as a last defense against air leaks, used clear silicon caulk to seal the valve body assembly (see below). The caulk is not necessary, but will assist in producing a marked improvement in the models performance. 
https://www.instructables.com/id/Four-Whistles-Version-2/


quinta-feira, 13 de abril de 2017

Gauss gun, and a 3D Freebie! Sim, uma Ideia e um Ficheiro 3D grátis!

Ora cá vai uma maneira de melhorar as Gauss Gun, esses Brinquedos Magnéticos que pareciam que já tinham tudo pensado...
Mas não!
Um Íman de Neodímio, é um Íman muito frágil, se for forte, a sua própria força o vai destruír, mais tarde ou mais cedo...
È, ainda por cima, preciso pegar na esfera de trás, depois de se ter disparado, colocá-la à frente, e só assim se pode re-começar.
Esta versão, ideia minha, pemite-vos disparar, mover uma esfera para a frente, disparar, até se fartarem.
E não partem o Íman. 

Mas, como se isso não fosse o suficiente, podem, ou fazer a coisa em casa, ou mandar imprimir em 3D:


Repetition Gauss Gun
Edgar

Gauss guns, those roller bearing ball shooting magnetic toys, fun as they are, suffer from the limitation of having to re-configure all the elements for each shot.

And, too strong Neodymium magnets may be destroyed by those hardened steel spheres, because they are directly impacted.

Not good.

So this is my solution, first, the magnet is out of line with the balls, and second, the balls have a no-return latch, so, all you have to do, to re-set the thing, is to move the balls forward.

Neat, huh? :)


And the Latch uses a small steel or iron part, a bolt, etc. in that hole, there, so you don't need to add any spring to keep the latch down, see the second picture:

Don't want to make it?

You can have it 3D printed:


sexta-feira, 7 de abril de 2017

Imprimir A CORES, na vossa Impressora! E o Zero Terninal, tricotar a 3D(!), um Sistema de Segurança Pi, e rodízios retractáveis!

Uma das tais ideias que são simples...
Mas só DEPOIS de se lá chegar!
Dica de Helga Pushkina:
Imprimir a cores, multi-materiais, numa só cabeça de Impressão, sim, sem mais do que uma Cabeça de Impressão, com a Impressora que já compraram?

Fácil... 
Se se cortar, e enviar, por sequência, de N Bobimas de filamentos diferentes, uma série de segmentos, conforme a impressão decorre!
Tempo para levar a mão à testa e dizer, "porque é que eu não pensei nisto?"


Palette takes up to four filaments and combines them into a single filament strand. This strand is then fed to your printer, enabling your one extruder printer to create multi-filament prints! 

HOW IT WORKS

  • Drive: Palette’s all-metal drive systems, inspired by those on industrial FDM machines, accurately controls filament to ensure the right lengths are driven from each input.
  • Cut: A rotary cutter system slices filament to ensure a clean, low-resistance cut, time after time.
  • Connect: Palette’s patent-pending splicing system connects filaments together end-to-end before passing them through a machined Teflon channel and splicing them together.
  • Cool: Combining both active and passive cooling systems, your newly spliced filament is re-hardened to ensure it keeps tight dimensions before being passed to your printer.
  • Calibrate: Our patent-pending synchronization systems continually monitor and adjust for filament usage, allowing Palette to modify filament lengths to ensure perfect calibration over thousands of feet.
https://www.mosaicmanufacturing.com/


Para os Geeks e Coders, ora aqui está um belo dum Projecto a seguir, acessível, e um Computador portátil por mérito próprio, com Linux lá dentro:


Zero Terminal is a Tiny Linux PC in a 3D Printed Case
Bulent Yusuf 
The Raspberry Pi Zero W is a computer with wifi and Bluetooth that’s the size of a stick of gum. It’s cheap, cheerful, and staggeringly significant in democratizing computing. But you still need to hook it up to a monitor and keyboard to make use of it.
Enter the Zero Terminal, created by a mysterious character known only as “Node”. This homemade project combines the Pi Zero W with a slide-out QWERTY keyboard, touchscreen display, and a 3D printed shell. The result? A small, all-in-one computer that’s both portable and usable.
The PC runs stock Raspbian, which is a Linux operating system for the Raspberry Pi. The limited processing power of the Zero W means operations like running a web browser are slower than molasses. For basic tasks like working in the command line, meanwhile, or even word processing and running games in an emulator, the Zero Terminal should be adequate. 
https://all3dp.com/zero-terminal/


Mais uma ideia insólita, tricotar em 3D!
Porque pode tricotar em CNC, de forma a imprimir uma Camisola, por exemplo, e não só linearmente.
Vai ter futuro...


Ready-to-knit meets ready-to-wear: Kniterate is the new 3D printer for knitwear
Julia

Kniterate, the 3D printer for Knitwear, has taken Kickstarter by storm with its new crowd-funding campaign. The digital knitting machine, which first crossed our radar back in June 2016, has recently resurfaced, catching the eye of design bloggers, knitters, and knitwear enthusiasts alike. And all the buzz may be just what Kniterate needs to hit the market: with almost $250,000 already pledged, the Kickstarter campaign has more than doubled its initial goal of $100,000.

http://www.3ders.org/articles/20170403-ready-to-knit-meets-ready-to-wear-kniterate-is-the-new-3d-printer-for-knitwear.html


E se já estão sem mais ideias sobre o que hão-de fazer com um Raspberry Pi, que tal, um Sisteme de segurança para as vossas casas?


R-PiAlerts: Build a WiFi Based Security System With Raspberry Pis

imjasonc  
While working at your desk, suddenly you hear a distant noise. Did someone just come home? My car is parked in front of my house, did someone break into my car? Don't you wish you got notification on your phone or at your desk so you can decide whether or not to investigate? Well question no more! R-PiAlerts is here!
What is R-PiAlerts?
R-PiAlerts is a Raspberry Pi3 based security system built around Firebase's Cloud. If movement is detected, the system will notify the user of a potential break-in with a text message and a blinking LED display (silent visual alarm of sorts). Once user receives a notification, he or she can investigate. All detected movement will be logged to the Firebase database. Besides viewing the movement log on a web browser, the user can also access the movement log via an iOS app. I decided to build this due to the recent rise in break-ins to both vehicles and homes around my area. 


...E termina-se com este Projecto, que vos permite construírem os vosso próprios rodízios retractáveis, para mesas que podem re-colocar em qualquer parte, mas que ficam fixas, quando no sítio que querem, mas também podem apreciar um pouco da metodologia que este nosso amigo usa para fazer estas e outras Engenhocas:


How to Make Retractable Casters!

Marsh  
Like many makers, I have a lot of everything except space. To make things more accessible, I put everything on wheels. My tablesaw was a real problem until I saw retractable casters on a work bench. Once I saw how easy they were to make, my mission was clear. 


3D, auto-suficiência, faça você mesmo, faz você mesmo, home made, fabricação, fabbing, Impressoras 3d, raspberry pi, instructables, tecnologia,