Blog Posts

Mostrar mensagens com a etiqueta scan 3d. Mostrar todas as mensagens

sábado, 11 de janeiro de 2020

Faça o seu Retro-Projector! Multi-Máquina, fornalha do micro-ondas(?), Dremel CNC, e um Scanner 3D


Isto faz-me um Engenhocas feliz...

Podem fazer isto com alguns plásticos de embealagem, e acho que vou fazer isso mesmo!

5 Minute Cheap and Easy Rear Projection Screen 
melarky

Looking for a new way to decorate for the holidays? This projection screen is great for Halloween, Christmas, New Years, 4th of July, just about any holiday you want to make cooler!
We use this projection screen in our front window at home as well as at my husbands work (makes for a great eye catcher right on main street).
With 5 minutes and a few dollars worth of supplies, this is a great project that really makes holidays and special occasions fun. We are entering this into the halloween contest, please vote for us! 
https://www.instructables.com/id/5-minute-cheap-and-easy-rear-projection-screen/


Multi-Máquinas!
Vão figurar SEMPRE, aqui.
Por isso, cá vai mais uma:

$150, 12″ Swing, Metal Lathe, Mill, and DrillPat Delany
The Lucien Yeomans “secret” that was almost lost.
Your developing world school needs almost-free machine tools?
Your developing world factory needs unavailable spare parts?
You need a complex part that is too expensive to have made?
Need to bootstrap a factory but only have a few bucks?
No problem!
You just need a metal lathe. Metalworking lathes are necessary to the production of almost everything but are very expensive. In 1915, special lathes made from concrete were developed to quickly and cheaply produce millions of cannon shells needed for World War I. Lucien Yeomans, the inventor, won the nation’s highest engineering award for it but sadly the technique was almost forgotten after the war. We re-discovered it as a way to quickly make inexpensive but accurate machine tools for use in developing countries and in trade schools and shops everywhere. We made modern construction practical by replacing the original poured, non shrinking metal with cement grout.
https://makezine.com/projects/the-multimachine-150-12-swing-metal-lathemilldrill/


Aqui, podem aprender com fazerem a vossa própria Fornalha...
De Micro-Ondas?


DIY Microwave Kiln | Fuse Glass in Your MicrowaveShakeTheFuture 
In this Instructable, we'll look into way to make a microwave kiln.
For those who don't know what is a microwave kiln, here is a quick introduction.
Microwave kiln is a kiln that you can put in your regular microwave oven.
It does not use a wire heating element or gas to heat up. Microwave kiln is covered with silicon carbide.
Silicon carbide absorbs microwaves and turns them into heat.
Microwave kilns are usually used to fuse glass.
You can turn broken glass into amazing jewelry. 
https://www.instructables.com/id/DIY-Microwave-Kiln-Fuse-Glass-in-Your-Microwave/


Eis outro Engenhocas feliz, pudera, já fez a sua Frasa CNC, dum Dremel!


DIY 3D Printed Dremel CNCNikus
When I got my first 3D printer I was extremely happy with all the new possibilities to create things but after some time I noticed the limitations of 3D printing. Plastic is easy to melt, sometimes it's not mechanically resistant enough and most importantly sometimes doesn't look good. Don't take me wrong here, I love 3D printing and I like plastic (except plastic waste) but there are things that look, work or feel way better when made out of nonplastic material. Imagine all your furniture made out of plastic. Sometimes I prefer wood, when I need strength, metal (mostly aluminum) is a way to go. That's where CNC milling machines are used. Usually, the cost of such machine is really high, most of the hobbyist, small makers can't afford such expensive equipment. That's why the idea of building my own CNC machine sparked in my head
https://www.instructables.com/id/DIY-3D-Printed-Dremel-CNC/


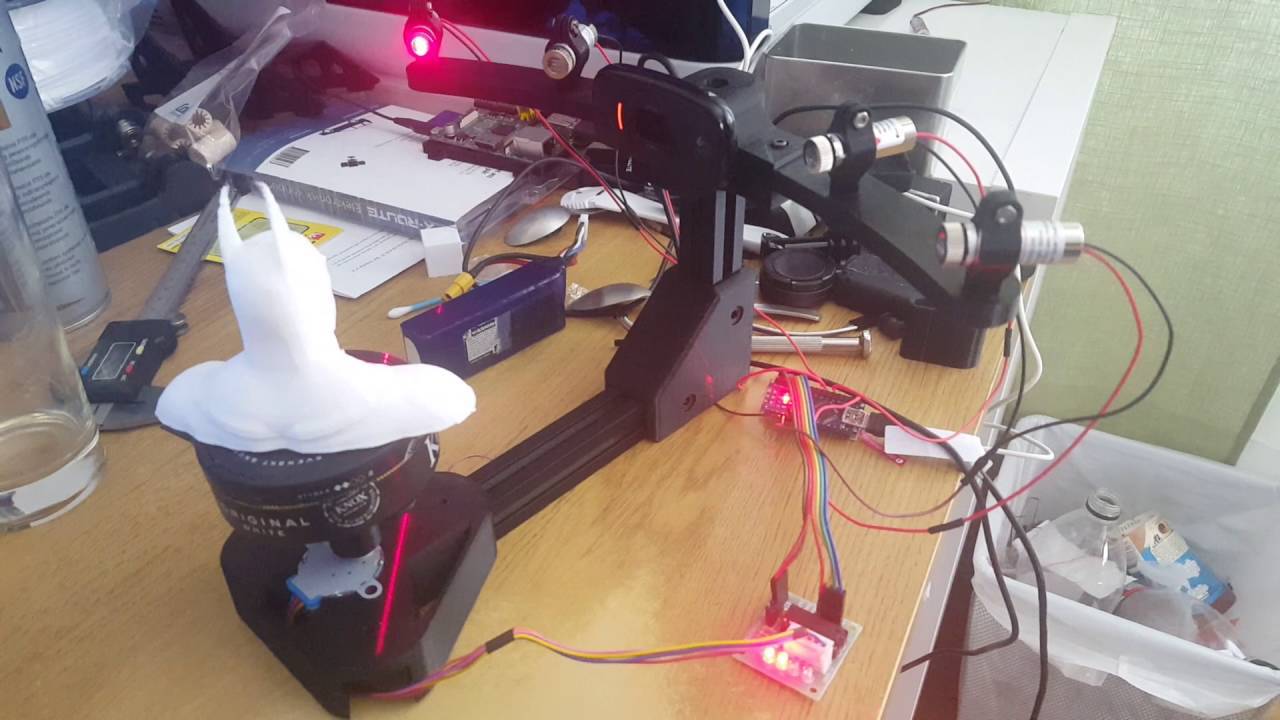
E para terminar, um Scannner que fazem com pouco, mas faz o serviço!


DIY Budget 3D Scanner V3

tobychui

Hey guys, it has been a while I didn't publish any instructables. This time, I brought to you guys one of the project I made back in Feb 2019. The version 3 Budget 3D Scanner!




sexta-feira, 10 de maio de 2019

Mais Lego! E Diesel a partir de Lixo, 359(!) ideias para imprimirem, Scanners Open Source, e Fabbaloo!

Isto é muito importante, porque é mais uma Ferramenta para criarem não só as vossas peças de Lego...
Mas também para usarem o sistema da Lego Technic para incorporarem ligações, fechos, dobradiças, eixos, e tudo o mais, nas vossas próptias Criações!


About 
This is a free online CAD tool to create custom LEGO® Technic compatible construction parts for 3D printing. 
https://marian42.de/partdesigner/


Mais uma para ser chamada importante, é esta Dica, podem fazer DIESEL, a partir de Plástico!
Impressionante.
Já viram que podem fazer Electricidade, dum Gerador a Diesel, a partir de LIXO?


Make your own Free Diesel from Waste Plastic! PART 1

TinyHouse and Offgrid Resources 
A series  showing step by step guide to making  Sulfur free Diesel from waste plastics. 
all soft plastocs- PE, PVC, PPE all yield quality oil when pyrolised. 


Estão sem inspiração, sem ideia nenhuma, para mandarem a Impressora fazer qualquer coisa?
Cá vai uma CARRADA de ideias, 359 delas!


3d printing 
359 Pins
50 followers
https://www.pinterest.pt/totoro1427/3d-printing/


Um Scanner 3D dos bons, custa muito dinheiro...
Mas não se o conseguirem fazer em casa, e eis logo 5, e todos, Open Source! 


5 Best Open-Source 3D Scanners in 2019Melanie Griffin  
3D scanning is a great companion to the additive manufacturing family. It lets you create models of real-life objects and spaces without you needing to know their design specifics beforehand. 3D scanning does the measuring for you so you can ditch the measuring tape. This is super helpful in a wide variety of industries and hobbies, as it’s a non-intrusive way to replicate 3D objects.
If you’re not familiar with 3D scanners, you can think of them kind of like advanced video cameras. Using a variety of techniques, they capture light in order to generate digital maps of 3D objects.
Once this map is complete, the appropriate software helps you create a replica design of the object you scanned. Within that software, you can either leave the design exactly as is for a direct clone, or you can adjust design details for any improvements or deviations you might want to make. 
https://all3dp.com/2/best-open-source-3d-scanners/


Acaba este Post, com um Site para quem está mesmo no início da Impressão 3D!

Fabbaloo, um Site onde é só porem o que querem num Search Tab, e APRENDAM TUDO, sem mais esforço nenhum!


About 
We believe in a near future where 3D print technology is routinely used to make revolutionary products, parts and objects previously thought impossible to produce.

Fabbaloo tracks developments in the amazing technology of 3D Printing, publishing news and analysis daily. Whether from a manufacturer’s press release, onsite coverage of events or just some crazy ideas we thought up, our material will keep you up to date. 
https://www.fabbaloo.com/


Uma dica final, para os Lisboetas, uma Loja que vende e repara uma data de coisas, para além das Panelas de Pressão, no Areeiro:


terça-feira, 7 de agosto de 2018

FDM como DLP! E aprendam Scan 3D, soldem Plástico, soldem Cobre, e um Robot pró Verão


Uma maneira maluca, ou engenhosa, ou ambas, de forçar as nossas Impressoras FDM a imprimir quase como uma DLP! 
É bom!
Mas mais lento, é claro... 
Mas para figurinhas e estatuetas, tudo bem!


How To Print Resin-Like FDM Minis on $200+ 3D Printers (Printing The Game #3)
3D Printed Tabletop

In this video I show you how to get even your $200, stock FDM printer printing nearly layerless, detailed, miniatures in no time. No, these aren't meant to be a replacement to resin prints - but this is a great alternative until you can afford an SLA/DLP resin printer. I used a Creality Ender 3 to print the minis in this video, but the profile down below works with other printers in the Creality family as well (like the Ender 2 and CR10/CR10S). I also share the secrets of this profile for those who don't have a Creality printer so you can make your own profiles and/or adjustments to start getting better quality minis on your FDM printers in no time.


Fazer um Scan 3D, bem feito, é algo de importante...
Por isso, aprendam como se faz, nesta série de Lições:


3D SCANNING CLASS
MikaelaHolmes

In this class, you'll learn everything you need to know to use your camera to take objects from the world around you and turn them into 3D models on your computer! I'll introduce you to the basic concepts of 3D scanning, and teach you an easily accessible method of reality capture called photogrammetry. Then I'll show you how to use a great program called ReCap Photo that will magically reconstruct your photos into 3D models in the cloud. Last you'll learn how to repair and edit your models to turn them into functional objects for all kinds of uses.
3D scanning is an amazing technology with all kinds of innovative applications from product design, to medical technology, to historical preservation, and beyond. What will you use it for??


As coisas que se poderiam fazer, se se pudesse SOLDAR Plástico...
Pois agora, pode-se!
Uma Ferramenta adicional, nas vossas Oficinas.


Spot Weld Plastic
zimitt

I'm a big fan of the plastic milk jugs. They're a strong, flexible, accessible, free material. There's hardly a jug that makes it to my recycle bin, without a gaping hole of some sort, in the side.
The only problem I had was the HDPE (high density polyethylene) plastic is, it's almost impossible to glue. Glue just won't stick.
I decided I wanted to develop a method to weld this plastic and make it even more versatile.
In his instructable, I'll show my process, successes and failures and I hope you'll find some tips for your own creativity.


Agora, é como soldar tubos de Cobre, algo que serve para desde Destilarias a Ar Condicionado...
Vejam como é:


How to CORRECTLY Solder a Copper Pipe
JulioC150

Hi in this article I’ll be thoroughly explaining how to solder copper pipe to get a nice leak-free joint. If you’re unfamiliar with soldering, you’ll be able to solder any diameter pipe after this video with ease and peace of mind.


O Verão, quer dizer, Praia ou Rio, ou Piscina!
Por isso, podem levar este amigo, o primeiro Robot Aquàtico com um Arduino.
Vejam como é, e apoiem o Kickstarter, também.
Vão lá:


Waterbot: Arduino Robot Boat
Slant Concepts

The Waterbot is a robotics arduino boat. He can be programmed from scratch using arduino tools or just built and contolled using the LittleBots app. It is currently Live on Kickstarter.
At Slant, for the past two years, we have been developing and manufacturing 3D printed arduino robotics kits. Up to this point we have created 5
When we started on the 6th bot, we knew that we wanted to go where no robot had gone before. So we chose water. No one in the entire Arduino community had created a robotics kit for the pool or the puddle. We fixed that.
Now STEM students and hobbyists have a programmable arduino platform for exploring small ponds or just being creative in the water. You can use this kit to learn basic robotics, flotation, hydrodynamics, electronics, and programming.


quinta-feira, 15 de março de 2018

Scan 3D & CAT! E a LAN Party, LED&MAT, erros de Impressão, e rodas e rodízios

Que tal, fazerem em casa, com um Arduino, uma Engenhoca que fazx, não só Scan 3D, mas também CAT de Luz visvel? 
Já imaginarama quantidade de coisas que podem fazer com isso?
Como um Modelo 3D com partes translúcidas!
Uma fenomenal ideia deste nosso amigo, que nos faz ganhar o dia, com a noção que há coisas boas, neste Mundo, todos os dias.
Obrigado, jbumstead.


Desktop CT and 3D Scanner With Arduino
jbumstead

Computed tomography (CT) or computed axial tomography (CAT) is most often associated with imaging the body because it enables clinicians to see the anatomical structure inside the patient without having to do any surgery. To image inside the human body, a CT scanner requires X-rays because the radiation has to be able to penetrate through the body. If the object is semi-transparent, it is actually possible to conduct CT scanning using visible light! The technique is called optical CT, which is different than the more popular optical imaging technique known as optical coherence tomography.
To acquire 3D scans of semi-transparent objects, I constructed an optical CT scanner using an Arduino Nano and Nikon dSLR. Halfway through the project, I realized that photogrammetry, another 3D scanning technique, requires much of the same hardware as an optical CT scanner. In this instructable, I will go over the system I constructed that is capable of CT scanning and photogrammetry. After acquiring images, I have steps on using PhotoScan or Matlab for computing 3D reconstructions.


Decorre dias 23 e 24 deste Mês, a Lan Party em Ourém, com uma data de actividades, aproveitem, e vão lá, que também ajudam os Animais, com o Bilhete de entrada:


Lan Party Robótica
Escola Profissional de Ourém

É já no próximo dia 23 e 24 de março, sexta e sábado, que os alunos do curso de Informática e Eletrónica da Escola Profissional de Ourém organizam um evento onde poderás mostrar as tuas skills de gamer e robótica!


Uma Ferramenta à vossa disposição, para verificarem como se portará o vosso Produto na Vida real, é este Laboratório do Instituto Pedro Nunes, onde toda a espécie de testes se execem sobre as vossas Engenhocas e o que mais, obtendo-se assim um nível de qualidade que não engana, e evitando uma série de dores-de-cabeça Pós-Producção:


LED&MAT
Laboratory for Wear, Testing & Materials

At LED&MAT (Laboratory for Wear, Testing & Materials) we develop R&D activities and technology transfer to enterprises in the field of materials and fabrication processes, surface modification, energy efficiency and fabrication by innovative technologies. We also perform a multiplicity of tests for the characterisation of physical, chemical, mechanical and tribological properties on multiple types of materials. We wish to contribute to the perfect symbiosis between fundamental research and industrial application.
What we do
We develop ideas from their genesis to their application in real situations that are related to problems with materials and processing technologies proposed by our customers, R&D institutions and companies which deserve our special attention. Our actions begin at conception, going through research and development to the prototype and final application. Throughout the process we use methods of product development, generating products and innovative processes, improving production efficiency and providing tailored solutions to meet the needs of our customers.


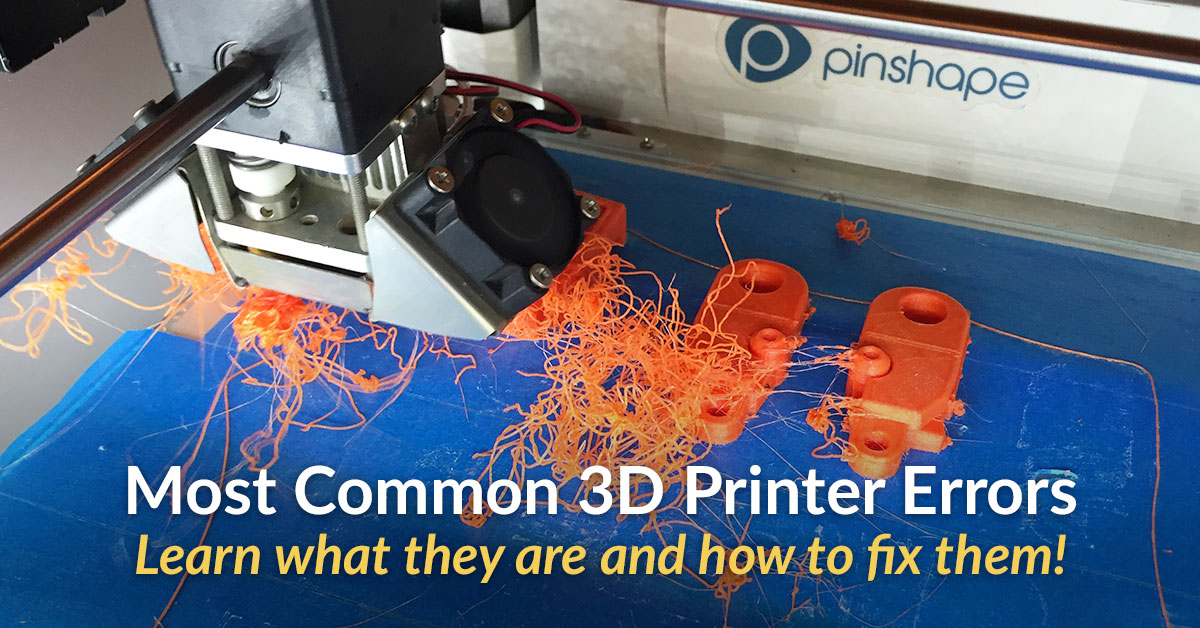
Por falar em dores-de-cabeça, e desgostos variados, eis mais uma achega para evitarem os erros de Impressão 3D mais comuns, as 3 maiores misérias da Impressão 3D:


3 Most Common 3D Printer Errors and Their Fixes

Features like Formlabs’ one-click print exist for professional machines, but hobbyist printers often require a bit more tweaking and troubleshooting. In this post, you’ll learn about the most common problems you’re bound to run into as a maker and discover their fixes.

https://pinshape.com/blog/3-most-common-3d-printer-errors-and-fixes/


Parte duma Invenção minha, que vocês vão apreciar quase todos os dias, são estas Rodas, e não só, que se podem encontrar nos catálogos bacanos que vêem neste link abaixo...
Rodas, escadotes, automatismos e ferragens para portas, etc.


A RODALGÉS

O nosso core business são as Rodas e Rodízios, para todo o tipo de aplicações, com soluções profissionais GAYNER e BLICKLE, dispondo de mais de 30.000 soluções standard.
Presente no mercado nacional desde 1998, a RODALGÉS é a representante oficial das marcas GAYNER e BLICKLE, conceituadas empresas multinacionais, fornecendo soluções profissionais para armazéns, unidades fabris e centros de distribuição comercializando equipamentos para movimentação, elevação e transporte de cargas.
Dispomos de uma gama variada de Handling & Warehouse Equipment para a manutenção operacional e logística in-house, contribuindo para a maior eficiência dos equipamentos e melhoria de processos, para uma qualidade sem falhas e para o aumento da produtividade.

http://www.rodalges.pt/pt/produtos/


sábado, 2 de julho de 2016

Impressora 3D DLP super-rápida! E de Fotos para 3D em 5 passos, uma Impressora por 60€, Um mini-engenho, e uma Impressora 5D!!!

Uma Impressora 3D de Resina, com velocidade de Impressão de 3mm por minuto, dá um objecto com 18 Cm de altura, numa hora! 
E é claro, com uma qualidade de impressão inigualável pelas Impressoras de Filamento...


Gizmo GiziPro Super Speed 
The world’s first continuous print super speed, high quality top down DLP 3D printer: The GiziPro is now on Indiegogo. GiziPro is designed for producing high quality 3D models at an amazing speed up to 3mm/minute! Gizmo GiziPro has received an A rating from iMakr's test report. 
Utilizing a multiple built-in USB connections and an HDMI connection, the GiziMate can connect directly to your PC. One USB connection is used by Gizmetor to control the printer and the second USB connection can be used for anything the user might require, e.g. adding a web camera to the printer. The HDMI connection is used to display the layers when building 3D models.


Dica da Imaterialise, podem agora transformar uma data de objectos em Ficheiros 3D, com esta técnica simples.
E tudo isto, com Software grátis?
É bom! 


How To Make a 3D Model from Photos in 5 Easy Steps

Billy
Looking for turning a photo into a 3D model? You can easily create 3D printable objects and 3D models from images and photos nowadays. In this tutorial we will show you how you can turn ordinary 2D pictures of everyday objects into extraordinary 3D models. Turning 2D into 3D has never been easier as this project requires no coding experience and runs 100% on free software. If you think about 3D printing these 3D models, you don’t even have to buy a 3D printer and you can do it all without leaving your house.  Let’s get started!


Se estão apertados de Finanças, mas têem MESMO de ter uma Impressora, podem então construír esta Impressora 3D, por só 60€, o que já estará ao alcance, práticamente, de qualquer um...
E feito por um engenhoso Geek de 16 anos de idade, por isso, não me venham com desculpas, façam uma destas! 


Cherry- 60€ 3D-Printer

Vulcaman 
Hello, in this instruction, I will show you how to make a 3D-Printer for less than 60€ (maybe the cheapest in the world)
I'm 16 Years old and I made everything by myself.
This 3D-Printer, works with the cheapest motors on the market (28Byj-48), for the electronics I use the Ramps 1.4 . It also has an all metal hotend for around 5€.
Specs:
Buildsize : 10x10x10cm
Travel speed: 20mm/s
Printspeed: 10mm/s
Resolution: 0.2mm 


Do nosso amigo Andrea Biffi vem mais esta ideia, de  como podem  ter um mini-Engenho, para as vossas Dremmel, para furos como devem de ser furados, sem falhas nem brocas partidas:


Cheap precision drill stand

andrea biffi
When I begun to etch my custom pcb I felt the need to improve circuit drill tecnique. I drilled my first circuits by free-hand with my Dremel, but despite it's very fast, it's subject to errors, and it's also dangerous, because the drill bit is very narrow and weak.
I've searched a column drill as the "Proxxon Bench Drill Press TBM 115" but it's a little too expensive. I've found also a vertical stand for Dremel alt 50€, but it was a model with a single metal column as rail, similar to the most you can see with a "drill stand" search, and it had a low precision in horizontal movement of the bit. In fact you felt the head moving of about a millimeter, which is a lot when your bit is so narrow. So I decided to build it by myself.


E ainda fora do alcance do Público em geral, eis uma Impressora...
5D!
Mas bnão se assustem, que é uma Impressora de Filamento, com um Extrusor normal, mas que pode inclinar a placa de deposição, em 2 eixos, e daí 5D, ou mais exactamente, 5 graus de liberdade, no movimento.

O que isto traz de muito útil, é que esta máquiina imprime não só em camadas planas, mas em camadas CURVAS, o que para além dum sem-fim de usos possíveis, e do fim das "escadinhas", significa sobretudo, Objectos com um grau de resistência muito maior...
Por serem feitos seguindo as Linhas de Força exercida sobre esse Objecto, tal como os Edifícios, que seguem a arquitectura da maior força com o menor Material.


3D Printing is So Last Week...Say Hello to "5D Printing" at Mitsubishi Electric Research Labs!
Clare Scott  
 
We all know what 3D printing is – obviously. (If you don’t, here’s a handy overview. Welcome, newcomer.) We’ve also explored 4D printing, which involves printed objects that mutate and morph into different shapes when exposed to an outside stimulus such as light, water or temperature changes. So what’s involved in 5D printing? Printed objects that levitate? Printed objects that teleport? Time-traveling printed objects?!
Well…no. You can 3D print a TARDIS, but you still can’t make it travel. 5D printing is simply another name for five-axis additive manufacturing, and while it may not be as exciting as teleportation, it’s still pretty cool – and useful. The term “5D” as applied to five-axis printing is being used by Mitsubishi Electric Research Laboratories (MERL), the North American subsidiary of the multinational corporation’s research and development branch. They’ve been experimenting with a print bed that actually rocks back and forth on two axes, creating a fourth and fifth axis as a result.
What this means for the final printed part is that instead of being created as a series of flat layers, the layers are curved. William Yerazunis, Senior Principal Research Scientist at MERL, describes the advantages of this process as applied to a pressure cap. A cap printed using standard 3D technology will be quickly ripped apart along the adhesion lines when pressure is applied, he explains. But if that same part is printed with the 5D method, curving the lines where the maximum stress will be applied, the part will be three to five times stronger – and will use 25% less material.