Blog Posts

Mostrar mensagens com a etiqueta robótica. Mostrar todas as mensagens

sábado, 1 de junho de 2019

Um Nano mais barato! E aprendam FreeCad, um braço-robot Open Source(!), convertam scad para stl, e um Kit Arduino,

Muita coisa para cobrir, por isso, vai ser rápido:

Eis a ùltima criação da Arduino, um Micro-Controlador Nano, e mais em conta, para facilitar ainda mais a vida dos Engenhocas:


Arduino Launches New Affordable Nano Microcontroller BoardsHanna Watkin  
Arduino is the Italian open-source computer hardware and software company announced a new family of affordable, microcontroller boards at last weekend’s Maker Faire Bay Area 2019.
“The new Nanos are for those millions of makers who love using the Arduino IDE for its simplicity and open source aspect, but just want a great value, small and powerful board they can trust for their compact projects,” said Massimo Banzi, co-founder of the Arduino project.
The company’s press release explains that these boards offer high quality and reliability, with a cheaper price tag. The microcontroller boards are also compatible with classic Arduino boards and boast low energy consumption. They’re also equipped with powerful processors. 
https://all3dp.com/4/arduino-launches-new-affordable-nano-microcontroller-boards/


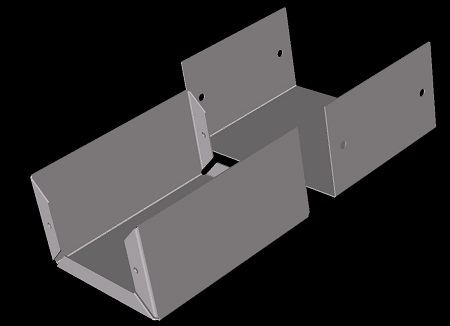
O FreeCad é a melhor opção para quem quer desenhar os seus Objectos 3D, e aqui vai um simpático Tutorial para aprenderem como dominar o Programa:


2019 FreeCAD Tutorial for 3D Printing – 5 Easy Lessons
Rocío Jaimes Gutierrez 

Welcome to our FreeCAD tutorial for 3D printing. FreeCAD is a 3D parametric modeler, designed to create and customize real-life objects. Its beauty lies on the easiness to modify your designs, together with the open-source principle, and of course, being for free.
In this 5-lesson FreeCAD tutorial, you will learn the basic commands and tools to visualize your ideas on screen for 3D printing. We will construct a seemingly simple object – step by step. After each instruction, you will find pictures highlighting the steps. By the end of this tutorial, you will be ready to print your first self-constructed CAD model.


Ora aqui está um Kickstarter a apoiar, um braço-robot OPEN-SOURCE!
Dito de outra maneira, CNC para o Povo!


Evezor: Open Source SCARA Robot ArmJeremy S. Cook

Per this project’s Kickstarter video seen below, when 3D printing first jumped came into the mainstream, many people thought they could now make anything they wanted, perhaps even many of them to sell with no human interaction. While true in some sense, these machines do require human intervention between prints, and can take a very long time to produce useful parts. Additionally, some designs may require a different tool, such as a laser cutter or CNC router. That, of course, means more space and money, and still there is the issue of machine tending.

https://blog.hackster.io/evezor-open-source-scara-robot-arm-b955daac3d82


O programa SCAD tem muitos aderentes, por isso, podem aprender como transformar aqueles Sólidos criados em relações Matemáticas, em Objectos impresso em 3D:


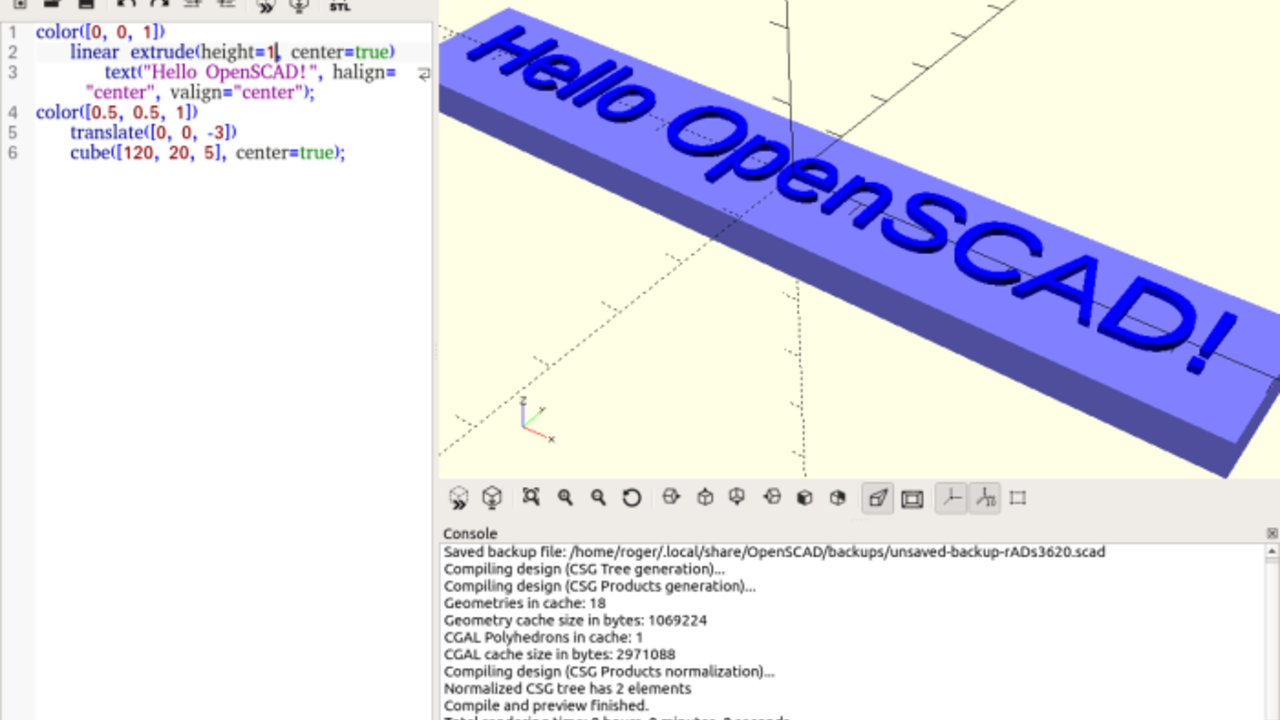
SCAD to STL – How to Convert SCAD Files to STLBenjamin Goldschmidt 

SCAD and STL files are two common file types for 3D design applications. SCAD stands for “Solid Computer Aided Design”, and the file format is used to describe 3D objects. It was pioneered by a software called “OpenSCAD,” which is a free CAD software for designing 3D objects. STL stands for “stereolithography” and is a popular file type to use with slicers for 3D printing.
The main difference between these two file types is in the way the models are described in code. In STL files, the 3D model is created using a “tiled” set of triangles along the surface of the object. This creates a fully 3D object. In contrast, SCAD files design an object using mathematical relationships. For example, a cube-like object can be described using its length, width, and height. This type of design can be useful for printing objects such as fractal art on objects.
Because the geometry used by STL files is more capable of conforming to complex designs, you may find you want to convert SCAD to STL. Lucky for you, there are two really easy ways to do this.

https://all3dp.com/2/convert-scad-files-to-stls/


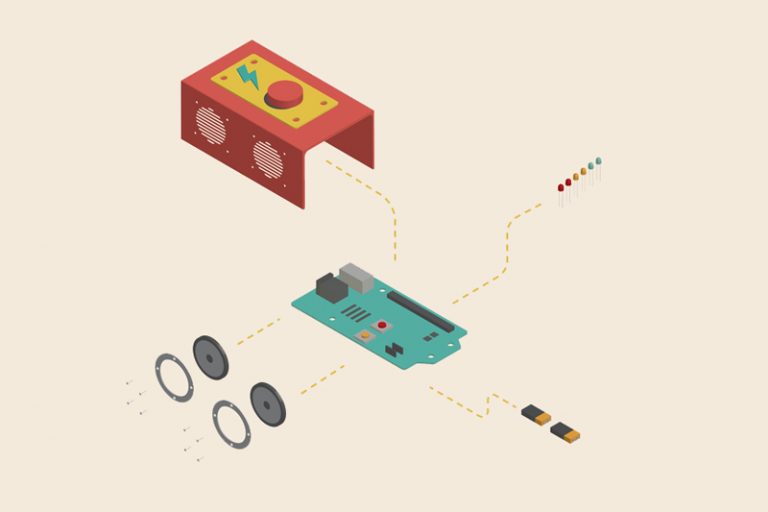
Este nosso amigo tem-vos a oferecer um bastante exaustivo Instructable para aprenderem uma data de usos para o Arduino!
É bom!


Arduino Learner Kit (Open Source)taifur

If you are a beginner in Arduino World and going to learn Arduino having some hands-on experience this Instructables and this Kit is for you. This Kit is also a good choice for the teachers who like to teach Arduino to their students in an easy way.
If you want to learn Arduino you should include the following topics:
Digital Output:
Controlling multiple LEDs using Arduino
Generating Tone using Buzzer
Digital Input:
Interfacing button switch using Arduino
Interfacing DHT11 Sensor Using Arduino
Analog Input:
Reading Analog data from a potentiometer
Interfacing LM35 temperature sensor using Arduino
Analog Output (using PWM):
Generating multiple colors using the RGB LED.
SPI Communication:
Interfacing 74HC595 Shift Registerwith Arduino
Interfacing MAX7219CNG with Arduino for driving DOT Matrix display or multiple seven segment display using only 3 pins of Arduino.
I2C Communication:
Reading date and time from DS1307 real time clock
UART Communication:
Interfacing GROVE GPS and Bluetooth Module with Arduino
Display Interfacing:
Driving 16 X 2 Character LCD display using Arduino
Multiplexing:
Driving multiple seven segment display using a minimum number of Arduino pins.
You will be wondering to know that the Kit is designed to experiment with all the above-mentioned topics. So, it can be an Ideal Learner Kit for learning Arduino Programming.
[The Kit includes onboard 6 Green LED, 1 RGB LED, 1 Potentiometer, 1 LM35 Sensor, 1 DHT11 Sensor, 4 Button Switch, 4 Seven Segment Display, 1 8X8 Dot Matrix Display, 1 MAX7219CNG IC, 1 74HC595 Shift Register, 1 Buzzer, 1 16X2 LCD display, 1 DS1307 RTC, 3 Grove Universal Connector.]
No more separate shield or module, no more disgusting wiring on the way of learning Arduino.
https://www.instructables.com/id/Arduino-Learner-Kit/


terça-feira, 29 de maio de 2018

Waterjet em casa? E aulas de Metal, um Cão-Robot(!), Caixas para Electrónica, e uma Engenhoca sem-fim


Fenomenal, como se vai,  aos pouco, democratizando a CNC.
Agora, podem comprar uma cortadora CNC de Jacto-de-Àgua, e cortar tudo aquilo que as máquinas Laser não podem!
Isto corta tudo, Metal, Cerâmica, Plástico, Policarbonato, uma limpeza...
Corta até 6 mm em aço Inox, e pode cortar até 25 mm, em tudo o resto!


Yup, an affordable Waterjet CNC, so you gan go where no Laser CNC has gone befoooore! 
6 mm in Stainless Steel, up to an Inch in other Materials.


Tinijet — Affordable Waterjet Cutting At Home
James Hobson

While laser cutting remains the dominant force for rapid prototyping anything made of plastic, MDF or wood, the real holy grail is the ability to cut metal — something most laser cutters are just not capable of.
In the industry, this is done using extremely high-powered laser cutters, plasma cutters, or water jet cutters. All of which are very pricey equipment for a hacker. Until now anyway. Introducing the Tinijet, the missing tool for affordable water jet cutting.
We first covered this project a few years ago when it was just a university research project called Hydro — it’s since evolved immensely, and will be available for sale very soon.


Um Engenhocas que não mexa em Metal, é apenas Meio-Engenhocas!
Aprendam, em 5 Lições, como se faz, para evitarem muita ferramenta estragada, cortes vários e etc...

5 free Metalworking Classes, so you can spare your Tools and fingers... Ouch!


METALWORKING CLASS
randofo

Working with metal is a challenging, yet rewarding, skill.
In this class, we will go over the very basics of metalworking including, cutting, drilling and finishing.
This class is designed for people with absolutely no prior experience ever working with metal. It will give you the knowledge and confidence to move on to more advanced metalworking topics.

https://www.instructables.com/class/Metalworking-Class/


O vosso Arduino não ladra, nem faz companhia?
Ora cá vai um Canito-robot, para que não vos falte nada!


You can make your Arduino, your own Pet, with this DoggoBot.
Kewel! 


DoggoBot Version 1
makerinchief

Ever since I started programming Arduinos, I wanted to build a robot using one. I also want a dog. However, living in NYC makes it tough to take care of a dog. So after hours of watching videos of robots and dogs, I decided to put my phone down and build myself a pet!
I present to you find readers, DoggoBot Version 1! I created a 4 legged walking bot which can be build with cardboard and hotglue. The electronics are simple and can be ordered from Amazon. However, I noticed the links from Amazon tend not to last very long so the links provided are from websites which routinely carry the items. If you want to get them from Amazon, simply enter the name of the item in the Amazon search bar. You can definitely get a lot of these items cheaper on Amazon then directly from the websites provided.

https://www.instructables.com/id/DoggoBot-Version-1/


Electrónica sem uma caixa que a envolva, é apenas desleixo... 
E acidentes à espera.
Evitem muita fumarada, encapsulando as vossas obras-primas numa caixa bem-construída:


No use making your wonder-thingamajig, just to have it taken apart or shorted...
To avoid the magic smoke, learn how to make an adequate encasing:


Your Guide To Making Electronics Project Boxes
DJ Harrigan

Designing And Laser Cutting Electronics Project Boxes Just Got Easier With This Must-Have Tutorial
You’ve just made something great: It blinks, it whirrs, it speaks in tones, it’s voiced-controlled and it’s “cloud connected” (of course). And now this assembled heap of your own design is waiting on your desk for the final touch.
Whether you are making a product for sale or prototyping your brand’s next show-stopping piece of promotional swag, you probably want to not only keep this electronic creation alive for years to come but also add context and personality to your product and draw fewer eyes as you ferry it through airport security. How? By making a robust electronics project box to house and protect your hard work, of course!


Uma Máquina de berlindes que podem imprimir em 3D?
É preciso dizar mais? MUÁHÁHÁHÁHÁ!
FAÇAM UMA!


A Marble Machine you can 3D print!
Need I say more? MEWAHAHAHAHAHA!
GO THERE!


Marblevator Mini, Loop.
gzumwalt

I had to dust off my physics textbook for this one...
How fast is too fast for a marble machine? Well, check out the video "Marblevator Mini, Loop, High Speed Test", at 324,000 marble runs per day, it is indeed the fastest marble machine I've ever designed.
"Marblevator Mini, Loop" is not quite as "mini" as my previous Marblevator Mini designs, but is still quite small, and features a 7.5mm radius loop with a tapered auger lift. Using a few relatively simple physics equations, the height of the entrance ramp (H) is determined by the simple equation H = 2.7R (where R is the radius of the loop). My desire to keep the model small determined the loop radius (7.5mm) and ball bearing diameter (8mm). And to add friction compensation, especially for a 3D printed track printed in this orientation, I increased the height of the ramp over the calculated height of (2.7 * 7.5mm) or 20.25mm.
In the video "Marblevator Mini, Loop Stress Test", the stress test ran over 29 hours and is still running. The auger rotates at approximately 75rpm which in this test translates to 75 marble runs per minute. At this rate, Marblevator Mini, Loop has executed (29 * 75 * 60) or 130,500 marble runs without loosing a marble.


quinta-feira, 29 de março de 2018

Motor drivers! E um Hexápede, um Segway à pata, soldar a partir de Baterias, e Vidro metálico?

Tanto para o Arduino, como para o Raspberry Pi, já têem estes bem acessíveis drivers, da Pololu, para os vossos Robots, e automatismos, e o que mais for, controlando um par de motores, motores esses duma enorme variedade de Motores e Voltagens.
É bom.


New products: Dual MAX14870 Motor Drivers for Arduino and Raspberry Pi
Patrick
For my birthday, I am excited to share two new products to help get your projects moving: dual motor driver boards for Arduino and for Raspberry Pi based on Maxim MAX14870 drivers, which on these boards (without additional cooling) can power motors with a continuous 1.7 A (2.5 A peak) from a voltage source anywhere from 4.5 V to 36 V. This makes the driver ideal for powering a wide range of motors including our high power micro metal gearmotors, and our 12 V 20D mm metal gearmotors. We like the MAX14870 so much that already we make a single driver carrier for it, and we use it on our A-Star 32U4 Robot Controller SV. These new boards make it easy to control two motors using the MAX14870 with an Arduino or Raspberry Pi.
https://www.pololu.com/blog/759/new-products-dual-max14870-motor-drivers-for-arduino-and-raspberry-pi


O termo correcto é mesmo Hexápede, (como em "quadrúpede"), aqui está um Robot de 6 patas, que podem construír, e este, por ser alongado, move-se mais como os Insectos:


Capers II, a Hexapod Robot
Toglefritz

This Instructable will show you how to build your very own hexapod robot, I call the design Capers II.
A hexapod robot is a robot with six legs. Each leg is actuated by three servos: one for forward/backward movement, one for up/down movement, and one to bend the leg in the middle. This gives the robot three degrees of freedom, allowing it to move in any direction.
Some hexapod robots are symmetrically designed, with the six legs equally spaced around a linearly symmetrical body. Capers II, on the other hand, has a slightly elongated body, giving the robot a more natural appearance and the ability to use gaits reminiscent of insects.

https://www.instructables.com/id/Capers-II-a-Hexapod-Robot/


Na brincadeira, na palhaçada, e um pouco fazendo troça dalguma Gadgeteria, cá vai uma Segway à lá Pata, isto é a pedalar, e é para quem quer...
Gandas malucos! 
Impecável.


Steampunk Segway ( Legway )
bdring

A self balancing, human powered, steampunk styled, Segway. All you need is a brave self balancing human. This is the ultimate green vehicle for all you eco conscious steampunkers. Is that an oxymoron? I made this out of mostly found materials. This was my first steampunk styled build. Any good suggestions on making it look better will be incorporated as long as the materials are cheap and easy to find. I have been calling it the Legway in reference to the propulsion method. Yes, I know about those Lego self balancers of the same name.

https://www.instructables.com/id/Steampunk-Segway-Legway-/


Algo que acho bem ùtil, por contraste ao projecto anterior, é esta ideia de ter um Ferro de Soldar que funciona com uma Bateria de Berbequim! 
Façam uma coisa destas.


Power Your Soldering Iron With a Drill Battery!
Chris Ray

Back in June of 2017 I moved out of my parent's house and started renting my own. One of the many things that changed was my workspace. I went from a 12' x 13' room to a 4' desk which meant I had to make some changes. One of the major changes was switching from a soldering / hot air rework station to a TS-100 as my main iron. I ended up falling in love with this little thing but I still didn't have a way to make it mobile. That is where this little circuit comes in. I designed this circuit to fit onto a Dewalt 20v Max battery and provide power to my iron, as well as protect the battery and charge my phone.

https://www.instructables.com/id/Power-Your-Soldering-Iron-With-a-Drill-Battery/


Uma coisa para o Futuro, que com a rapidez com que isto tudo agora se desenvolve, pode ser para a semana que vem, são estas ligas Metálicas amorfas, que não formam Cristais, o que lhes dará uma data de novas propriedades eléctricas e estruturais...


Researchers Reveal Method to 3D Print Metallic Glass Alloys in Bulk
Matthew Mensley

Materials Science and Engineering researchers at North Carolina State University recently detailed their method to produce large amounts of metallic glass alloys using 3D printing. The development could lead to better efficiency in electric motors and tougher materials and structures.
Researchers at the Material Science and Engineering department at North Carolina State University have turned to 3D printing to create a means to produce bulk amounts of metallic glass alloys. Typically produced in small amounts, the material (also known as amorphous metals) is notoriously tricky to produce in any large amount.
Unlike most other metals, metallic glass alloys lack a crystalline structure. With an amorphous structure instead, they boast “exceptionally desirable properties”, says Zyanab Mahbooba, a Ph.D student at the department and first author of the research’s paper.

https://all3dp.com/researchers-reveal-method-to-3d-print-metallic-glass-alloys-in-bulk/


sexta-feira, 15 de dezembro de 2017

Acabamentos de Luxo em 3D! E Moldagem a Resina, tudo para Robótica, CAD pré-fabricada(!), e uma Calculadora de preços 3D!


É terrívelmente frustrante deitar fora um Objecto acabado de imprimir em 3D, por causa duma falha que desfigura o trabalho feito.


Mas vejam como podem emendar a coisa, e poupar Filamento, Tempo...


E a Santa da Paciência! 


E não só podem emendar erros, como eliminar o ar farrusco da Impressão, com Acabamentos de Luxo:


Visual 3D Print Finishing Guide


Tom Nardi


With 3D printers now dropping to record low prices, more and more people are getting on the additive manufacturing bandwagon. As a long time believer in consumer-level desktop 3D printing, this is a very exciting time for me; the creativity coming out of places like Thingiverse or the 3D printing communities on Reddit is absolutely incredible. But the realist in me knows that despite what slick promotional material from the manufacturers may lead you to believe, these aren’t Star Trek-level replicators. What comes out of these machines is often riddled with imperfections (from small to soul crushing), and can require considerable cleanup work before they start to look like finished pieces.


Imprimir em 3D leva muito tempo... 


E se vos encomendam uma Dúzia de Objectos iguais?


Ora aqui está como fazerem duma peça, muitas, pelo método da Moldagem com Resina.


Eles até oferecem Kits, para o caso de quererem tudo pronto:


Mold Making & Casting Tutorial: 73-20 Figurine Mold


This
 is a basic "cut block mold" that may be used to reproduce figurines,
model parts, or small ornamental pieces. We used PlatSil 73-20 to create
 a fast, accurate mold. 73-20 is an easy to use 1:1 ratio silicone that
may be demolded in ~1hr. Upon demold, we cast an EZ Flo 60 positive.


Atenção, Inventores, Designers, e Malta das Universidades!

Têem aqui neste Site, não só as Porcas & Parafusos que precisarem, mas também os Motores de Precisão e tudo o mais, para as vossas Máquinas-Ferramentas, ou Robots, Ou Drones, ou o que seja:


Robotic and Automation Applications
There's No End To The Wonders Made Possible By SDP/SI.


Whether it's diffusing a bomb or performing a delicate surgery, every robotics application is dependent on one thing: precise motion.

SDP/SI proudly includes the robotics industry among the many markets it supplies with quality miniature drive components. Robotics is especially important because the possibilities for applications are nearly endless; as a result, robots have become far more commonplace in many different industries over the years. No matter what the application is, the success of any robotic operation hinges on one thing: precise motion. The precision mechanical components offered by SDP/SI ensure just that, whether it's a custom gear assembly, a standard stock item or a modified standard component.


http://www.sdp-si.com/


Isto é que é ter a papinha toda feita!

Uma carrada de Wizards em que só têem de inserir as medidas, e ficam com Desenhos CAD à medida do Freguês!

É bom!

Só para dar um exemplo, que há desde Rodas Dentadas, a Dissipadores de Calor, vai esta imagem da caixa que precisam para a Engenhoca XPTO tudo bem dimensionado...


Free Mechanical Design Software

emachineshop


Need a custom part, but aren’t sure just how to get started? eMachineShop lets you design many custom parts in minutes using wizards. Simply fill in the parameters and the wizard produces a CAD drawing for you. You can then modify the drawing or add features as needed. Just Download the FREE CAD software, fill in the dimensions and select a material. Ordering a custom part has never been easier! Please use the buttons at the top of this article.


Wizards include: 


 Front Panel/Name Plate/Sign

 Bolt Plate

 Sheet Metal Box

 Gear

 Machined Enclosure

 Box Lid

 Bolt

 Bearing Block

 Flywheel

 Heatsink

 Bracket

 Hex Nut

 Pulley

 Regular Convex Polygon

 Shaft Clamp

 Shaft Coupler

 Spacer

 Wrench


https://www.emachineshop.com/part-template-design-wizards/


...Mas não acabam aqui as facilidades...


Não sabem quanto hão-de pedir por um Trabalho de Impressão 3D?


É só usarem esta Página, da IC#D, com mais um Wizard.


Desta vez, para saberem quanto devem pedir par imprimir um Objecto nas vossas Impressoras:


3D Printer Job Cost Calculator


We created this little calculator for our friends who run 3D printer farms in their garage as a side business. It’s a quick way to give your customer a quote on a job. The “cost per hour” field lets you easily play with what you want to charge for printing time.

As a fun thing to do, try inputting different costs for “cheap” filament vs. “expensive” filament. Then, try adding 30 mins to the “job time” to simulate having to unclog a jammed extruder / hot-end for using cheap filament and check out the difference in final cost. This is why we put more time and energy into quality over cost.


https://consumables.ic3dprinters.com/3d-printer-job-cost-calculator/


quinta-feira, 23 de novembro de 2017

Acabamentos de Luxo em 3D! E Moldagem a Resina, tudo para Robótica, e CAD pré-fabricada(!), e uma Calculadora de preços 3D!


É terrívelmente frustrante deitar fora um Objecto acabado de imprimir em 3D, por causa duma falha que desfigura o trabalho feito.
Mas vejam como podem emendar a coisa, e poupar Filamento, Tempo...
E a Santa da Paciência! 
E não só podem emendar erros, como eliminar o ar farrusco da Impressão, com Acabamentos de Luxo:


Visual 3D Print Finishing Guide
Tom Nardi

With 3D printers now dropping to record low prices, more and more people are getting on the additive manufacturing bandwagon. As a long time believer in consumer-level desktop 3D printing, this is a very exciting time for me; the creativity coming out of places like Thingiverse or the 3D printing communities on Reddit is absolutely incredible. But the realist in me knows that despite what slick promotional material from the manufacturers may lead you to believe, these aren’t Star Trek-level replicators. What comes out of these machines is often riddled with imperfections (from small to soul crushing), and can require considerable cleanup work before they start to look like finished pieces.


Imprimir em 3D leva muito tempo... 
E se vos encomendam uma Dúzia de Objectos iguais?

Ora aqui está como fazerem duma peça, muitas, pelo método da Moldagem com Resina.
Eles até oferecem Kits, para o caso de quererem tudo pronto:


Mold Making & Casting Tutorial: 73-20 Figurine Mold

This is a basic "cut block mold" that may be used to reproduce figurines, model parts, or small ornamental pieces. We used PlatSil 73-20 to create a fast, accurate mold. 73-20 is an easy to use 1:1 ratio silicone that may be demolded in ~1hr. Upon demold, we cast an EZ Flo 60 positive.


Atenção, Inventores, Designers, e Malta das Universidades!
Têem aqui neste Site, não só as Porcas & Parafusos que precisarem, mas também os Motores de Precisão e tudo o mais, para as vossas Máquinas-Ferramentas, ou Robots, Ou Drones, ou o que seja:


Robotic and Automation Applications
There's No End To The Wonders Made Possible By SDP/SI.


Whether it's diffusing a bomb or performing a delicate surgery, every robotics application is dependent on one thing: precise motion.
SDP/SI proudly includes the robotics industry among the many markets it supplies with quality miniature drive components. Robotics is especially important because the possibilities for applications are nearly endless; as a result, robots have become far more commonplace in many different industries over the years. No matter what the application is, the success of any robotic operation hinges on one thing: precise motion. The precision mechanical components offered by SDP/SI ensure just that, whether it's a custom gear assembly, a standard stock item or a modified standard component.

http://www.sdp-si.com/


Isto é que é ter a papinha toda feita!
Uma carrada de Wizards em que só têem de inserir as medidas, e ficam com Desenhos CAD à medida do Freguês!
É bom!
Só para dar um exemplo, que há desde Rodas Dentadas, a Dissipadores de Calor, vai esta imagem da caixa que precisam para a Engenhoca XPTO tudo bem dimensionado...


Free Mechanical Design Software
emachineshop

Need a custom part, but aren’t sure just how to get started? eMachineShop lets you design many custom parts in minutes using wizards. Simply fill in the parameters and the wizard produces a CAD drawing for you. You can then modify the drawing or add features as needed. Just Download the FREE CAD software, fill in the dimensions and select a material. Ordering a custom part has never been easier! Please use the buttons at the top of this article.

Wizards include: 
 Front Panel/Name Plate/Sign
 Bolt Plate
 Sheet Metal Box
 Gear
 Machined Enclosure
 Box Lid
 Bolt
 Bearing Block
 Flywheel
 Heatsink
 Bracket
 Hex Nut
 Pulley
 Regular Convex Polygon
 Shaft Clamp
 Shaft Coupler
 Spacer
 Wrench

https://www.emachineshop.com/part-template-design-wizards/


...Mas não acabam aqui as facilidades...

Não sabem quanto hão-de pedir por um Trabalho de Impressão 3D?

É só usarem esta Página, da IC#D, com mais um Wizard.
Desta vez, para saberem quanto devem pedir par imprimir um Objecto nas vossas Impressoras:


3D Printer Job Cost Calculator

We created this little calculator for our friends who run 3D printer farms in their garage as a side business. It’s a quick way to give your customer a quote on a job. The “cost per hour” field lets you easily play with what you want to charge for printing time.
As a fun thing to do, try inputting different costs for “cheap” filament vs. “expensive” filament. Then, try adding 30 mins to the “job time” to simulate having to unclog a jammed extruder / hot-end for using cheap filament and check out the difference in final cost. This is why we put more time and energy into quality over cost.

https://consumables.ic3dprinters.com/3d-printer-job-cost-calculator/