Blog Posts

Mostrar mensagens com a etiqueta fabricação. Mostrar todas as mensagens

sábado, 18 de abril de 2020

Reciclar a vácuo, um Manual de Soldagem num Blogue fantástico, um Buldozer para a criançada, uma Lanterna completa, e um Sistema de Som!

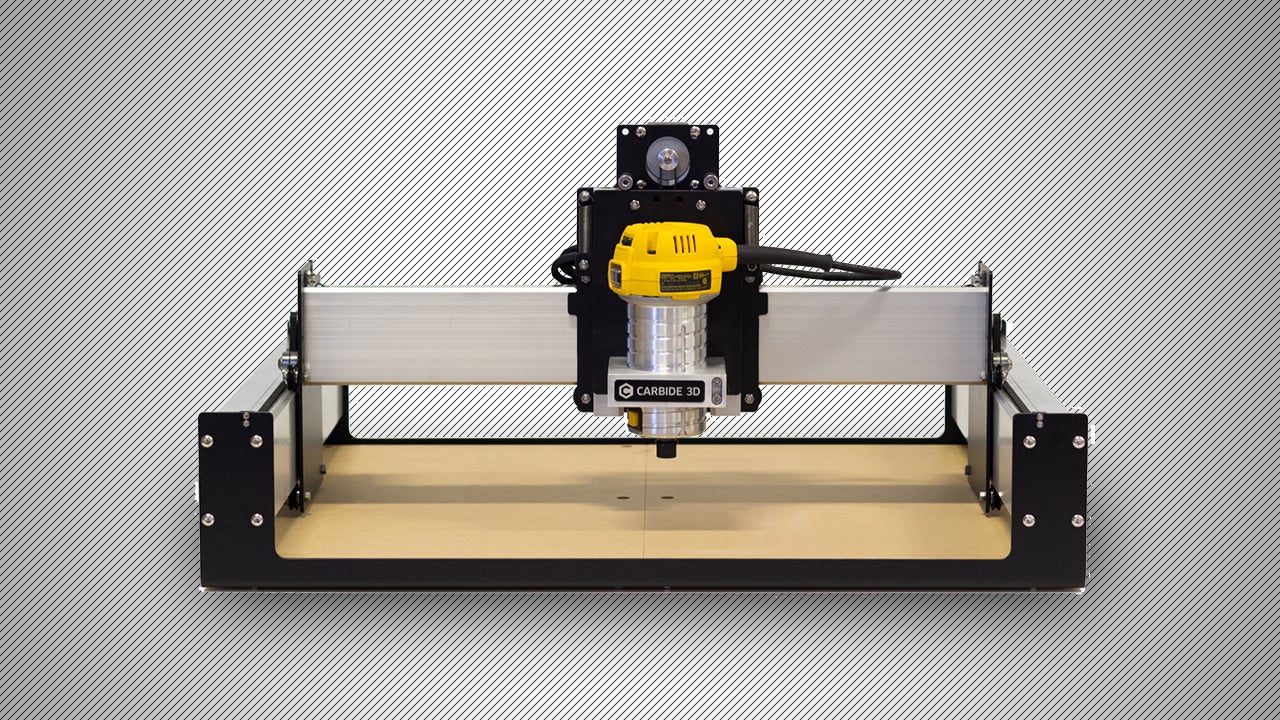
Aproveitem todo aquele plástico rijo das embalagens, reciclando-o com esta máquina de Molde a vácuo:


Milk Jug Vacuum Forming - Recycled HPDE PlasticHey Jude 
This Instructables shows you how to reclaim / re-use / re-cycle HDPE plastic, from waste milk jugs - and use them for Vacuum Forming. It saves using virgin plastic, (say for prototyping), is food safe, is flexible once moulded (good for concrete mini moulds), and does not give off harmful fumes upon careful heating (Easter Eggs Treasure!).
(Please consider voting in Trash to Treasure contest, if you liked it! Thanks.)
You may have access to an industrial grade Vacuum Former in your workshop or maker space, but if you are using a hobby Vac Former, like a Mayku*, you do need to avoid draughts to keep the plastic extra warm. I made a heat shroud here (LINK to Instructable) to Fix It...so do take inspiration from it if it helps with thicker HPDE containers, etc. (though at your own risk). 
https://www.instructables.com/id/Milk-Jug-Vacuum-Forming-Recycled-HPDE-Plastic/


Neste Blog há muito para explorar, Sofware, Mecânica, Manuais, e este manual é um deles:


Welding processes handbook

Klas Weman

Mecha Source 
Production of this guide to welding was prompted originally by a wish for an up-to-date reference on applications in the field. The content has been chosen so that it can be used as a textbook for European welding courses in accordance with guidelines from the European Welding Federation. Over the last few years, an equivalent Swedish guide has been used for courses on welding processes and equipment. The author hopes that this guide will serve as a useful reference book for those involved in welding. In writing the book, there has been a conscious effort to ensure that both text and illustrative material is clear, concentrating particularly on interesting and important aspects. 


Eis um exemplo de criatividade, para a Criançada, um soprador de neve que virou um Bulldozer!


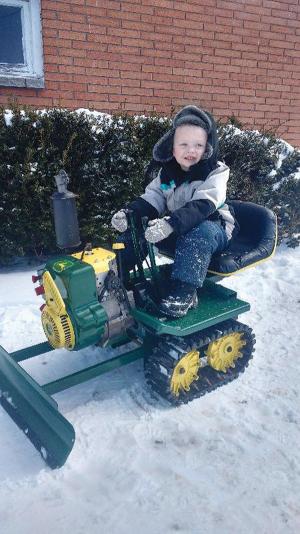
Snowblower Converted To Mini Tracked BulldozerFarm Show 
“My 4-year-old son Matthew loves to drive it. I’m really happy with how it turned out,” says Randy Brancheau, Lachine, Mich., who converted a tracked walk-behind snowblower into a kid-size, ride-on bulldozer.
  The mini tracked bulldozer is equipped with a 27-in. blade and the seat off a riding mower. It’s painted Deere green and yellow.
  Brancheau built it last winter and says his son has already had a lot of fun operating it. “I hear from Matthew every day how much he likes to plow snow with it, and I made a video of him at work. He raises or lowers the blade by pulling on a lever and steers by maneuvering a pair of levers. It has 4 forward gears and one reverse. I didn’t modify the snowblower’s original friction disc drive system at all.”
  Brancheau says he got the idea a long time ago but was only recently able to make it happen. 
https://www.farmshow.com/a_article.php?aid=33214


How I Made the Most Advanced Flashlight Ever

Julie


PCB design is my weak spot. I often get a simple idea and decide to realize it as complex and perfect as possible.
So I once looked an old "military" 4.5V flashlight with regular bulb that was collecting dust a. The light output from that bulb was pretty miserable and the batteries were non rechargeable, battery life was non existent. But its case was nice.
So I decided to give it a new high-tech heart.
So I asked myself: "How many functionalities do I want to build in?"
and I said: "Yes. All of them."
:)


...E por  hoje é tudo, mas não sem antes divulgar este Instructable para os Audiófilos, um Sistema de Som: 


DIY 5.1 Surround speakers - a learning opportunity!

Thomas Sanladerer


3D printing parts that are more complex than what we usually make can be daunting - especially when it also needs look good! Making my own 5.1 surround satellite speakers was a project I started over two years ago and today we're finally finishing it. There were plenty of hiccups and mistakes - I'll show you all of them so that you don't have to make them yourself!
The speakers were modeled with Onshape, unfortunately I don't have the models anymore or I'd gladly share them with you.


terça-feira, 30 de abril de 2019

Um Aspirador para a Fresa! E aprendam código, uma grande Delta, Polypanels, e um Manual de encaixes!

Ora cá temos esta bela desta ideia, para começar, o vosso próprio Aspirador para toda a limalha, lixo, e serradura que a vossa Fresa CNC produza, numa grande contribuição para o asseio, a segurança...
E para a paz doméstica! 
LOL


3D Printed Vacuum Cleaner for a CNC MachineNikus 
As I started to use my Dremel CNC more often I noticed that after milling wood and MDF there is a lot of thin dust everywhere around. I also faced a problem with aluminum chips that got stuck in a lead screw, so I added a cover for the lead screws but I knew that the best solution would be attaching a vacuum cleaner to the machine. I have a really big and loud workshop vacuum cleaner that is way too powerful for this task. While I was scrolling through posts in Dremel CNC builders group on Facebook I noticed Jan's post about his 3D printed vacuum cleaner. I thought that it's a really cool idea to build a small vacuum cleaner that I can put next to my CNC machine and keep it on all the time when CNC is milling. So I opened Fusion 360 at 1 AM and 2 hours later my very own 3D printed vacuum cleaner was ready to be printed. Before you will start reading this instructable you have to know that this was more of like an experiment than a project, I had no idea if it will work, I just did a quick research on the internet to find out how cyclonic separation works and how vacuum cleaner turbine looks like. But I have to say that this project exceeded my expectations a lot! 
https://www.instructables.com/id/3D-Printed-Vacuum-Cleaner-for-a-CNC-Machine/


É mesmo indispensável que conheçam alguma coisa do G-Code, porque, se se meterem no maravilhoso mundo da CNC, isso vai-vos poupar muita, mas mesmo muita, dor-de-cabeça...
Por isso, aprendam no link abaixo, como!


G-Code Generator – All You Need to Know

David Pechter  
These days, computer numerical control (CNC) machines range from 3D printers to lathes, mills, and engraving machines that use lasers, plasma, or water jets. Computer control manages tool movements, spindle speed and coolant flow for CNC lathes and mills, and extrusion and bed temperatures for 3D printers. Over time, a common computer language evolved for CNC: G-code.
G-code is the not-so-secret sauce that runs a 3D printer. Based on your STL model and your settings, your slicing program decides how to make your part. It takes into account layer thickness, infill percentage, support, adhesion, extrusion, and bed temperature to generate a G-code recipe for your part, which can be understood by your printer. Each motion of the printer is given, for example, to trace the perimeter, cross-hatch, or trace interior holes. Temperature control, extrusion, and retraction are also given in G-code. 


...E se quizerem fazer uma ganda Delta, sigam o exemplo deste nosso amigo, que assim, já podem fazer estátuas do cão e dos filhotes!

Brutalmente porreiro!


3D Printer the C3Dt/bd (Big Delta)

Core3D

The C3Dt/bd is my latest 3D printer design and has been turning heads at various Maker Faires and most notably at the MidWest RepRap Festival 2019. It is large and and it is accurate and most importantly, most of it's parts are off the shelf. Following are some of the features of the C3Dt/bd:
  • Build Volume: 330mm(dia)x1240mm
  • Board: DuetWifi (24Volt)
  • Screen: Panel Due
  • Delta Smart Effector
  • BondTech Extruder
  • Flying extruder
  • Hot-end: E3D
  • Auto bed Leveling
  • BuildTak Flex Plate system (magnetic bed)
  • Built-in bed tensioning
  • Haydn Huntley’s Magball Delta arms
  • Easily detachable Flying extruder
  • 110volt heated bed
  • 6.8mm aluminum bed
  • Nema 23 stepper motors
  • Unique Cable Management
  • Board cooling fans
  • Parts cooling fan
  • 40mm fan bracket for heatsink (reduces noise)
Optional wheels in case you move it a lot
Fair warning, this is NOT a budget printer. Parts can easily run into to the thousands, but you do get one nicely working printer out of this. This being my first Delta, I was concerned about calibration and troubleshooting but I found that with the combination of parts/features above, the setup was child's play compared to some of the other printers I have designed. 


Polypanels
Make anything 
Welcome to the world of Polypanels, a system of snap together parts that let your build whatever you want! It’s like an open ended construction toy for making functional things, harnessing the power of 3D printing and the community to make it truly limitless. This page will teach you the basics of Polypanels to get you started making anything. 


E das grandes cabeças do famoso MIT, vem-nos esta Borla, da autoria da BASF, um Manual para que as vossas criações possam encaixar sem problemas, seja lá o que queiram, que  nelas encaixe...
Muito bom.


Snap-Fit Design ManualBASF 
This manual will guide you through the basics of snap-fit design, including: types of snap-fit designs and their applications; how to calculate the strength of the unit and amount of force needed for assembly; and the three common causes of failure in snap-fits and how to overcome them.
http://web.mit.edu/2.75/resources/random/Snap-Fit%20Design%20Manual.pdf


terça-feira, 9 de abril de 2019

Ganda Impressora! E uma Laser CNC, uma Cana de Pesca portátil(!), Moldagem sem falhas,

O nosso amigo Angus traz-nos esta Bizarma desta Impressora, da Hungria, País surpreendente, e há muitas boas razões para o entusiasmo dele...
E para o meu entusiasmo, também!
Maravilha.


CraftBot 3 3D Printer Review - Heavy Duty IDEX Beast
Maker's Muse

Today we're checking out the CraftBot 3! A huge, heavily built 3D Printer with Independent Dual Extrusion (IDEX) from CraftUnique, Hungary.


Da enigmática Empresa J&R Technology vem-nos este vídeo duma Laser CNC de Fibra, caso sério, pois corta METAL!
Boa!
O link para a Empresa está no vídeo:


Fiber Metal Cutting Demo Video from J&R
J&R Technology

J&R specialized in design, R&D and production of CO2&fiber laser machines for cutting, engraving, and marking.

https://www.youtube.com/watch?v=kaEVkuYJVi0&t=6s


Algo de fantástico, uma Cana de pesca Portátil, que podem imprimir, nas vossas Impressoras, para exibir à Malta...


PortaReel Portable Fishing Pole
MechEngineerMike

This is our originally designed "PortaReel" Portable Fishing Pole! Its the smallest full function fishing rod available, a super useful tool to add to your fishing toolbox!


Isto é importantíssimo!
Tanto pela Técnica de produdcção de excelentes peças de fundição usando vácuo;
Quanto pela Cera de moldagem, que é mesmo superior;
Como, até, pela própria BOMBA DE VÁCUO que pode servir para N engenhoquices diferentes!
Fenomenal.


EASY build Vacuum Casting machine system for Lost Wax / PLA Casting - DIY chamber & Pump : lwc #6
VegOilGuy

Vacuum casting machines are expensive. But can you make one? YES… here’s a easy, simple construction, low cost vacuum arrangement to assist with you lost wax or lost PLA casting. Many of the parts you may already have lying around and the rest are cheap as chips. Building a vacuum system has literally saved me thousands and just as importantly it’s dramatically improved the quality of my metal castings… beautiful, clear and precise details matching exactly the original wax pattern, with no pockets, no porosity and no sand. This really is a cheap and simple solution to better lost wax casting!

https://www.youtube.com/watch?v=EGNnH_xbjR4


Só coisas boas!
Agora é esta pequena maravilha de Fresa CNC, da qual, que podem Imprimir muitas das partes!
Toca a fazer uma, e mais nada!


DIY 3D Printed Dremel CNC
Nikus

When I got my first 3D printer I was extremely happy with all the new possibilities to create things but after some time I noticed the limitations of 3D printing. Plastic is easy to melt, sometimes it's not mechanically resistant enough and most importantly sometimes doesn't look good. Don't take me wrong here, I love 3D printing and I like plastic (except plastic waste) but there are things that look, work or feel way better when made out of nonplastic material. Imagine all your furniture made out of plastic. Sometimes I prefer wood, when I need strength, metal (mostly aluminum) is a way to go. That's where CNC milling machines are used. Usually, the cost of such machine is really high, most of the hobbyist, small makers can't afford such expensive equipment. That's why the idea of building my own CNC machine sparked in my head.


E terminamos por hoje, com esta ideia Estratosférica, atenção, malta das Universidades, como fazerem os vossos próprios Balões Estratosféricos, para o bem da CIÊNCIA!
MUÁHÁHÁHÁHÁHÁ!


How to Make a Picoballoon
Jakub_Nagy

What is a picoballoon and why would I want to build it?! I hear you ask. Let me explain. You all probably know what a HAB (High Altitude Balloon) is. It's a bunch of weird electronics stuff connected to a balloon. There are soooo many tutorials regarding HABs here on Instructables.
BUT, and that's a very big BUT what they don't tell you most times in the tutorial is the cost of the filling gas. Now, you can build a decent HAB tracker under 50€, but if it weighs 200g (which is a pretty optimistic guess with the batteries, cameras, etc.) the helium to fill the balloon can cost you 200€ or more, which is just too much for many makers like me.
So, as you can guess, picoballoons solve this problem by just not being bulky and heavy. Picoballoon is just a word for a light HAB. Light, what do I mean by light? In general, picoballoons are lighter than 20g. Now, just imagine that a processor, transmitter, a PCB, GPS, antennas, a solar panel and also a battery with a mass same as a disposable coffee cup or a spoon. Isn't that just insane?


quinta-feira, 28 de março de 2019

Moldes! E a Shapeoko, uma CNC Modular, uma Escritora de Pavimento, e uma 3ª Mão!

A Impressão 3D demora muito tempo!
Mas os Moldes para Injecção de Plástico, permitem-vos produzir não uma ou duas, mas centenas de peças.
O que vos resolve uma data de chatiçes...
E vos dá muito mais DINHEIRO!


10 CAD Tricks for Mold Design
Michael LaFleche

Mold design is one of the most complex aspects of product design. Not only are the part geometries challenging, but the timeline to get jobs quoted and manufactured are tight. OEM design companies sending designs to contract mold designers is typically the last stage of the design cycle, and “tooling up” can be some of the most expensive parts of the project.
Luckily, there are some mistakes that part designers and mold makers can avoid to reduce time and cost.


Eis a ùltima Fresa CNC Shapeoko, e vem carregada de novidades, para uma máquina que já era uma maravilha, como estava:


2019 Shapeoko 3 (XXL) CNC Kit Review – Editor’s Choice
Tyler Koslow

Arguably the most popular “desktop-sized” CNC router of the day, the Shapeoko 3 from Carbide 3D has origins waaay back in 2011, when its creator Edward Ford launched Project ShapeOko on Kickstarter.
A sub-$300 open-source CNC machine kit, Project ShapeOko was an affordable entry point into the world of CNC carving, achieving the fantastic feat of simplifying the procurement of parts for an open source project.
With a build comprised of electronics, plus other sundry items such as laser cut plywood sourceable from Shapeways and Ponoko (hence, ShapeOko) and one other provider, Ford’s original machine was a trailblazer.
Fast forward seven years, and much has changed. In 2014 Ford joined forces with CNC machine and CAD/CAM software company Carbide 3D, becoming a partner and VP.


https://all3dp.com/1/shapeoko-3-xxl-review-specs-carbide-3d/


...Mas esta máquina é impressionante, Impressora, Fresa, e Laser CNC, basta mudar as cabeças.
E fazem-na em casa!


Modular DIY CNC V2
jtaggard

I build my first CNC about a year ago and learned a lot from the process. As an engineer I'm always looking at ways to improve things, and my first machine was no exception. The process began with some small changes which quickly turned into the opportunity to overhaul the design even more to better suit my needs (an overview of these changes is detailed in the next step).


Uma Impressora, mas para escrever no chão, algo que suspeito, vai ser muito usado em MakerFaires...


StreetWriter
charlesglorioso

I started this project because I wanted to make my mark on the world but didn’t want to leave any aftereffects.
I also wanted a challenging project for my new 3D printer that involved some Arduino Programming.
Finally, I like to build things using as much “found” stuff as possible.
As the videos show, StreetWriter does all of that. It writes 8 inch high messages in water on the pavement as it moves, and leaves no trace once the water evaporates.
I have built two StreetWriters, with minor design differences between them, This Instructable, is based on the second build which is somewhat improved.
In StreetWriter, water is pressurized and fed to a manifold which carries 8 automotive fuel injectors. As StreetWriter moves forward, the Arduino controls the fuel injectors, squirting water onto the pavement. The message to be written is one of 8 that have been written onto an SD Card plugged into the Arduino. The operator can easily select among the messages and can create new messages on the SD card at a computer. There is no length limit on any one message other than the amount of water in the pressure tank. The longest message I have written so far is PI to 300 places.


...E acaba-se, por hoje, com esta 3ª Mão, para não terem uma crise de nervos, nem quemarem os dedos, quando estão sós, na oficina!


Magnetic 3rd Hand
lonesoulsurfer

Anyone who plays arounsd with elecronics knows how important a 3rd hand is. It gives you the ability to hold solder in one hand and the soldering iron in the other and easily add solder to a component.
I've been using some homemade 3rd hands for some time and can't imagine building a circuit without one. Recently I was using a couple of magnets for a project and a resister got stuck to it. I had a bit of an epiphany and realised that adding a magnet to a 3rd hand would be a quick and easy way to hold a part whist I add solder to it.
The project is an easy one and will definitely become a welcome addition to your solder station.

https://www.instructables.com/id/Magnetic-3rd-Hand/


quinta-feira, 7 de março de 2019

Um Clone de Prusa! E um Escafandro feito em espuma(!), dobrar cartão, uma Empilhadora R/C, e um Gerador de Sinais de RF

Um Clone da Impressora Prusa, e ainda por cima, o mais Económico possível?
É BOM!
Vejam aqui como se faz, e assim, mais gente poderá ter uma Impressora 3D...
Ou, os que já as tèem, podem ter ainda mais! 
LOL


Building the cheapest possible Prusa i3 MK2
Tom

What is the cheapest possible, real 3D printer you can buy without making one compromise after the other? That’s the question we’re asking by building a Prusa i3 MK2-style 3D printer that comes with most of the important features of the original one from Josef Prusa and requires a bit more work for sourcing and building the machine, but most importantly, we’re going to build it only with the most affordable set of parts.
This page will serve as a hub for part lists and build guides as the project moves along! All build videos and the accompanying project videos have been organized into a neat playlist!

https://toms3d.org/2017/02/23/building-cheapest-possible-prusa-i3-mk2/


Por incrível que pareça, podem fazer ISTO, com Placa de Espuma de Plástico, e por isso, é de aproveitar, malta!
Recriação Histórica, Carnavais e Espectáculos, Montras de Lojas, um sem-fim de usos...


Recreating an Antique Divers Helmet From Foam
LostWax

I love the ocean. I can sit on the beach all day just watching the waves do their wavey thing. Sadly, I happen to live in the middle of the Canadian prairies. No ocean to watch here. But there's always the world of make-believe, and what better way to get in the ocean vibe than with an amazing deep sea diver costume. I created this costume pattern to try and recreate the feel of the classic "Mark V" dive helmet which has become an iconic image of divers and the sea. It was used by the U.S. Navy from 1916 until 1984! Let's make one of our own.

https://www.instructables.com/id/Recreating-an-Antique-Divers-Helmet-From-Foam/


Eis mais algo de simplesmente espectacular, na sua simplicidade, uma Ferramenta para dobrar aquele Cartão que podem ter por aí, para uma série de novos usos:


Cardboard Bender
nml235l

A tool is something that makes life easier and more convenient. I have got a rather huge mass of cardboard (a cause of a new furnishings :-)) and appropriate number of ideas to make something with it (Bag for Containers). One problem is bend operations. Cardboard plates have a multiply layer (as usual) so I get clumsy splits during bending. To prevent such behavior I decided to flatten cardboard according the bend line. At this moment we get situation for a ... NEW TOOL. How to make flattening along the path? Certainly, using a one of the ancient inventions – the Wheel. We need only move the wheel (roller) along the path on cardboard surface with giving insignificant pressure. This principle we use in home preservation to connect bank and cover (or let's remember about the roller-machine for road construction). Concept of a tool is very simple: roller (wheel) and handle – nothing more.

https://www.instructables.com/id/Cardboard-Bender/


Este é um projecto que vai ser a alegria de muita gente, ainda mais porque é Open Source, todas as peças e planos à mão, para todos tentarem...
Uma Empilhadora em miniatura, tele-controlada, até a partir dos vossos Smartphones!
Dá para a mandar ir buscar os chinelos, do sofá...


Arduino Forklift
Leon van den Beukel

This is a video about making a remote controlled forklift car. I've used Fusion 360 to design and create the 3D printed parts and CNC machining templates. If you don't have a CNC machine you can also use a jigsaw to cut out the wooden parts. I've provided the cutting templates, sources and 3D printing STL files on my GitHub page:


Este Gerador de Sinais para Rádio-Frequência, vai fazer a alegria dos Macanudos, aquela malta dos Rádio-Amadores, um equipamento que serve para afinar os vossos emissores:


RF Signal Generator
Milen

The RF signal generator is a must to have tool when playing with radio receivers. It is used to tune a resonant circuits and adjust the gain of different RF stages. Very useful feature of the RF Signal generator is its modulation capability. If it can modulate the frequency amplitude or frequency makes it non replaceable tool for RF design works.
Some time ago I have designed an AM modulator, which could be used for such purposes. It works fine in some cases, but it has the disadvantage to be not able to work as standalone device. It requires additionally power supply module and two signal generators - for the RF carrier frequency and for the modulating signal. This makes it inconvenient to work with it outside the house. I decided to create an RF signal generator working as fully functional stand alone device. Instead to base the architecture on the modern DDS chip, I decided to use the analog approach. As a basis I have chose an existing RF signal generator published here. Similar design is described also here. The credits for this design go to their authors. I repeated mainly the first design adding additional digital frequency counter instead the not very precisely radial scale analog calibration.

https://www.instructables.com/id/RF-Signal-Generator/


sexta-feira, 1 de março de 2019

Fundição PLA! E um Cadinho eléctrico, um Stepper DIY, Acústica caseira, e segurem o Filamento,

Estou farto de dizer isto, a Impressão 3D pode ser grandemente amplificada, usando-a como Moldes, para  a Fundição de Metais!
E usando uma Àrvore de fundição, para produzir N peças de uma só vez!


Lost PLA Casting - making & using a Casting Tree #pla4
VegOilGuy

Casting Trees are a great way to produce a large number of castings in one pour. But can this technique be used with a 3D Printer in Lost PLA? Yes! Jewellers and Ornamental Casters have been using this approach for years and I wanted to try it. In my last video I tried to make 5 pendants in one casting, but only 1 turned out okay. This time I try for twelve and almost nail it. With just a 3D printer and a little imagination, it's possible to make some incredibly detailed castings using the Lost PLA method.


E se querem meter-se nisso, sem usar Gás ou Carvão, podem usar este Método, que se pode usar em qualquer parte, sem causar alarme!


Zero Cost Aluminum Furnace (No Propane, No Glue / Epoxy, No Welding, Individually Replaceable Parts)
quickshadow_2

NOTE: THIS ITEM CAN BE USED TO MAKE CASTINGS AS GIFTS FOR ANY HOLIDAY OR OCCASION!
As seen from the picture and title this instructable is about how to make a zero cost aluminum furnace from salvaged items from your local scrapyard or around the house.
Please be advised that though this aluminum furnace can truly be made at zero cost, for some steps you may want to substitute a tiny bit of money for less hassle and trouble, throughout this instructable i shall be pointing out these steps and how you could do so.
BTW this aluminum furnace build can seriously smelt down a lot of aluminum, but takes a while to heat up, so ensure that you have a large store of scrap aluminum before using, for maximum efficiency.

https://www.instructables.com/id/Zero-Cost-Aluminum-Furnace-No-Propane-No-Glue-/


Um Stepper não serve de nada, sem um Controlador, e cá está como o fazerem vocês mesmos, com este Projecto:


DIY Stepper Motor Controller
DIY KING 00

Remember those DC motors, all you need too do is to hook up the positive and negative leads to a battery and holla it starts running. But as we started doing more complex projects those DC motors doesn't seems to deliver what you need.... yes I mean efficiency, precision and above all torque without any gear reduction.
Well the story started as I planned to built a semi automatic drill press which can help you drill through objects like a usual drill press but with the help of a foot pedal so that you can hold the object with both your hands without the need of a helping hand. Long story short I need a motor that can move the drilling head up and down precisely and also offers a good amount of torque.
Failing to get all those from a simple DC motor I decided to use a stepper motor. Yes the one that has four wires and thats all I knew about them.So I in this instructables we are going to make a controller for these four wire stepper motors that enables us to control the speed and direction of the motor without using a micro controller.

https://www.instructables.com/id/DIY-Stepper-Motor-Controller/


Um Estúdio de Som no vosso Quarto?
Podem fazê-lo, assim, com estes Painéis Acústicos que aprendem a fazer, neste Instructable:


Scratch Built Acoustic Absorbers for Bedroom Studio
epicchum

Hey everyone! I'm in the process of converting my bedroom into a bedroom studio for music recording and production, so I thought I would teach Y'all how I made my acoustic absorbers!

https://www.instructables.com/id/Scratch-Built-Acoustic-Absorbers-for-Bedroom-Studi/


É bastante irritante, quando a Impressora está alegremente a imprimir coisa nenhuma, porque o Carreto de Filamento conseguiu encravar o fio!
Esta é uma solução impecável, para poderem mandar imprimir a Máquina, e irem às vossas vidas, com confiança! 
É bom!


CreativeTools Creates Most Unique, Innovative 3D Printable Universal Filament Holder Yet
Whitney Hipolite

...
The other day, I was printing out some toys for my son. I had to leave the house for two hours, and fully expected that when I returned I would have 3 little toys laying finished on my print bed. Unfortunately, when I returned to check on my prints, the printer had completely stopped printing halfway through. I couldn’t figure out what went wrong… until I looked at the filament and found that it had become tangle up upon itself, preventing its own flow to the extruder. The 3D printer had no other option but to shut down. This was completely my fault, as I had been provided with a sample of filament to try out, and because I was in a rush, I had just put the filament to the side, rather than on a spool. This allowed it to easily knot itself up and ultimately terminate my print job.

If you were to browse websites like Thingiverse, you would discover hundreds of filament spool holders, all of which are unique in their own right. However, none are as innovative, as comprehensive, and frankly quite as amazing as one which was just created by a company called CreativeTools, and its CEO Paulo Kiefe. Called the ‘Universal Stand-Alone Filament Spool Holder’, it is entirely 3D printable and its name simply does not do it justice.

https://3dprint.com/20280/3d-printer-spool-holder/